

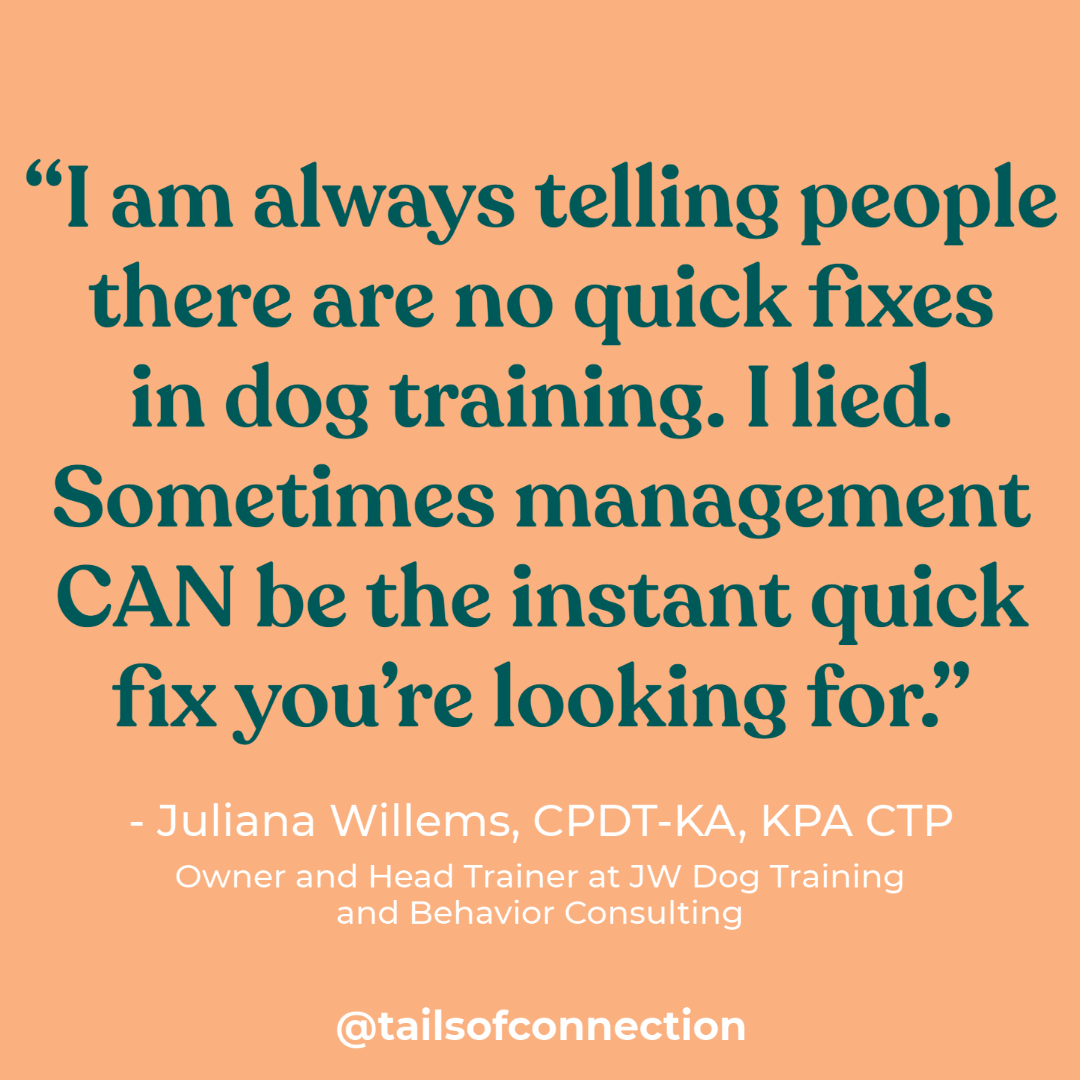
Training Tutorial: How to Train Your Dog to Focus on You
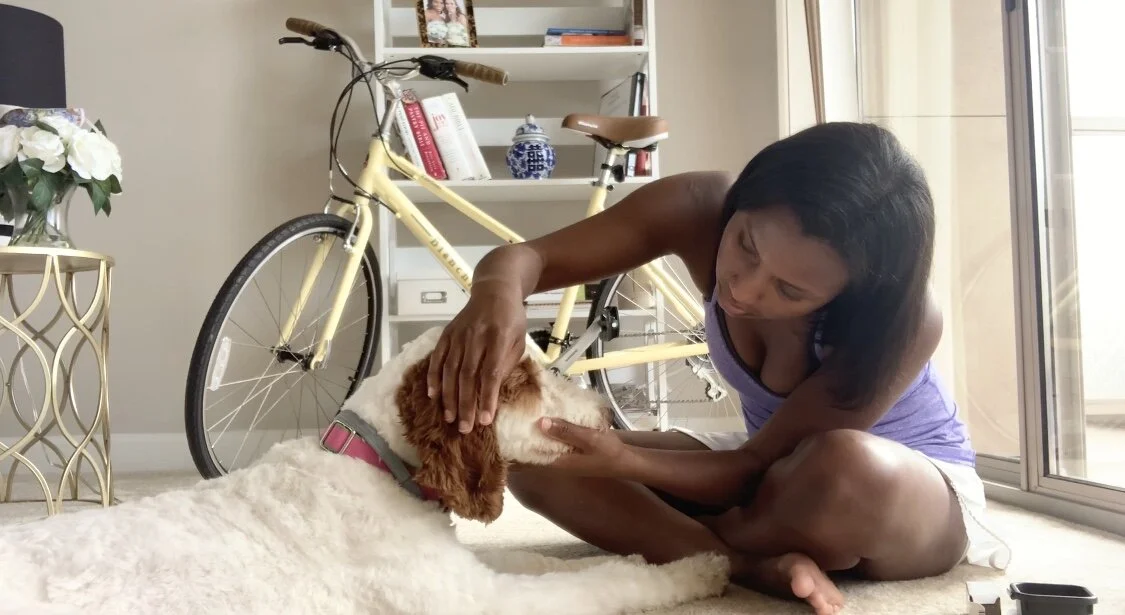
Wouldn’t it be awesome if you could make the things that really distract your dog become the cues that tell them to look at you?! Good news! You can begin to train your dog to focus on you by simply capturing behavior - aka rewarding your dog for what they’re already offering! This can make walks (among so many other activities) much more enjoyable! In the video above, Juliana Willems, CPDT-KA, and owner and head trainer at JW Dog Training & Behavior, explains how to find the smallest possible behavior to reward your dog for at first. Then she says to build on that until you have a dog who will happily and easily give you attention. Be sure to watch the whole video for a more thorough explanation and a great demo, and keep scrolling for the written steps for how to train your dog to focus on you.
Step by Step: How to Train Your Dog to Focus on You
✏️Pre-Reqs:
- A conditioned marker (aka yes, good, or clicker). If you’re interested in all things markers, check out the Tails of Connection Challenge.
📍 Setup:
- Line up some distractions on the ground, put your dog’s leash on, and have your treats ready. Start far enough away from distractions to keep your dog successful.
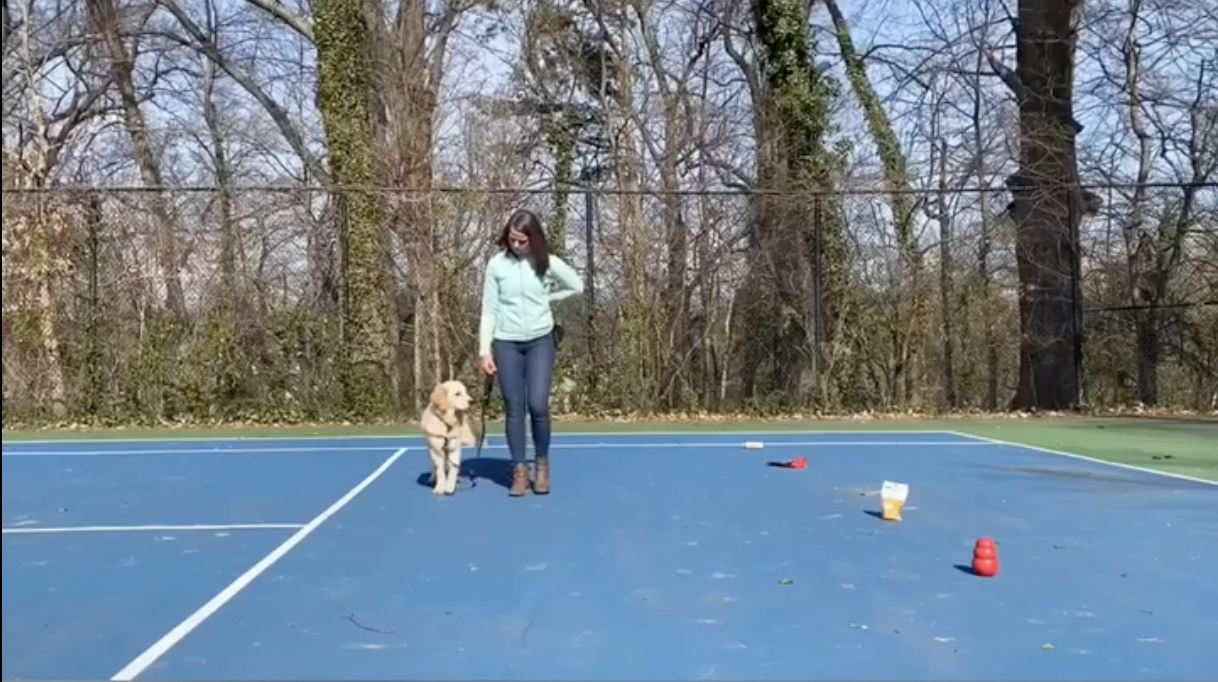
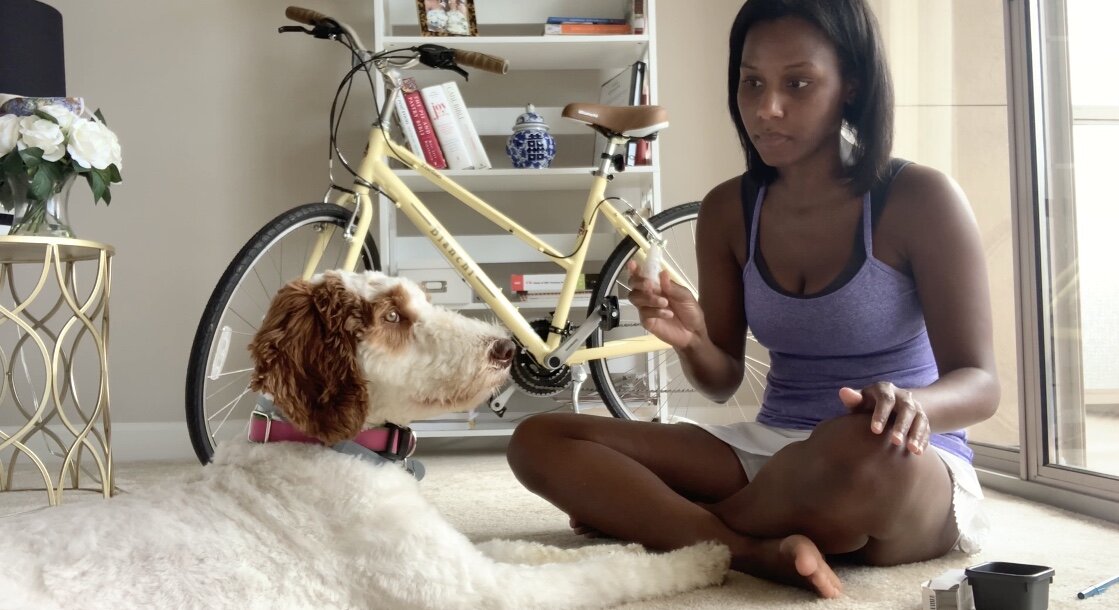
Trainer Juliana Wilems walks Austin the dog past cones as part of a training session for “how to train your dog to focus on you.”
✅Basic Steps:
Step One: Begin walking parallel to the distractions. The moment your dog looks at the distraction, mark and give them a treat. (Yes, you read that right! You want your dog to actually look at the distraction to start because you are going to teach them how to cope in real life when they notice things.)
Step Two: Slowly move closer to distractions (may take multiple sessions). Continue to mark and reward when your dog first notices the distraction.
Step Three: In time, you will be able to increase your criteria around distractions by asking for a behavior like eye contact. This means instead of marking the distraction, you will let your dog notice the distraction and wait for your dog to look back at you. You will then mark and reward that eye contact. (You may pick a different behavior for certain distractions). At this point, you are marking and rewarding your dog for noticing the distraction and disengaging from it on their own.
Why This Is a Great Strategy for How To Teach a Dog To Focus
Editor’s Note from TOC co-founder, Christie Catan: This is one of my absolute favorite things to do with puppies and dogs. It might feel counterintuitive to you at first to mark your dog for looking away from you, but remember, your dog hasn’t left to go engage with that distraction yet if they have only just noticed it. Simply marking the distractions starts to create beautiful behavior and takes so little effort on your part -- you just have to pay attention to your environment and your dog and have some treats on you.
Pin this article for later!


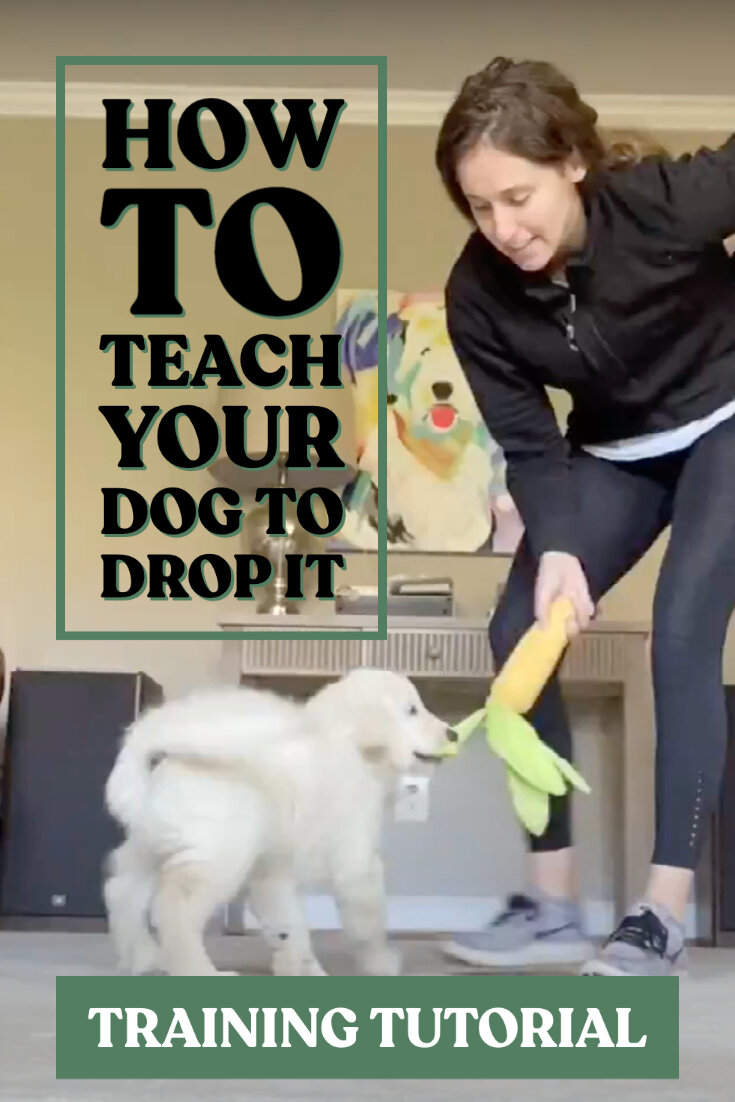
Training Tutorial: How to Teach Your Dog to Drop It
When you visualize "drop it,” do you picture your dog letting go of something? What would happen if we started teaching drop it so that our dogs (at first) think it means something awesome is going to be given to them!? We learned this method from Chirag Patel, and it is our absolute favorite (for puppies and dogs). Keep scrolling for our step by step breakdown of how to teach your dog to drop it (which leads to a great enthusiastic drop behavior):
Step by Step: How to Teach Your Dog to Drop It
Step One: "Condition your drop cue" by saying your cue and then scattering treats on the ground (wave your hand in the treats for a second when you do this to draw their attention there and continue to make your hands near food a good thing). This may feel silly because your dog won't have anything in their mouth to drop! But remember, we just want them to think that "something awesome is coming" when they hear "drop," so we are making it predict food. Think about it - what do they have to do in order to eat food? OPEN THEIR MOUTH! Ta-da -- that is the foundation for drop! (Tip: Make sure you say “drop” before you show or reach for the treats. “Drop” must predict incoming treats, so they need to be two separate events.)
Step Two: Once you are seeing anticipation in your dog's body after saying the drop cue, start adding in some objects for them to actually bite onto. Start with more neutral objects and work up to higher value objects. At first, you may still have to almost immediately scatter those treats on the ground after saying your drop cue.
Step Three: Start to build a pause in after you say your drop cue to see if they drop the object on their own (because if they think great food is coming, they have to open their mouth to eat it ... so you will get an out if the cue is conditioned enough). If they do drop the object on their own after they hear the cue, mark the behavior (say "yes" or click) and then scatter treats on the ground! If they don't drop it right away, no problem - just scatter the treats without marking.
Step Four: Keep working through various objects (building in that pause) until you very consistently get an out behavior as soon as you cue it and are then able to mark and reinforce it with treat scatters (or whatever you choose). When you are ready, practice in new settings (try outdoors if you have been working on this indoors the whole time).
Why Reinforcing Drop It Pays Off Over Time
I also reinforce this drop behavior almost every single time. Because of how we teach it, dogs will drop things FAST even without a reward, but I want to keep "money in the bank" on this behavior since the city has a strange supply of chicken wings on the sidewalks. However, my reinforcement certainly changes over time as my dog gets good at this (aka I am not doing treat scatters forever, but hey, you totally could!). Here are some of the things I now use to reinforce a drop: my dog drops a chicken wing and I reward by finding a stick from the ground to toss or play tug with; my dog drops another dog's ball at the field and I reinforce that by tossing my ball to them; my dog drops a stick they carried outside before we go inside and I reward by running away and letting him chase me (and with lots of praise and scratches when they arrive). To be honest, I have even rewarded some harder "real life" drops indoors with "let's go get a treat" and I walk over to the cabinet with my dog to give them one (sometimes I am just not feeling inspired and this is easy). I still use treats plenty because they are fast and efficient! But I am offering the other examples because some people get hung up on not wanting to use treats for some reason. I can get away with just using praise and pets because I have built those up as good rewards over time, but I try to find some way to make the reward even higher value if I can since this behavior can be life-saving.
Pro Tip: Your Voice Matters When Training a Dog to Drop
Fun fact: I try to keep "drop" incredibly positive and happy. I actually teach it to dogs in a higher pitch because I can't angrily say "drop" in that tone (setting myself up for success!). If you are someone who is likely going to panic and scream this at your dog, you can actually condition your dog to that tone, so it is positive instead of scary. We don't want our dogs to think this is a scary or threatening cue. Because if dogs feel threatened or scared, you are more likely to get a dog who does the exact opposite thing you want and actually runs away with the object (and since this is a behavior that can save their life - we definitely don't want to accidentally teach that).
PS: Pin this article for later!

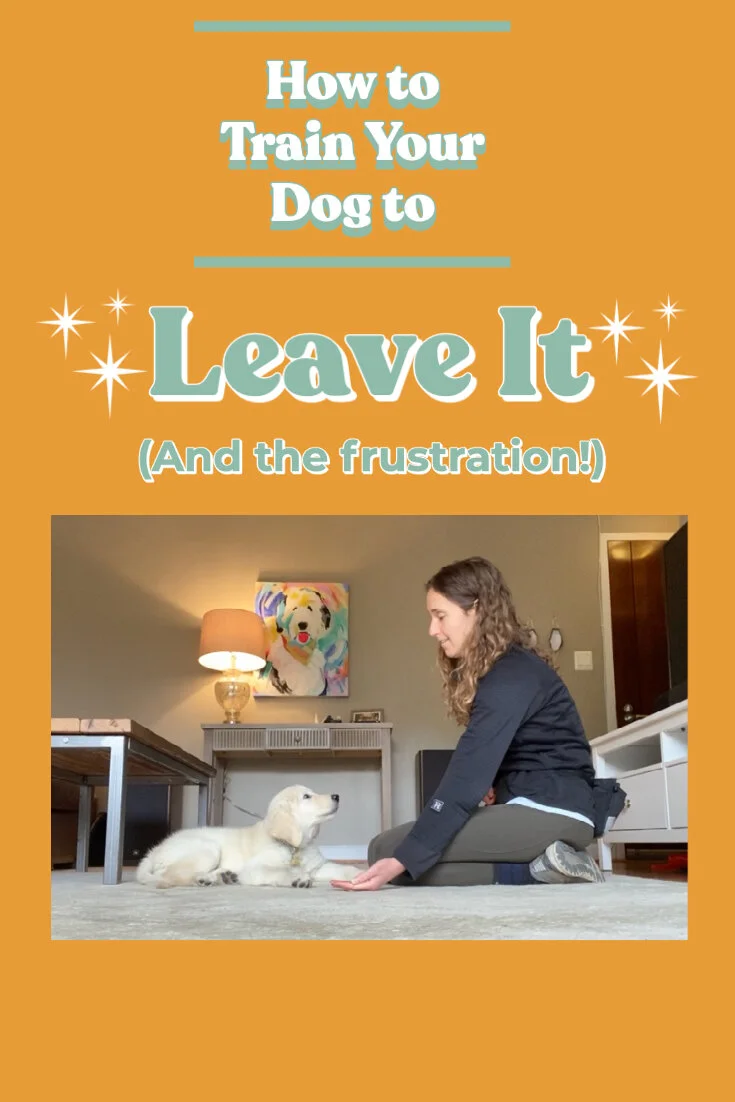
Training Tutorial: How to Teach Your Dog to Leave It
Isn’t “Leave It” one of those phrases that seems to just fly out of your mouth as soon as a new puppy or dog comes home? That’s often before your dog has learned what those words actually mean. We thought it would be fun to quickly show you our favorite way to teach “leave it!” Keep scrolling for our step by step process on how to teach your dog to leave it, which we also breakdown in the video above. We’ll show you how you can teach either an implied leave it (that means you teach your dog you want them to ignore that thing by default) and a cued leave it (where your dog understands how to respond when you say “leave it”).
What is “Leave It” in Dog Training?
The way we teach “leave it” will initially tell your dog to look at you immediately. Teaching them what to do provides way more clarity up front than trying to teach them what NOT to do. Leave it is a cue you would use before your dog actually puts something in their mouth whereas the “drop it” cue is something you would use if your dog already has something in their mouth. There are other moments you can use “leave it,” but we will keep it simple for now (fun fact: there are also a million other awesome cues you can use instead of leave it -- like your recall cue!).
✅ Step by Step: How to Teach Your Dog to Leave It
1️⃣ STEP ONE: Reward your dog for Eye Contact

TOC co-founder, Christie Catan, rewards Colby, the golden retriever puppy, for eye contact during their training session for how to teach your dog to leave it.
In this step, you are simply telling your dog up front how they will win this entire “Leave It” game: Eye Contact. To start, sit in front of your dog and wait. The moment your dog looks at you, mark and give them a treat. Keep repeating this until your dog is constantly looking at you (aka they know how to win the game). Eye contact is going to be what “leave it” means for your dog when you teach it initially to make it super clear for them.
2️⃣ STEP TWO: Fade In your Treat Hands
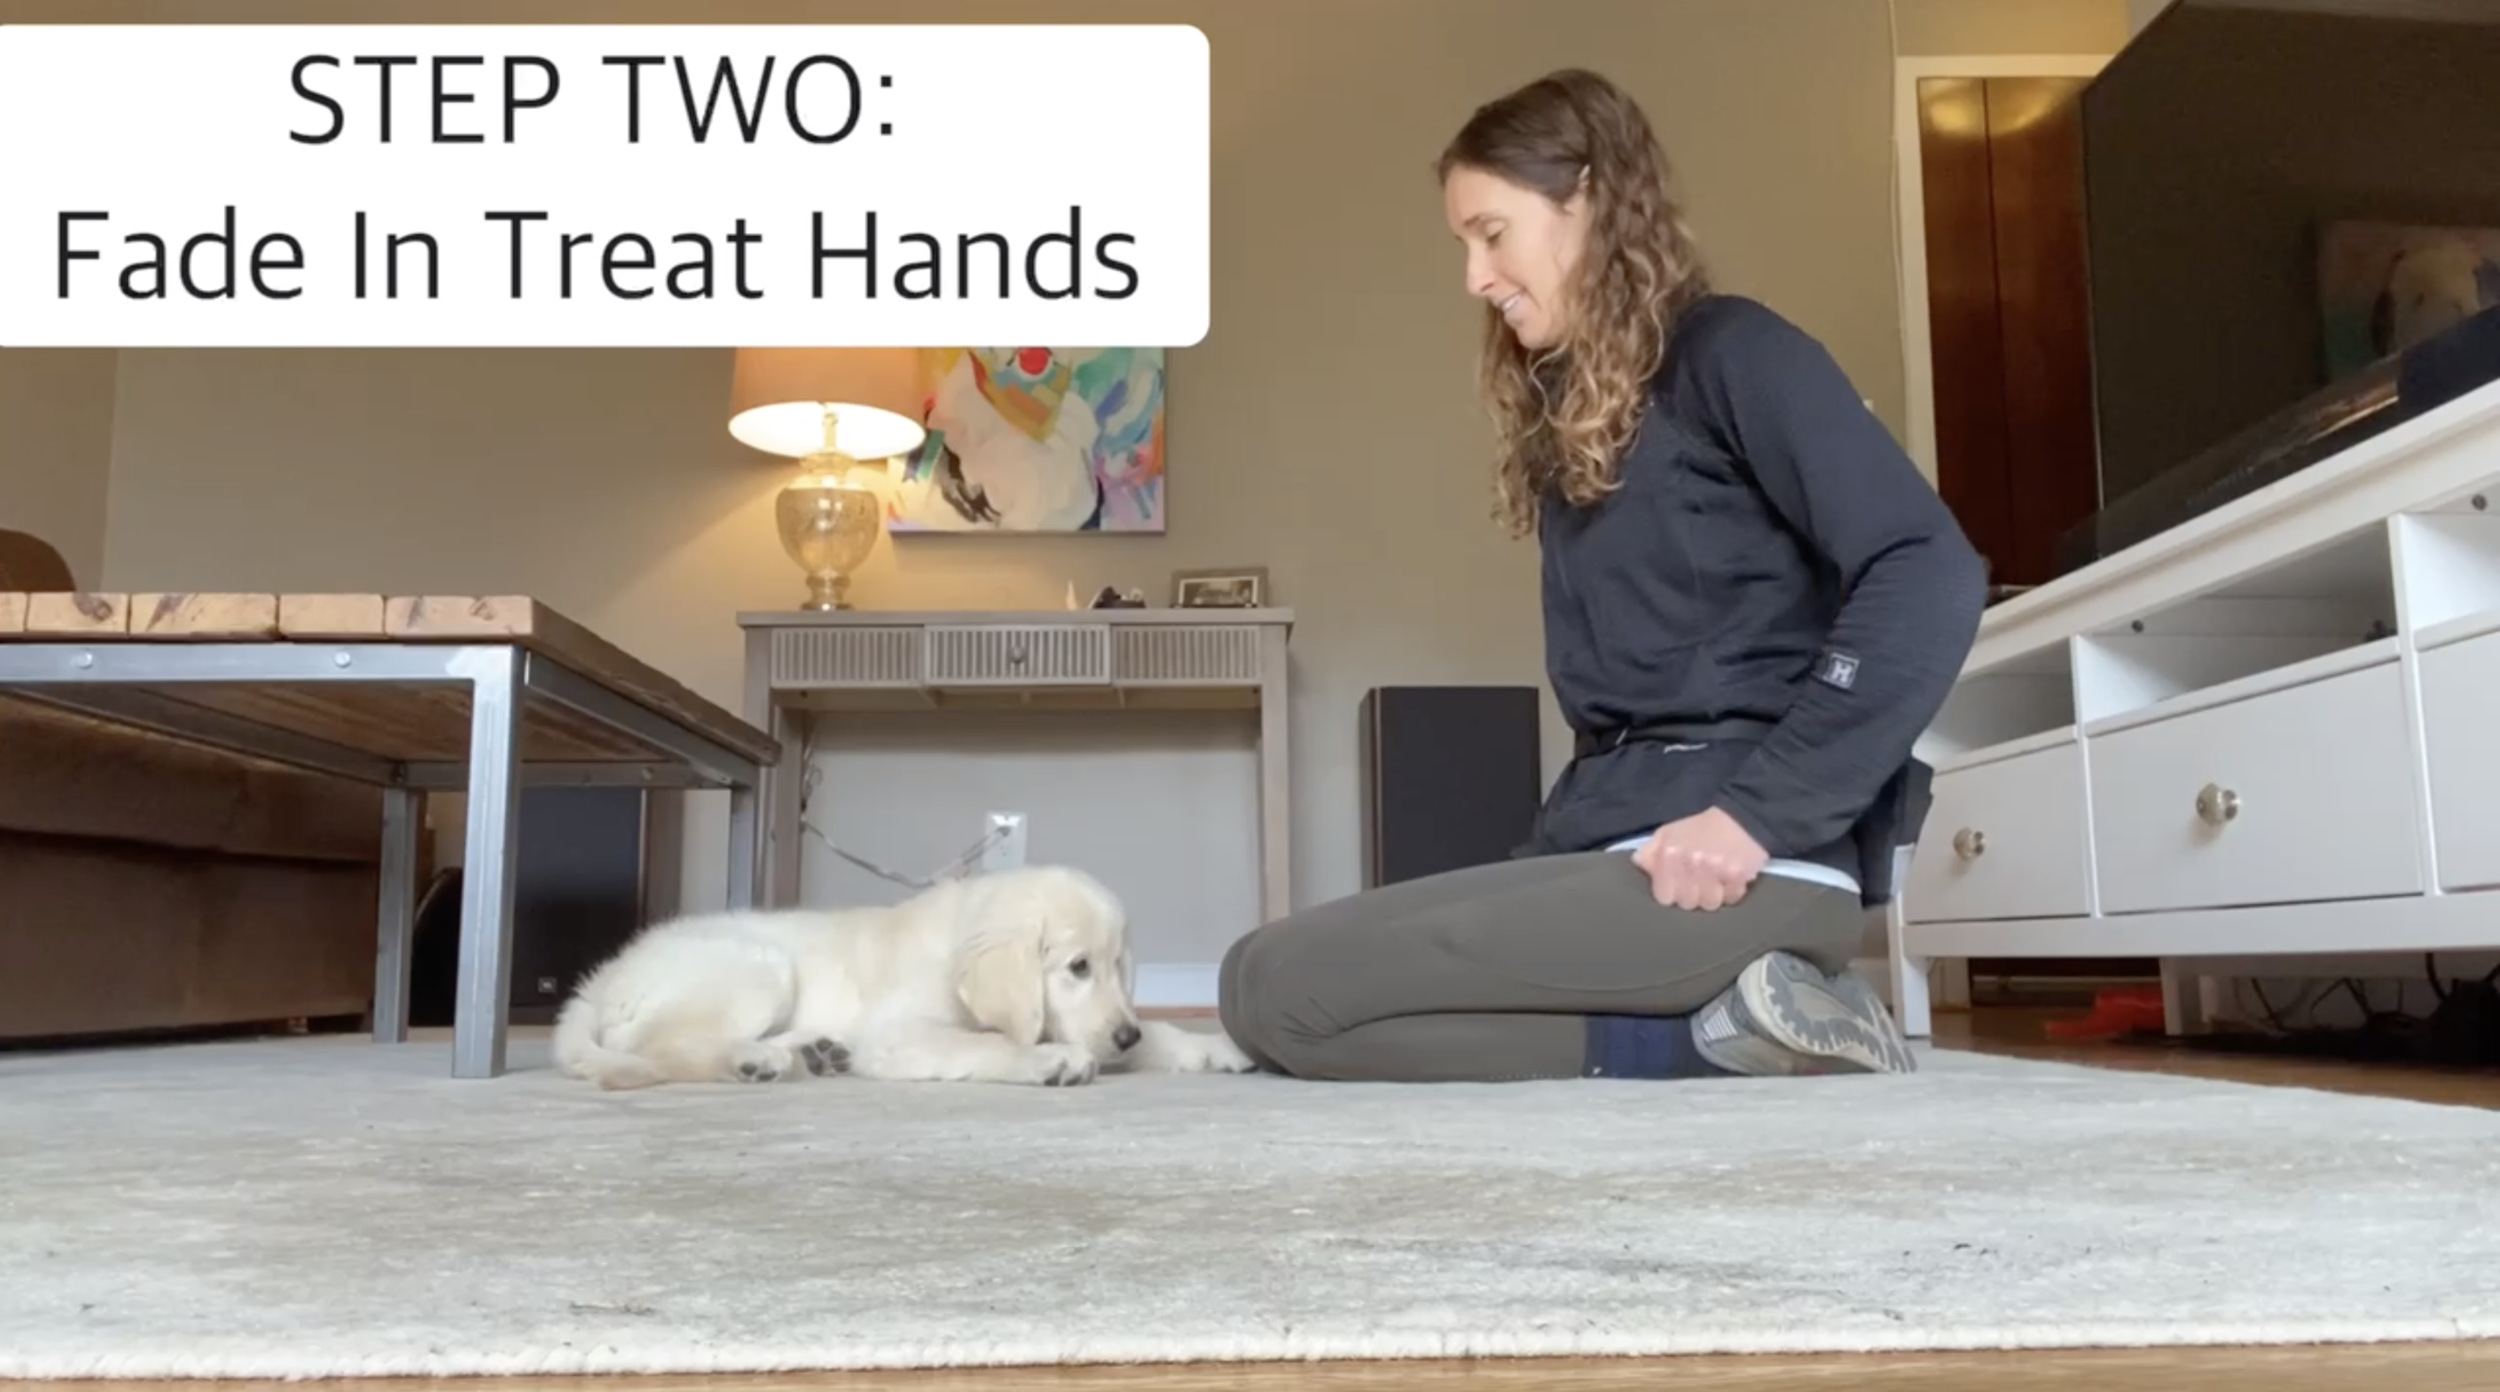
With food in your hands, make closed fists behind your back. Slowly creep them around your hips and down your legs toward your knees through various repetitions. Still mark and reward your dog everytime they make eye contact (the way to win the game is still the same). If your dog is stuck staring at the treats, you may need to back your hands up a bit and work up the “line” more slowly. Do not say “leave it” yet (we want the behavior consistent first). You want your dog to win -- so move at the pace that makes that possible. Keep doing this until your closed fist treat hands are in your lap right in front of your dog. You are actually building a calm default behavior for your dog when you have food in your hands (and it isn’t one where your dog mugs your hands trying to get the food).
3️⃣ STEP THREE: Open your Palms

With some food in both of your hands behind your back, flash one hand out (with food in it) with your palm open (if you need to start with it closed, that is fine too). Your dog will likely look at your open hand, and if you wait a second, your dog is likely going to look at you since that is how they have won every other variation of this game! When they look at you, mark and reward. (Looking away from the food in that outstretched hand to look at you looks a whole lot like a leave it, doesn’t it?!)
4️⃣ STEP FOUR: put Food on Floor
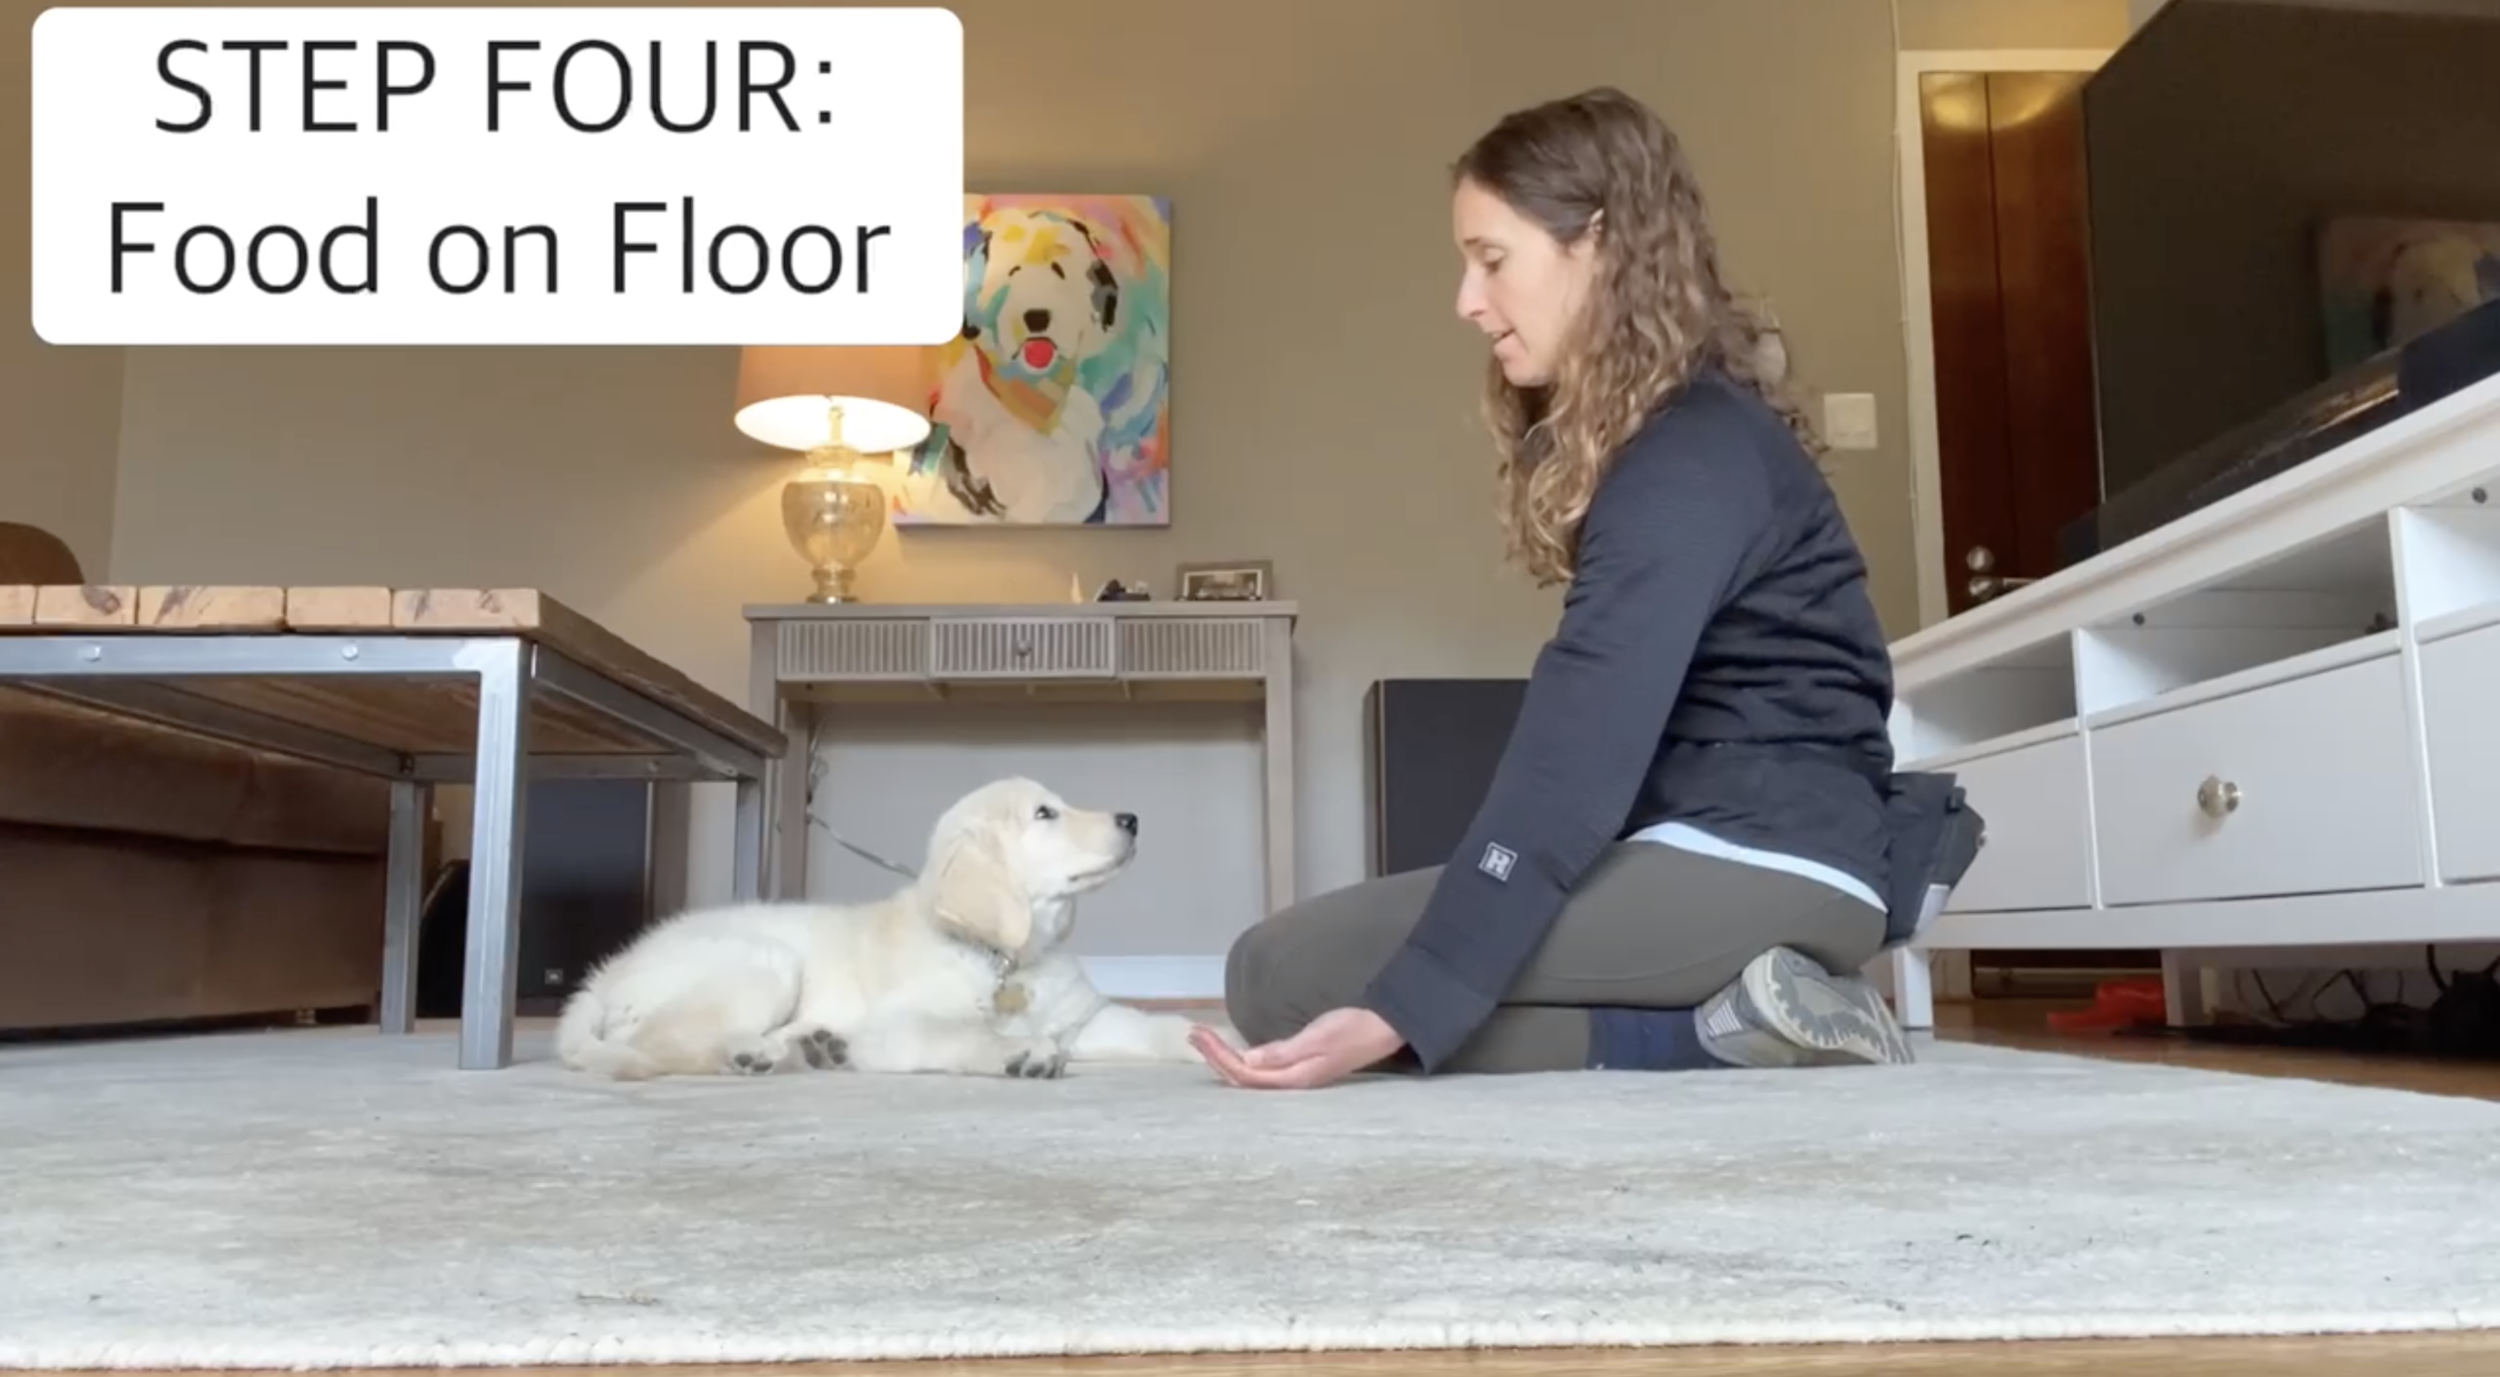
Slowly progress to putting the food on the floor. Perhaps start by flashing your food hand out and resting your other hand on the floor. Take baby steps with lots of reinforcement along the way to help your dog understand that eye contact is still the way to win this game. You are still not saying “leave it.”
5️⃣ STEP FIVE: Reward with “Take IT”(Optional)

Once your dog is consistently looking at you in the presence of food on the ground, you can mark and reward with “take it” (say “take it” and then point to the food to let your dog know they can have it).
6️⃣ STEP SIX: Add the Verbal Cue Leave It (Optional)
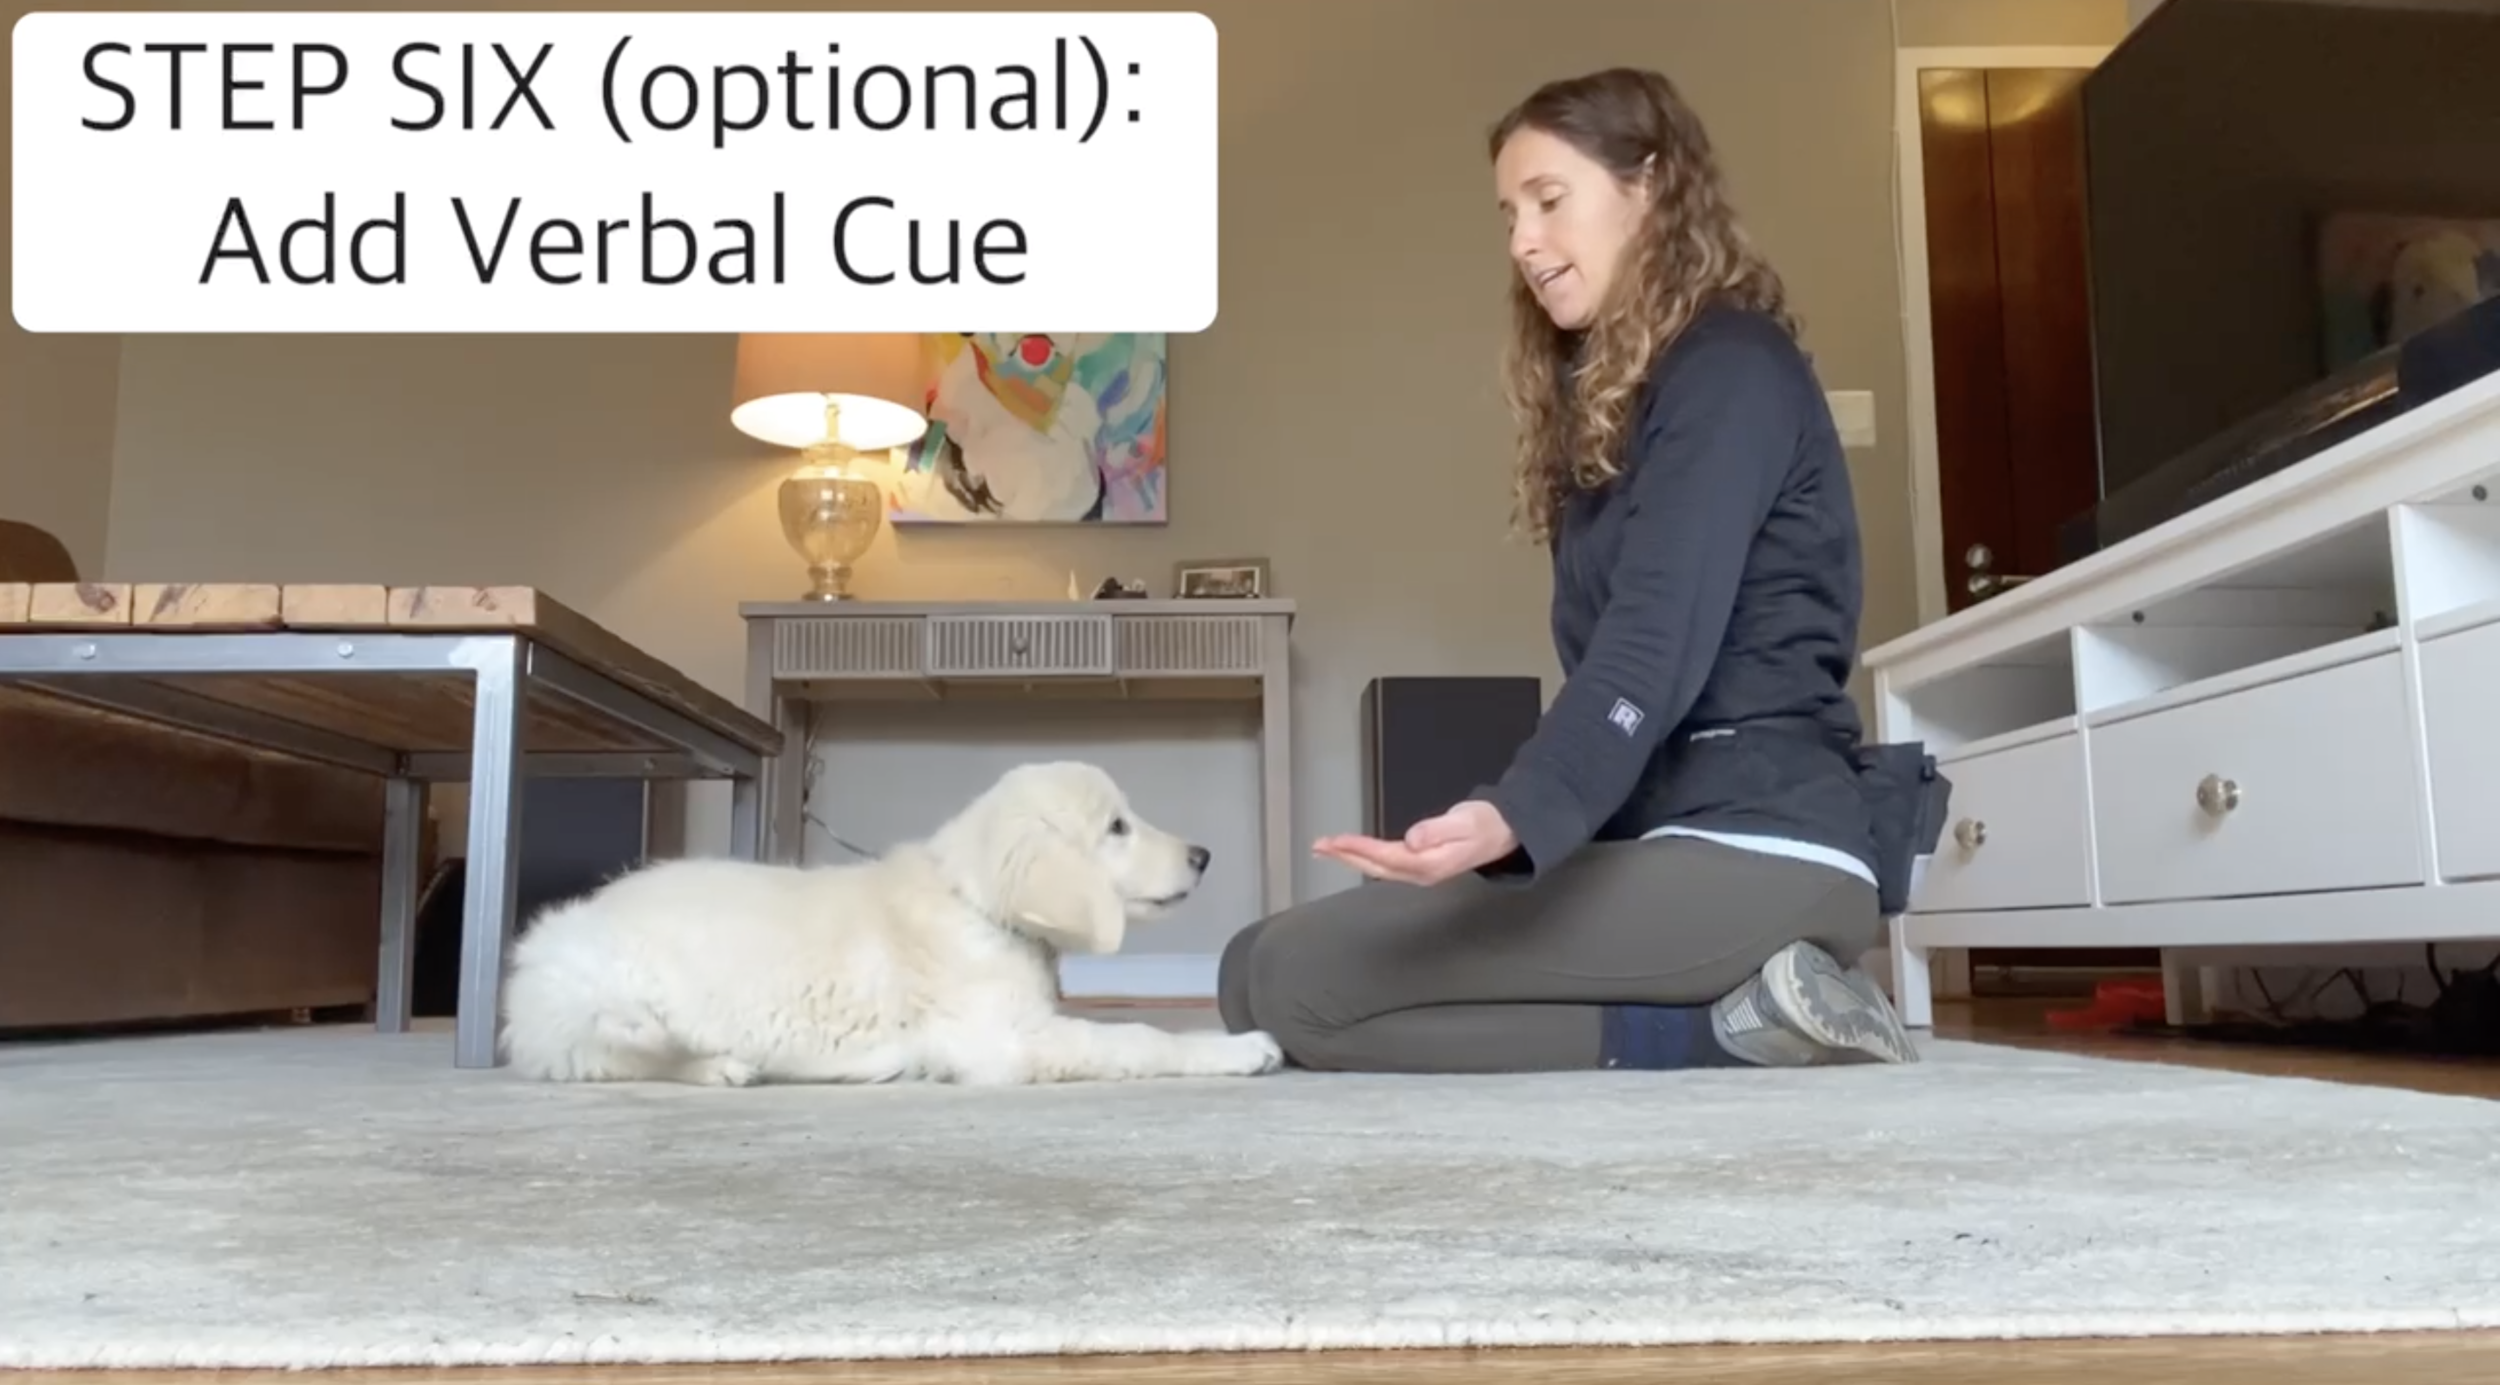
Once your dog consistently looks away from your food hand when you flash it out, you can add a verbal cue (aka say “leave it” when you flash your hand). Since your dog already knows how to win this game without that cue, you just need to mark and reward when they look at you when you do say the cue to associate the behavior they are already giving you with the verbal cue you choose.
📝 Additional Notes on How to Train Leave It
This is such an effective way to start to teach “leave it” because you are showing your dog the behavior you want (“look at me”) rather than trying to teach the more abstract behavior of “don’t do what you are doing.” Having clear criteria (aka rules for how to win) creates a super strong foundation for this behavior! You can then start to practice this with more and more objects and in more and more settings (aka start to proof and generalize the behavior).
Note, if you want your dog to always leave something as their default, we recommend teaching an “implied leave it” (this means you practice the behavior of leaving it but never use the verbal cue). I tend to teach an implied leave it for things I just always want my dog to leave as a general rule, so I don’t have to constantly say “leave it” (for example, I never really want my pup to eat rocks, so if they tend to want to eat those, I teach an implied leave it). You can bring in nature from outside and practice this exact game using a pinecone! And as far as verbal cues go, you may find some of your other cues work just as well (for example, I use my dog’s name, a quick kissy noise, or my recall cue in situations where people might say “leave it” since those cues have super strong responses and very clear criteria).
Follow @Tailsofconnection on Instagram for more training tutorials.
PS: Pin this post for later.
Christie sits on the ground with Colby the golden retriever during a leave it training session.

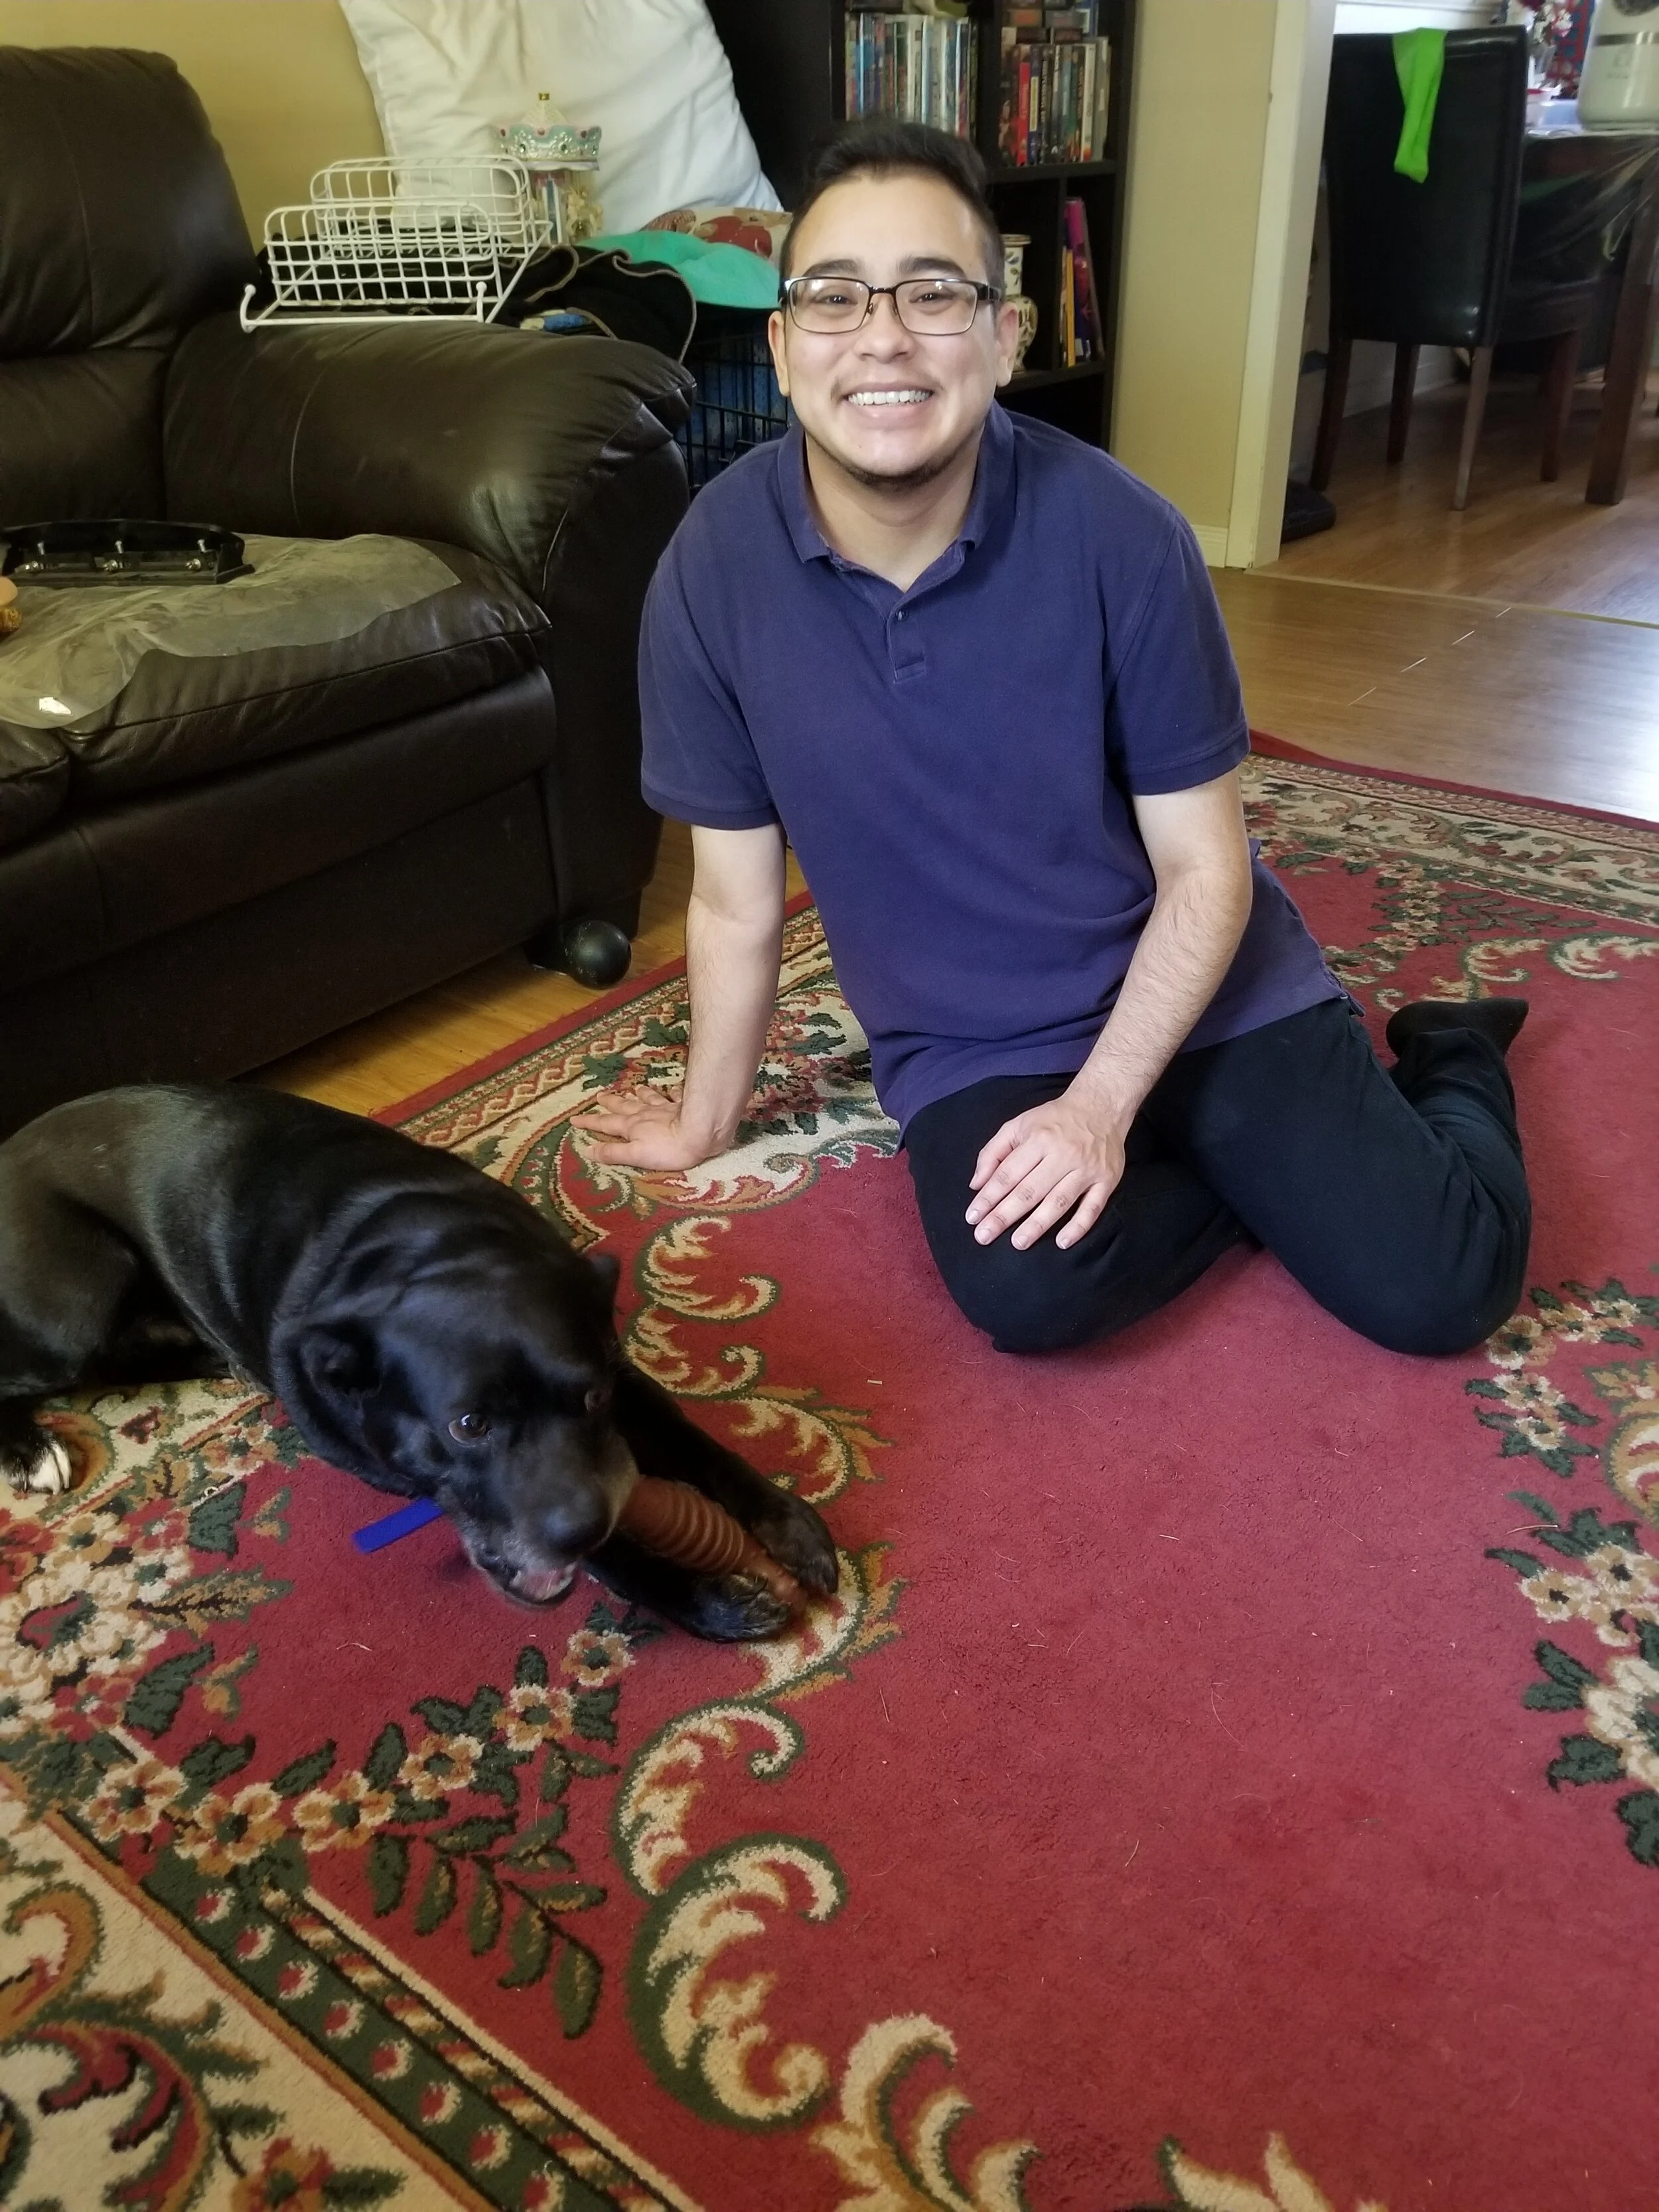
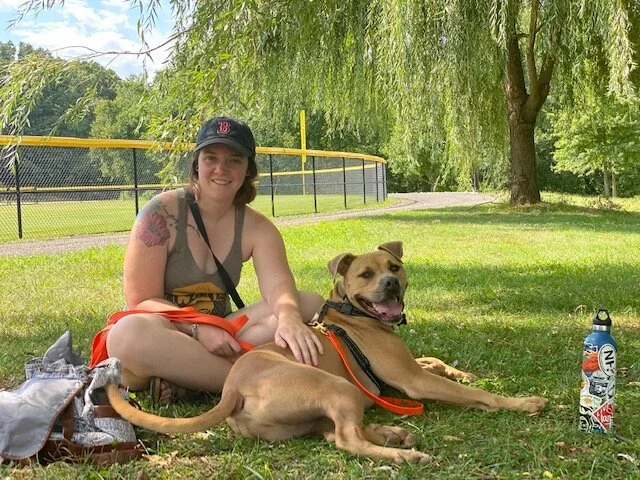
The Dog That Gave Me a Reason to Live: Chris and Vincent
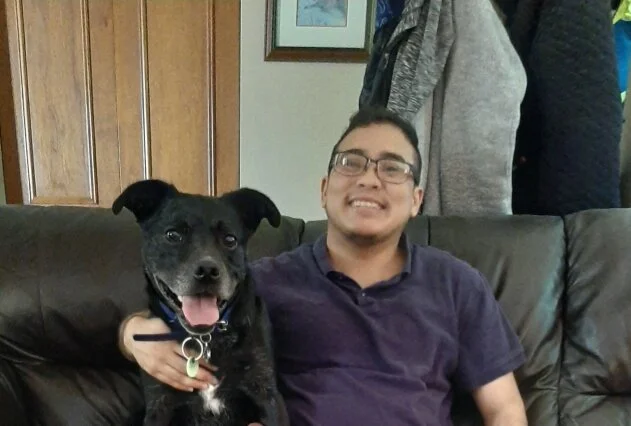
Chris, a transgender queer male in his early twenties, sits with his rescue Pitbull, Vincent, on their couch.
Editor’s Note: Earlier this month it was Transgender Awareness Week which culminated in the Transgender Day of Remembrance. Lauren (@empath_n_drake), a member of our #TOCFam, introduced us to her openly trans friend, Chris (@straydoglife), who also has a reactive dog named, Vincent (@littlebuddyvincent). Chris graciously agreed to sit down for a q&a and we are honored to share his story with you all. (Warning: This content mentions suicide, anorexia, and depression.)
Would you please introduce yourself and tell us a bit about your story (you can share whatever you want to share about yourself)?
My name is Christopher, or Chris for short, and I am a transgender queer male in my early twenties. I came out when I was 16, and it was a hard transition for everybody. Vincent always seemed to recognize me and my voice, no matter how much I changed. I am called his "papa" and he actually responds to that word and looks around for me. I study psychology at university, and I love all dogs very much! I am passionate about helping others because I have been through a lot of mental health struggles. I am passionate about reactive dogs because it is a community that needs a lot of support and has been so welcoming to Vincent and me.
When did you get Vincent?
Seven years ago! I was 16 at the time.

“I picked Vincent because he was the most energetic and felt drawn towards him. I fell in love with him the first time I held him” Chris told TOC.
How did you and Vincent “meet?”
He was in a litter with his siblings at a farmer's market - all his siblings were sleeping and he was being rowdy. My mom wanted me to pick a female dog, but I always wanted a male dog. I picked him up, and he calmed down in my arms immediately. We didn't find out his breed until way later because the farmer's market was pretty shady. We didn't even plan to get a puppy that day, we were just buying peaches, but I saw puppies and I wanted to look at them because I love dogs. My mom asked me, "Do you want one?" and I said yes. So she told me to pick, and I picked Vincent because he was the most energetic and felt drawn towards him. I fell in love with him the first time I held him.
What did bringing Vincent into your life mean to you?

“In this photo Vincent was about one year old and I was holding and kissing him. I was early in my transition” Chris said.
Vincent gave me a reason to live and recover from my mental illnesses. Before Vincent, I was in and out of the hospital for being suicidal among other things. I was struggling to get out of bed every day and wasn't eating. When I got Vincent, I wanted to take care of him the best I could. I got out of bed. I played with him, fed him, and he slept in my bed with me every night because he hated being alone. Eventually, for my own mental health, I decided to move out of my mom's [house]. It was hard because I couldn't take Vincent with me. Eventually I got my own place and he lived with me for a year, …and people would yell at us and threaten us because he was a pitbull. I eventually made the decision to send him back to my mom's, where he could feel safe, as he had become reactive from the stress of living with me. Without Vincent, I spiraled into anorexia. I went into the hospital and got treatment. On my hardest days, I looked at my planner which had a photo if him on it. It said below, "Do it for him." So I worked my hardest and now my mental health is much better, and I am in remission from anorexia. Whenever I think about relapsing or suicide, I think of him and I decide to go on. Whenever I think about giving up in school, I think of him and how I want a career so I can get a house for him to live with me again. Vincent seems happier and less stressed at my mom's, and honestly I didn't have the money or time to take care of him properly, so I let him stay there. I visit him every Sunday, for his birthday, and holidays.
What are some of your favorite things to do with Vincent?
We love to cuddle, take naps together, and play with his toys. It is the best when he is relaxing, and I am relaxing, and we can enjoy each other's company. He loves to give kisses and lets me kiss his forehead. Every time I come to visit, he [puts] out his paws on me and stays there "hugging" me for a long time. When Vincent is at ease, I am at ease.
How has Vincent’s journey with reactivity impacted your life?
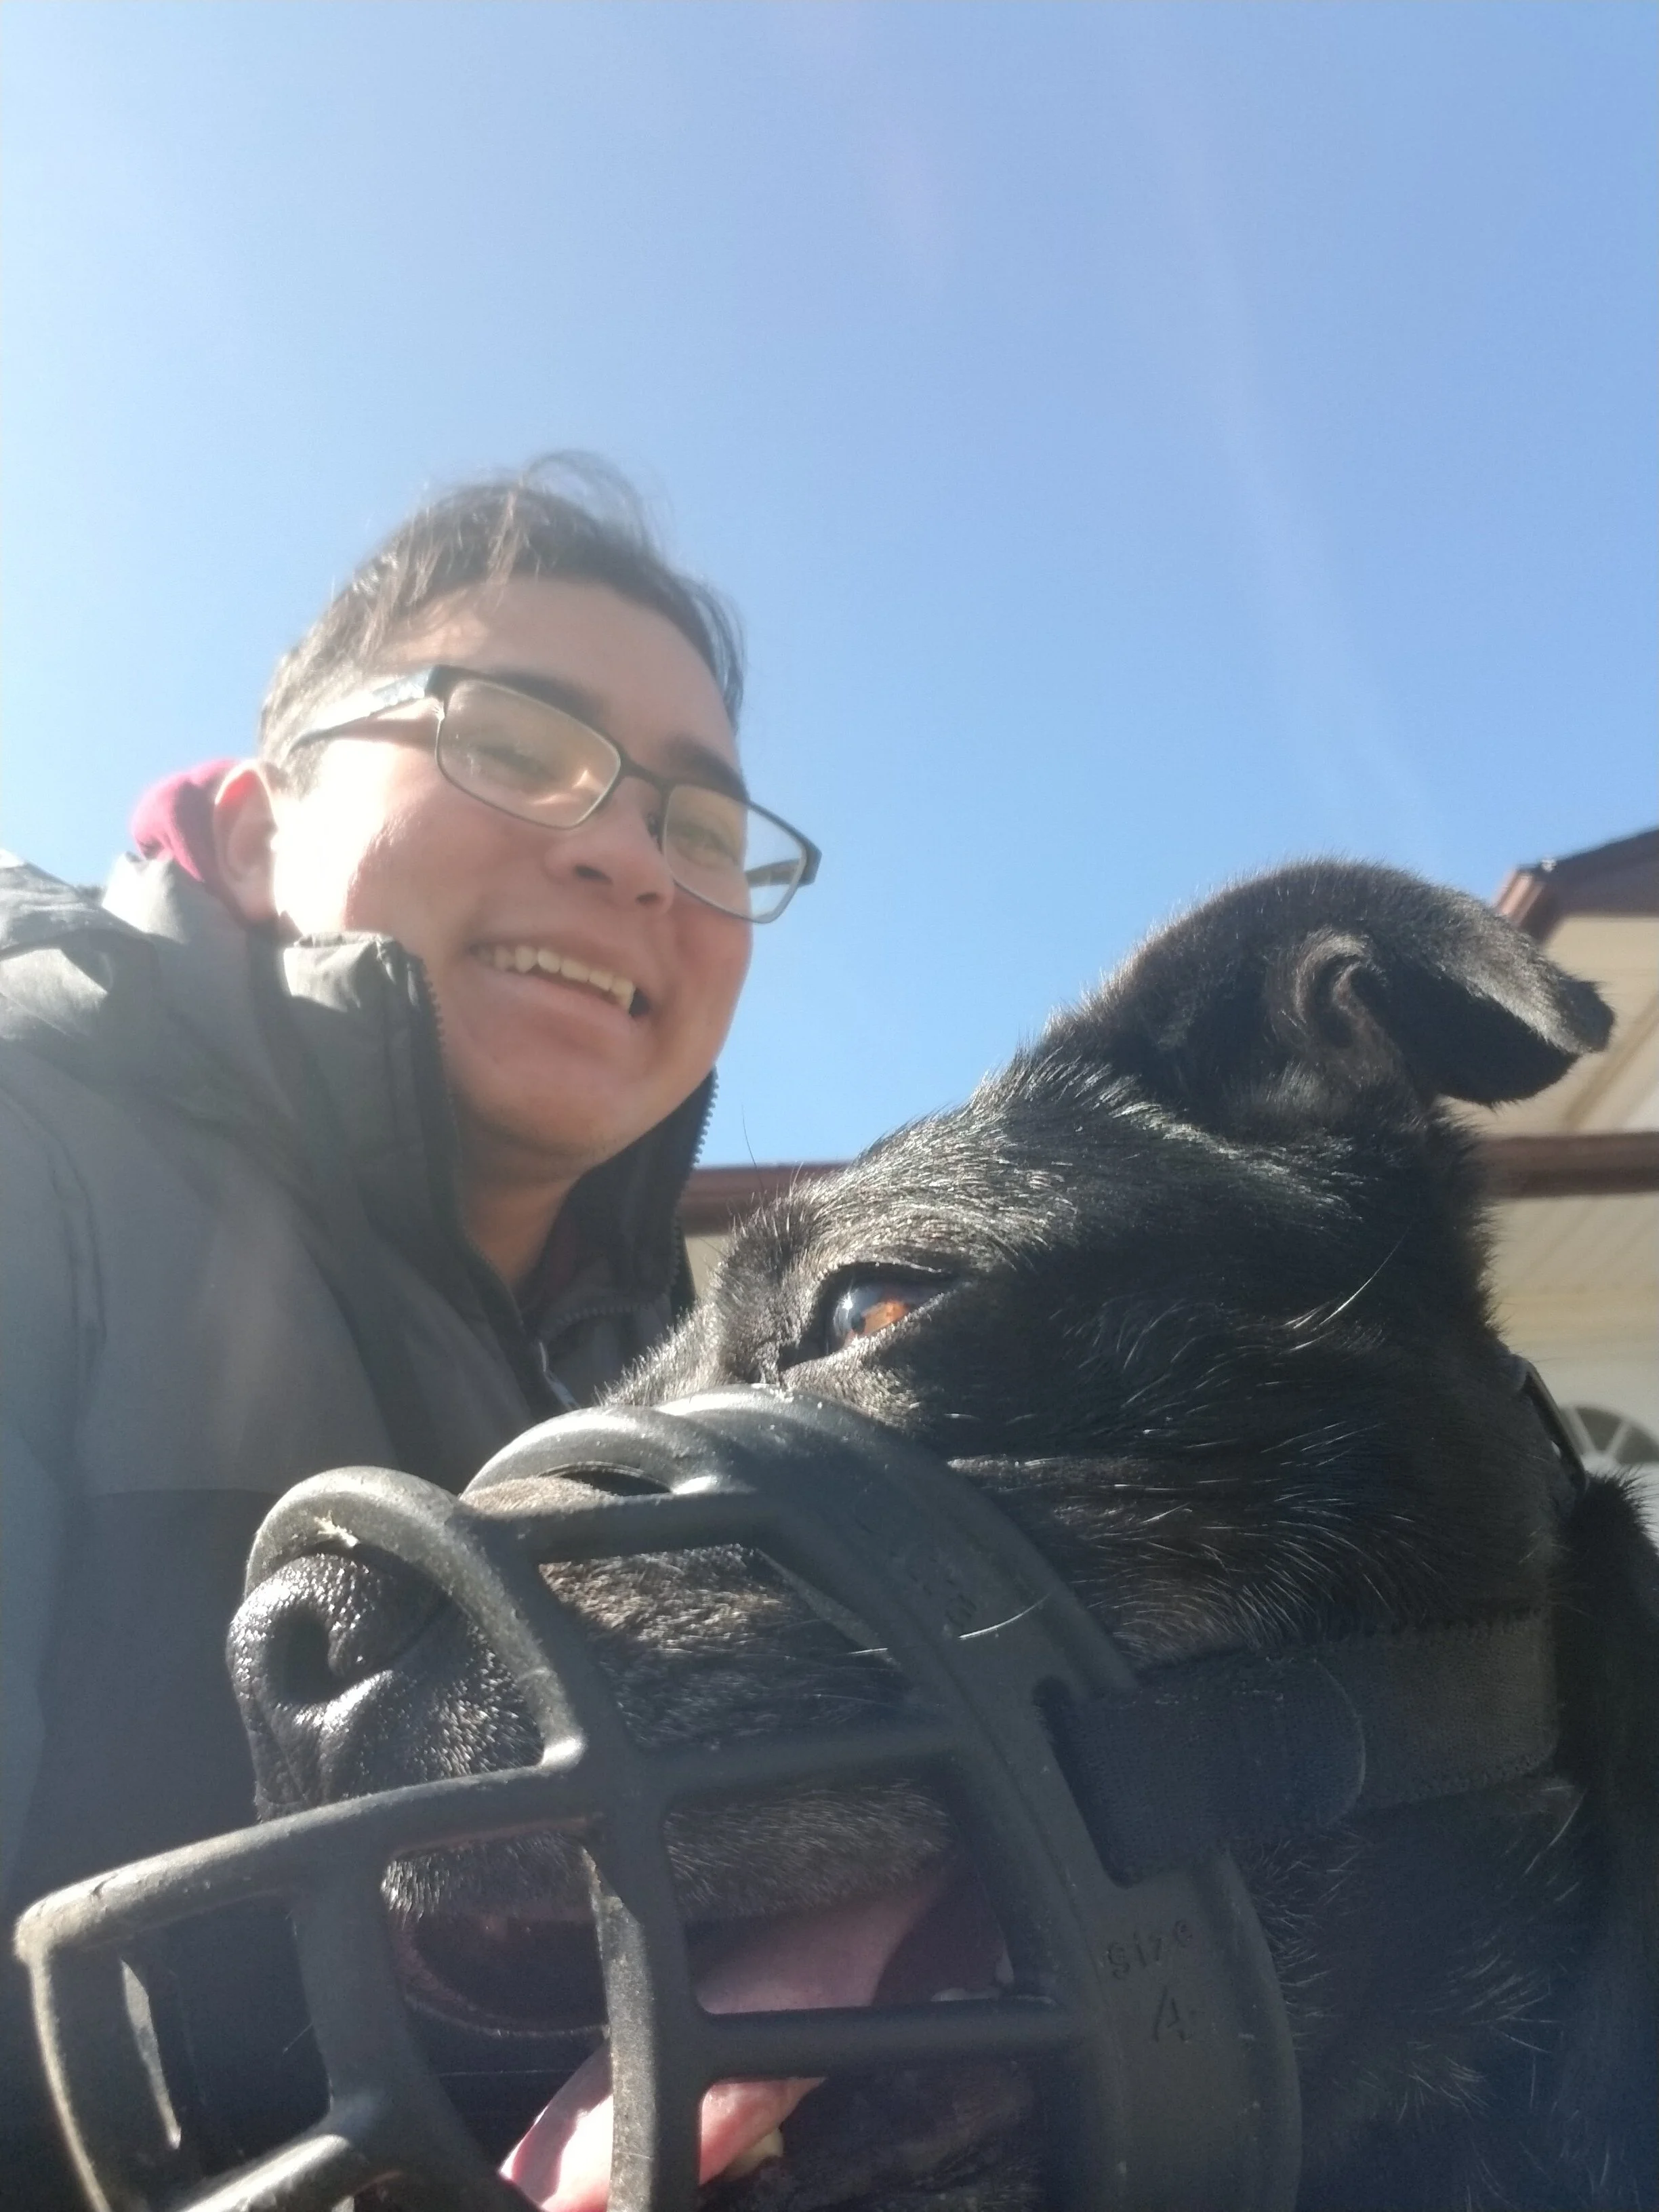
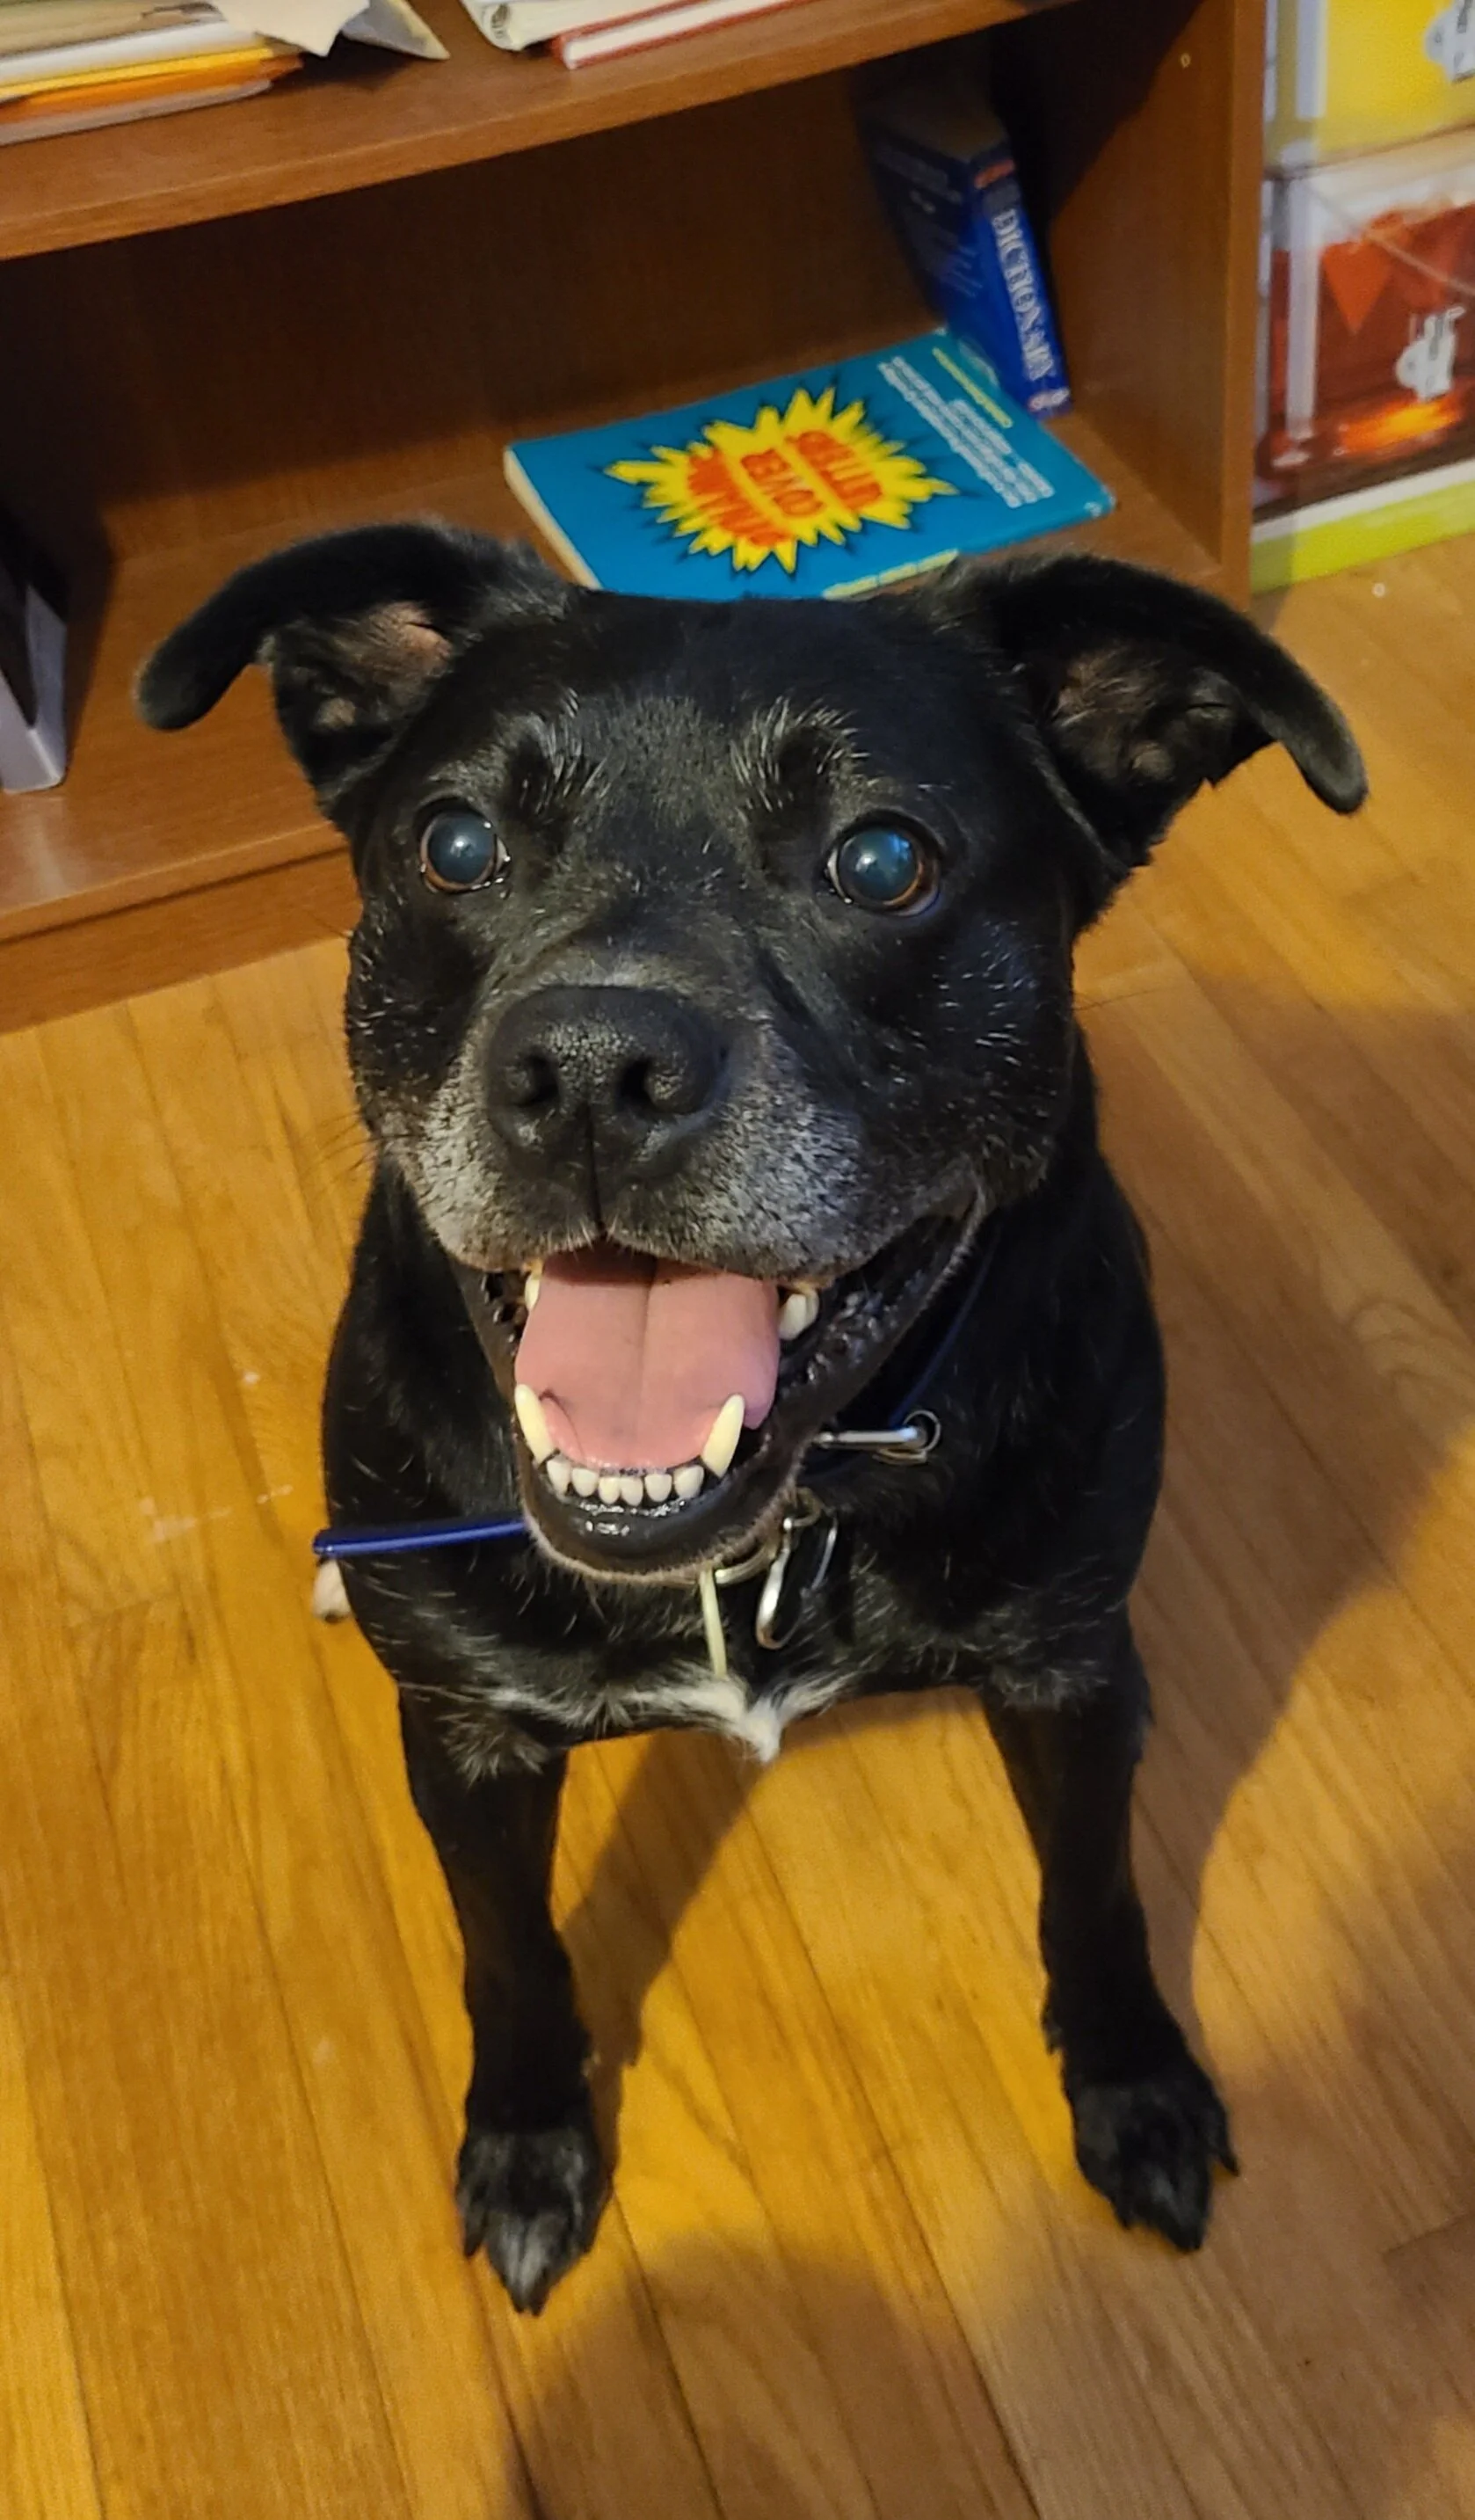
“Vincent is a good boy and enjoys taking treats from his muzzle. He is still working on his reactivity, but recently people outside said what a good boy he was. That made me really happy,” Chris told TOC.
It was really hard. The reason he is reactive was because of the neighborhood we lived in when he lived with me, so I always feel bad about that. He was under a lot of stress to protect me. I didn't do anything about his reactivity for a while, until I found supportive groups online for reactive dogs. I learned how to train him, how to properly muzzle him, and he is making great progress. I hope he inspires other dogs out there who have fear-based reactivity. I used to feel anxious when walking him, but I don't anymore now that he has a muzzle. I don't care what other people think, I am focused on making him comfortable on his walks. When he reacts, I try to gently lead him back to me with treats and tell him to lay down. One day a dog was off leash (illegally) and ran up to Vincent on a day he was not muzzled. Vincent bit the other dog. The owner said it was her fault, but when I got home I cried because I knew if he did it to someone else he could seriously hurt them and he could be put down. So he has been muzzled every walk since. He's a good boy and enjoys taking treats from his muzzle. He is still working on his reactivity, but recently people outside said what a good boy he was. That made me really happy.
When I am with Vincent, I feel_________. (Please fill in the blank and feel free to elaborate.)
Happy. For me, that's a big thing. I've dealt with chronic depression with major depressive episodes. Happiness was not something I felt for a long time. However, whenever I am with Vincent, I am truly happy. I cherish those moments, and they have gotten me through hard times.
Would you be willing to share a specific memory you have of Vincent?
A fond memory I have is a simple one that I think about a lot to calm down, it is my "happy place." I have narcolepsy, so I take scheduled naps on my mom's couch. He got used to the timing. Eventually, he would always take my naps with me. My fondest memory is him sleeping in the crook of my legs, warm and snoring. I would fall asleep happy knowing we were safe and he was there.
What are some of the ways you take care of yourself?
On my main instagram, I talk a lot about my experiences with mental health, and that helps me be solid in my recovery. I also draw to vent out feelings, as this has worked since I was little. I make sure to nourish myself properly, get plenty of rest, and try to be compassionate with myself. I take care of myself because I know Vincent would be sad if I didn't.
What are some of your hopes for the future?
I hope to get my masters in counseling psychology, get a stable job, and a house where Vincent can live with me again. However, that might take a while, so I am just hoping either with me or my mom he is comfortable and happy until his last days. I hope he continues to make progress in his reactivity, so he can be seen as the good boy he really is and not just a dangerous pitbull.
Any recent book recommendations?
“The Book Thief” was a book I really liked when I had the time to read for pleasure. These days I usually read manga, so I would recommend “Pandora Hearts” as a manga series. I read it since it came out, and it is my favorite and has beautiful art.
What song makes you want to sing along every time you hear it?
Como La Flor by Selena. My mom would sing this with me while I was growing up. I finally understand what the Spanish words mean, and it is quite sad. However, I feel happy singing in Spanish with my mom.
Is there anything else you want to share with us?
It is hard having a reactive dog. It is hard having a breed that is stigmatized. However, you can prove people wrong. You can show them your dog is not dangerous, just scared. You can show them your dog is good, no matter what breed, no matter if they wear a muzzle, no matter if they are reactive. Don't give up, it takes time, but it gets better.
To follow Chris’s life with Vincent, click here.
PS: Pin this article for later!

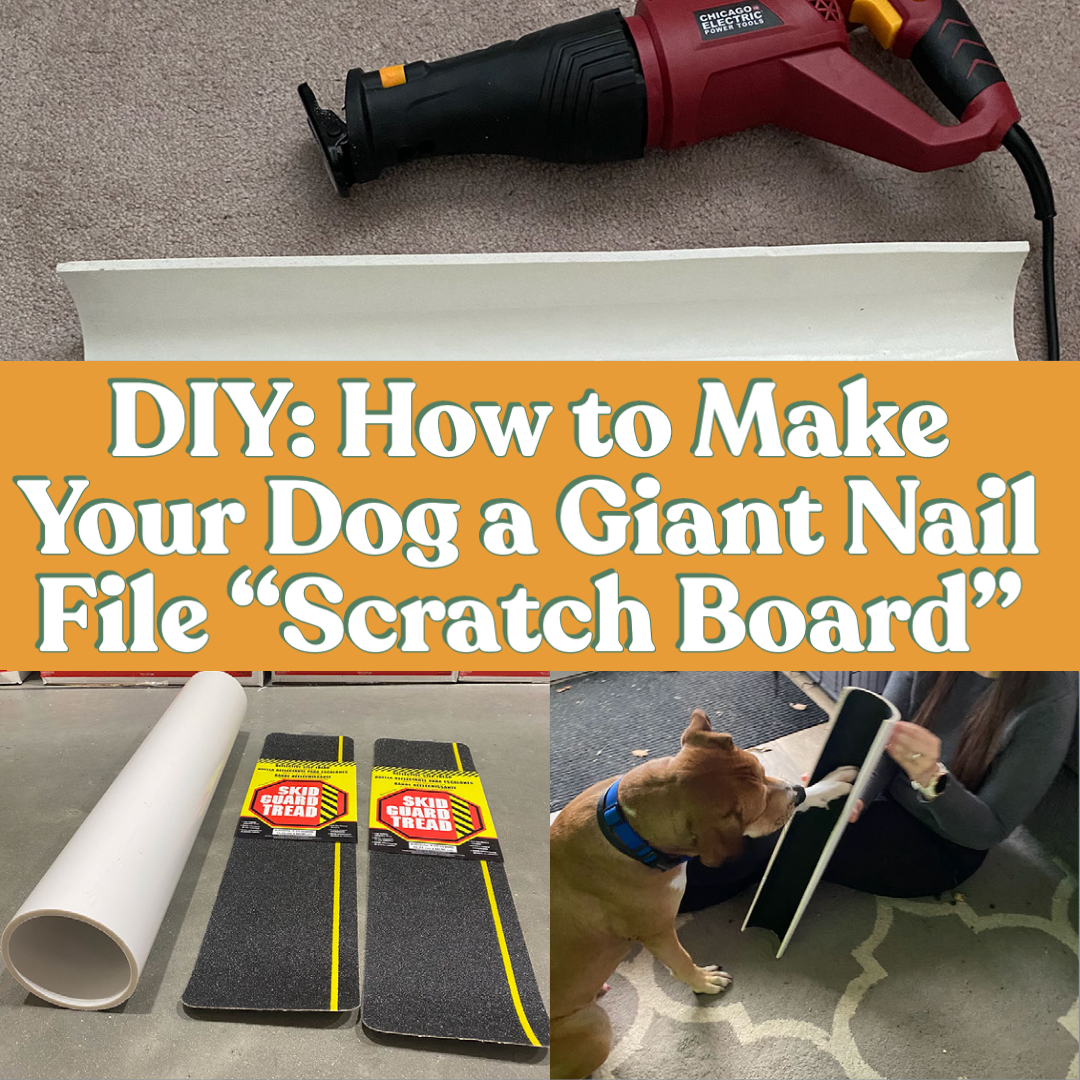
DIY: How to Make Your Dog a Giant Nail File “Scratch Board”
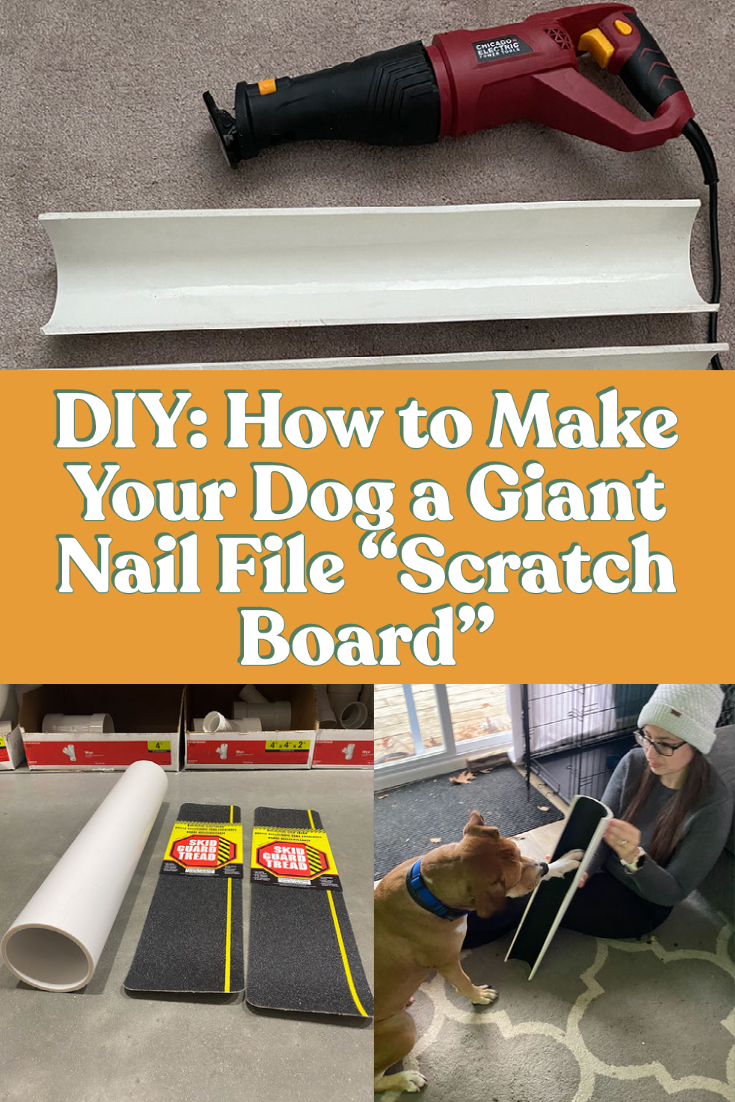
Editor’s Note: This week’s TOC DIY is brought to you by Erika Fields and her hound dog, Mack. Erika told TOC, “Mack was born in Alabama but his rescue brought him up to Massachusetts, where he lives now. He loves winters (snow zoomies!) and hates summers — we’re complete opposites in that respect.” In order to help keep Mack’s nails short and avoid frequent nail clippings (he’s not a big fan of having his paws touched), Erika made him a DIY scratch board, which is basically a giant dog nail file. Now she says that Mack loves nail time and they use the scratch board during training sessions, which Mack adores as long as he can have part of his dinner in the process! To learn the steps to make your own DIY scratch board, keep scrolling below.
📎 The Supplies That You’ll Need to Make DIY Scratch Boards
![“Mack has two trick titles and we’re working on his third (expert level)! He’s a mutt through & through but his hound nose is what started us on our journey of [also] making snuffle mats. Mack has yet to find a type of food he doesn’t love. Food…](https://images.squarespace-cdn.com/content/v1/5cfec609958de40001253e1d/1605639115472-KOMG6QSECOB7OU46V5KX/Erika+sits+on+a+bench+with+her+dog+Mack)
“Mack has two trick titles and we’re working on his third (expert level)! He’s a mutt through & through but his hound nose is what started us on our journey of [also] making snuffle mats. Mack has yet to find a type of food he doesn’t love. Food is definitely the way to his heart (like mine!),”Erika tells TOC.
One 4 inch wide pvc pipe (found at most local hardware stores like Lowe’s and Home Depot)
3M stair treads or 80 grit sandpaper
Double sided tape/similar adhesive (you won’t need this if you’re using the 3M stair treads)
Reciprocating saw (a handheld saw could probably work too)
⏰ Time Commitment
The scratch board will take you roughly 15 minutes to make.
⚖️ Skill Level
Making this scratch board should be relatively easy!
✅ Step by Step: How to Make Your Own Scratch Board

Step One
First you need to cut the pvc pipe in half. I’ve used a reciprocating saw, but a handheld saw could probably work too.
Step Two
Once you have the pvc cut in half, you just need to adhere the 3M stair tread to the inside of the pipe. These come with self-adhesive so you just line it up and press it against the pipe.

Step Three
If you are using sandpaper, you’ll need to cut the sandpaper to fit the inside of the pipe then put adhesive of your choice on the back of the sandpaper before you can stick it to the pipe.

Step Four
Grab some treats and invite your dog to start filing down their nails on their own!
If you have something that you’d like to DIY for your #TOCFam, please fill out our form here.

The Dog That Changed My Life: Marcella And Shimmer

Marcella Ward (above with her dog, Shimmer), is a professional dog trainer and the owner of Dogs Speak Dog Training in Houston, Texas.
A twinkle flashes in Marcella Ward’s eyes, and she hops up from her chair and walks over to the wall behind her where a rack with twenty five name tags hangs beneath a painting of her dog, Shimmer. Knowing each tag’s place by heart, she swiftly grabs one and returns to her chair to show me the tag. She holds it up to the screen for me to see and with a delighted grin on her face, she says, “I'm sexy, I'm cute, I'm popular to boot. It goes through the entire beginning cheer and on the back, it says, well, we don't like you either.” These tags haven’t jingled from Shimmer’s collar in over a year now, but it is impossible not to feel Shimmer’s presence and the ripple effects she had on Marcella’s life.
I plead with Marcella to help me understand what made her relationship with Shimmer so special. In that moment I can’t imagine losing the connection I have with my own heart dog, Otis. Her response surprises me.
“What if instead of trying to figure out what is so special about the relationship, we just enjoy the magic of it?” Marcella asks.
What Happened When Marcella First Met Shimmer
Marcella grew up with a family dog and jokes that she was always “that kid” who would rather play with dogs than other children. When Marcella was 14 years old, she went to an adoption event with her mom where they first met Shimmer.

Marcella says that Shimmer feels like happiness and home. She believes that she is a better human being because of this dog.
Marcella remembers feeling an instant connection as she watched that brown dog turn on the charm. When it was time to put Shimmer back, Marcella sobbed and knew this was her dog. “I just remember from the instant we brought her home, I was just in love with her,” Marcella tells me.
Why Taking Shimmer to College Led to Her New Role in Marcella’s Life
In high school, Marcella remembers walking around college fairs, and without a moment’s hesitation, she crossed colleges off her list that wouldn’t allow first year students to live off campus. Going to school without Shimmer was unthinkable.

Marcella went to Texas A&M where she got to live off campus as a freshman and bring Shimmer to school with her. Shimmer and Reveille (above), the college’s mascot, became friends and would chase squirrels together.
“I'd always had struggles in terms of both mental and physical health. I didn't really think about it until I was in college, but then I was like, maybe, she would make a good service dog,” Marcella tells me.
Shimmer was already tasking for Marcella and had basic obedience down, so when Marcella was a sophomore, she decided to see how Shimmer would do in public spaces since service dogs have public access. Shimmer took to it instantly, so at the age of six, Shimmer officially became Marcella’s service dog.
“Did your relationship with Shimmer change at all?” I ask her.
“I think the only change, really, was that it got stronger. She essentially became my heartbeat, my lifeline. She went everywhere. It really just got stronger,” Marcella says.

Shimmer loved to nap - especially if she could find something to serve as a pillow. She loved wearing the “Shim Jammies” that Marcella would put on her to keep her nice and cozy.
More than a Service Dog: The Unusual Way Shimmer Helped Marcella in Organic Chemistry
Marcella tells me that she often asks people who her favorite dog is, and anyone who knows her answers “Shimmer” without a moment’s hesitation. She goes into the sweet dog voice so many of us use and recites what she says to her two border collies, “You’re cute, but you're not the favorite,” as she starts to laugh with her whole body.

Luckily Marcella shared this priceless photo of Shimmer in her O-Chem lab outfit.
Marcella went to college with plans to become a vet. Very matter of factly, she tells me, “Yeah, physics and organic chemistry and I did not get along.” While those classes may have changed her mind about her career path, organic chemistry lab proved to be a highlight for so many people at school. Shimmer went to O-Chem lab each day, and like the humans in the room, she also had to be safe, so she wore a pair of human goggles (doggles were not really a thing at the time), a lab coat, and booties in case of any glass or spills. Marcella gets so excited just thinking about this that she pulls out her phone and starts searching for a photo to show me.
Marcella is right: That dog was meant to be a service dog -- her service dog. When Marcella graduated from college, Shimmer walked the stage with her.
How Shimmer Helped Marcella When She Almost Died
When Marcella was 23, she had a pulmonary embolism and nearly died. She spent six days in the cardiac ICU, and Shimmer was with her for almost every single moment of it. Shimmer didn’t even want to leave her side to eat or go to the bathroom. When people took Shimmer out to go to the bathroom, she would potty quickly and then immediately pull to get back to Marcella. I can feel the amount of gratitude Marcella has in her heart as she tells me, “Shimmer was there for me through some of my darkest times.”
Sixteen months ago at the age of 13, Shimmer died of cancer. “The day I lost Shimmer, I lost a part of who I was. I did. It really did feel like a piece of myself broke off and went with her,” Marcella tells me.
I have done a lot of personal work to remove the shame around my emotions, but at this point listening to Marcella, I start to feel a bit uneasy about being the one with tears in my eyes when she’s the one who lost Shimmer.
She looks straight at me and with kind eyes says, “Believe me when I say you have no worries crying in front of me. If Shimmer's story and the relationship I have help other people feel things, then I'm glad that I can share part of what I felt when I was with her.”
I smile and let the tears come as I accept the generous gift Marcella just offered.

Shimmer would always do a happy twirl and then fold her ears back and smile as she looked up at Marcella after an agility run.
Shimmer’s “Badass” Approach to Beating Cancer
Shimmer was almost 13 when she was diagnosed with cancer. Marcella tells me, “So many people would say it’s ill-advised to put a 13-year-old dog through surgery. I know this probably sounds so goofy to some people. But, I cleared my mind and I told myself I will fight for her… and do whatever I can … but Shimmer has to tell me if she wants to fight.”
Marcella sensed that Shimmer wanted to fight, so she began the process of helping her live. They went back to their alma mater, Texas A&M, for treatment of what doctors thought was sarcoma on her toe. They found out she had high-grade malignant melanoma on her toe as well as a different type of cancer in her chest.

When Marcella was debating treating Shimmer for cancer, she says she told her dog, “‘I will fight for you, I will do whatever I can. But, you have to tell me if you want to.’”
As Marcella spoke, it became clear to me that helping Shimmer live was about so much more than simply helping her survive cancer. It was about giving her more moments of joy. So on Shimmer’s 13th birthday, Marcella threw her a birthday party with some of her favorite people and dogs. Shimmer was a foodie who loved a nice pillow to nap on and was thrilled to open presents on birthdays and Christmas. So for Shimmer, this party hit on all three of those great loves (Marcella jokes that Shimmer just thought the inflatable donut collar was a personal pillow she got to carry around).
Shimmer’s surgery to remove the thymoma in her chest left her with a ten inch scar on her side. While doing some related tests, the vet also discovered that she had some rare liver flukes -- so uncommon that Texas A&M didn’t even have a stool sample from a live dog with them. Marcella got a proud look on her face as she said, “Shimmer's poop sample lives on at Texas A&M at the College of Veterinary Medicine, teaching students about liver flukes.”
When Marcella went to pick Shimmer up from the ICU to go home, Shimmer tried to jump into the car and slipped and fell on her back. In tears, Marcella took her right back into the vet, where they promptly told her that Shimmer was totally fine. “That’s the kind of dog Shimmer was. Badass little dog,” Marcella says.

Marcella speaks fondly of “the extra nine months” she spent with Shimmer following her surgery to remove the cancer. She rattles off memories as her eyes gaze into that distant place where I am certain she is getting to experience the moments all over again: puppuccinos, riding around in the car, ice cream, licking dinner plates. Marcella returns to the present and says, “I think that's what helped give me peace - knowing that we didn't waste a single moment together with the time we were given.”
Shimmer lived for nine more months following that surgery. When Marcella talks about this time, she calls it the “extra nine months” and tells me “every moment was filled with happiness - all of her favorite things and I know we didn’t waste a single moment together.”
Three weeks before Marcella lost Shimmer, she had a friend do a photoshoot with her. Marcella picks her laptop up and moves it to show me a large canvas photo of Shimmer hanging behind her. I see a dog with a massive smile on her face and a literal twinkle in her eye. I notice that I am starting to fall in love with Shimmer too. “This is one of my favorite pictures,” Marcella tells me.

This photo (one of Marcella’s favorites), was taken by one of her friends three weeks before Shimmer passed away.
How Shimmer Told Marcella It Was Her Time
The week before Shimmer died, Marcella sensed that something was off. She sat with Shimmer and had a lot of talks where she said, “Wow, look at this body! It’s taken you so many places.” It is hard to hear those words as anything other than a gift. A part of my mind latches onto them as if she is saying them to me, and I feel an immense amount of gratitude for the person that Shimmer has put in front of me.

Marcella still sleeps next to Shimmer’s blanket and jammies every night, and for just a moment, she will be able to smell Shimmer and feel reassured that she is still a part of her life.
The next morning, Marcella took Shimmer to the emergency vet after she collapsed. Marcella remembered telling the Texas A&M surgeon that she would help Shimmer recover from the cancer surgery but wouldn't ask her to fight beyond that. That day at the emergency vet, Marcella had a split second where she toyed with going back on that promise. Marcella heard Shimmer take a few of those agonal breaths and made one of the most difficult decisions she’s ever had to make -- to help Shimmer go.
“Even in the end, Shimmer and I made this decision together when she helped me make the choice because she chose to stop fighting,” said Marcella.
Shimmer did agility until she was twelve and could rebound off of Marcella until almost the day she died. Marcella smiles and shakes her head as she tells me that Shimmer could jump fully up on top of the counter from a standstill at the age of 13.5. Marcella took great pride in keeping Shimmer in good shape and believes Shimmer handled cancer surgery so well because she was so healthy and happy. “We called her little buff Shimmy,” she tells me.
“Where the heck did that strength come from?” I ask her.
“I think, for me, it was knowing that I was giving her that final gift, and also knowing that if I didn't do that, I'd be going against everything I promised to her,” she explains.
Marcella continues, “For the longest time, I was terrified of death, and, interestingly enough, Shimmer taught me to be okay with it. When it's my time, I have someone waiting for me now, so I'm okay with it. Now I'm okay with death.”

It was just Marcella and her border collie, Vengeance, in the room when Shimmer took her last breath. When they came to wheel Shimmer out after that final goodbye, two of Marcella’s friends who had come for support saw Vengeance boop his nose to Shimmer’s. “I think that was like a rite of passage - ‘Hey, I’m taking care of her now.’ I didn’t see it, but I know it happened,” Marcella tells me and I believe her instantly.
What a Spiritual Communicator Told Marcella About Her Connection with Shimmer
As the one year anniversary of Shimmer’s death was approaching, a friend of Marcella’s recommended she speak with a spiritual communicator. She quickly adds, “As much as I know that, we, as trainers, are all about science-based, I do believe that there are things that we don't know. Things that we may not have discovered yet.”
“It was incredible. [The communicator] basically told me Shimmer was and is my twin flame - two souls that are so connected that they are meant to find each other and they will always find each other. She said that through all the different lifetimes I've had, I've always had Shimmer with me, and that before I came into this lifetime, Shimmer's soul and my soul decided what lessons I would learn in this lifetime. She shared that Shimmer said she will come be with me again in this lifetime. It may not be right now, but she will. I do feel her everywhere around me,” Marcella says with a deep knowing.
I have never been someone who believes in reincarnation, but I am someone who rules very few things out. And regardless of what I believe, I can feel my whole body fill with warmth at the thought of a twin flame. Perhaps that is why some of these connections we have with dogs feel so magical -- they are soul connections. They aren’t rooted in intellectual conversations or status; they are two souls finding each other.
“She’s always with me,” Marcella tells me. She has Shimmer’s actual paw print tattooed on her arm, has Shimmer art all over her walls, and puts Shimmer’s old collar tags on her keychains.
How Shimmer’s Pure Joy Inspires Marcella

As Marcella reaches for memories of Shimmer, it becomes clear to me that she is remembering so many of life’s simple little moments. She is reveling in all of the “naughty” things she did like stealing the tuna right off her mom’s salad and smiling at the way Shimmer would grab one of Marcella’s shoes to snuggle with. Marcella is proving how much magic exists in life with dogs.
“When you walk by the pictures and the things remind you of her, do you feel joy or does grief hit you sometimes?” I ask her.
“Joy. I would say more joy than anything. There are moments where I do still have grief, where it hits me for just a second, and I just think how unfair the world is, because if she could have lived forever, that would have just been perfect,” she responds.
Even though Shimmer is no longer with her in the same way, it is Shimmer who helps her through her grief and struggles. She looks to how Shimmer dealt with cancer as a reminder that sometimes we just have to go through things. “I think that also helped model, despite what I'm going through, I can still find joy in things, I can still move forward,” she tells me.
Marcella tells me that she owes almost everything she is to Shimmer. She pauses for a moment and then admits that a piece of her left when Shimmer died. Shimmer was with her through so many of her biggest life moments: graduating high school, going to college, graduating college, nearly dying, and starting and growing her own dog training business. It is impossible to talk to Marcella and not see how Shimmer shaped her into who she is today. “Losing that special heart dog changes us as a person, but we become more of the person that we're meant to be in that journey,” she said.
If you look at the logo for Marcella’s dog training business, Dogs Speak Dog Training, you will see Shimmer and her current service dog, Vengeance. And when people ask her to send her professional photos for various higher profile dog training opportunities, she sends a photo of herself with Shimmer “because that dog got everything started.”
When we wrap up, Marcella looks at me and says, “Well, I don’t know how you feel about this, but I feel like I’ve gained a new friend.” I smile because it feels like I have gained two: Marcella and Shimmer. Their connection was so strong that I feel certain that a part of Shimmer lives on through Marcella. I leave feeling grateful for all the ways that their relationship continues to create waves of connection in a world so often determined to make us all feel disconnected.
To follow Marcella’s life with her two border collies, Vengeance and Fibonacci, while training other dogs, click here.
PS: Pin this article for later!


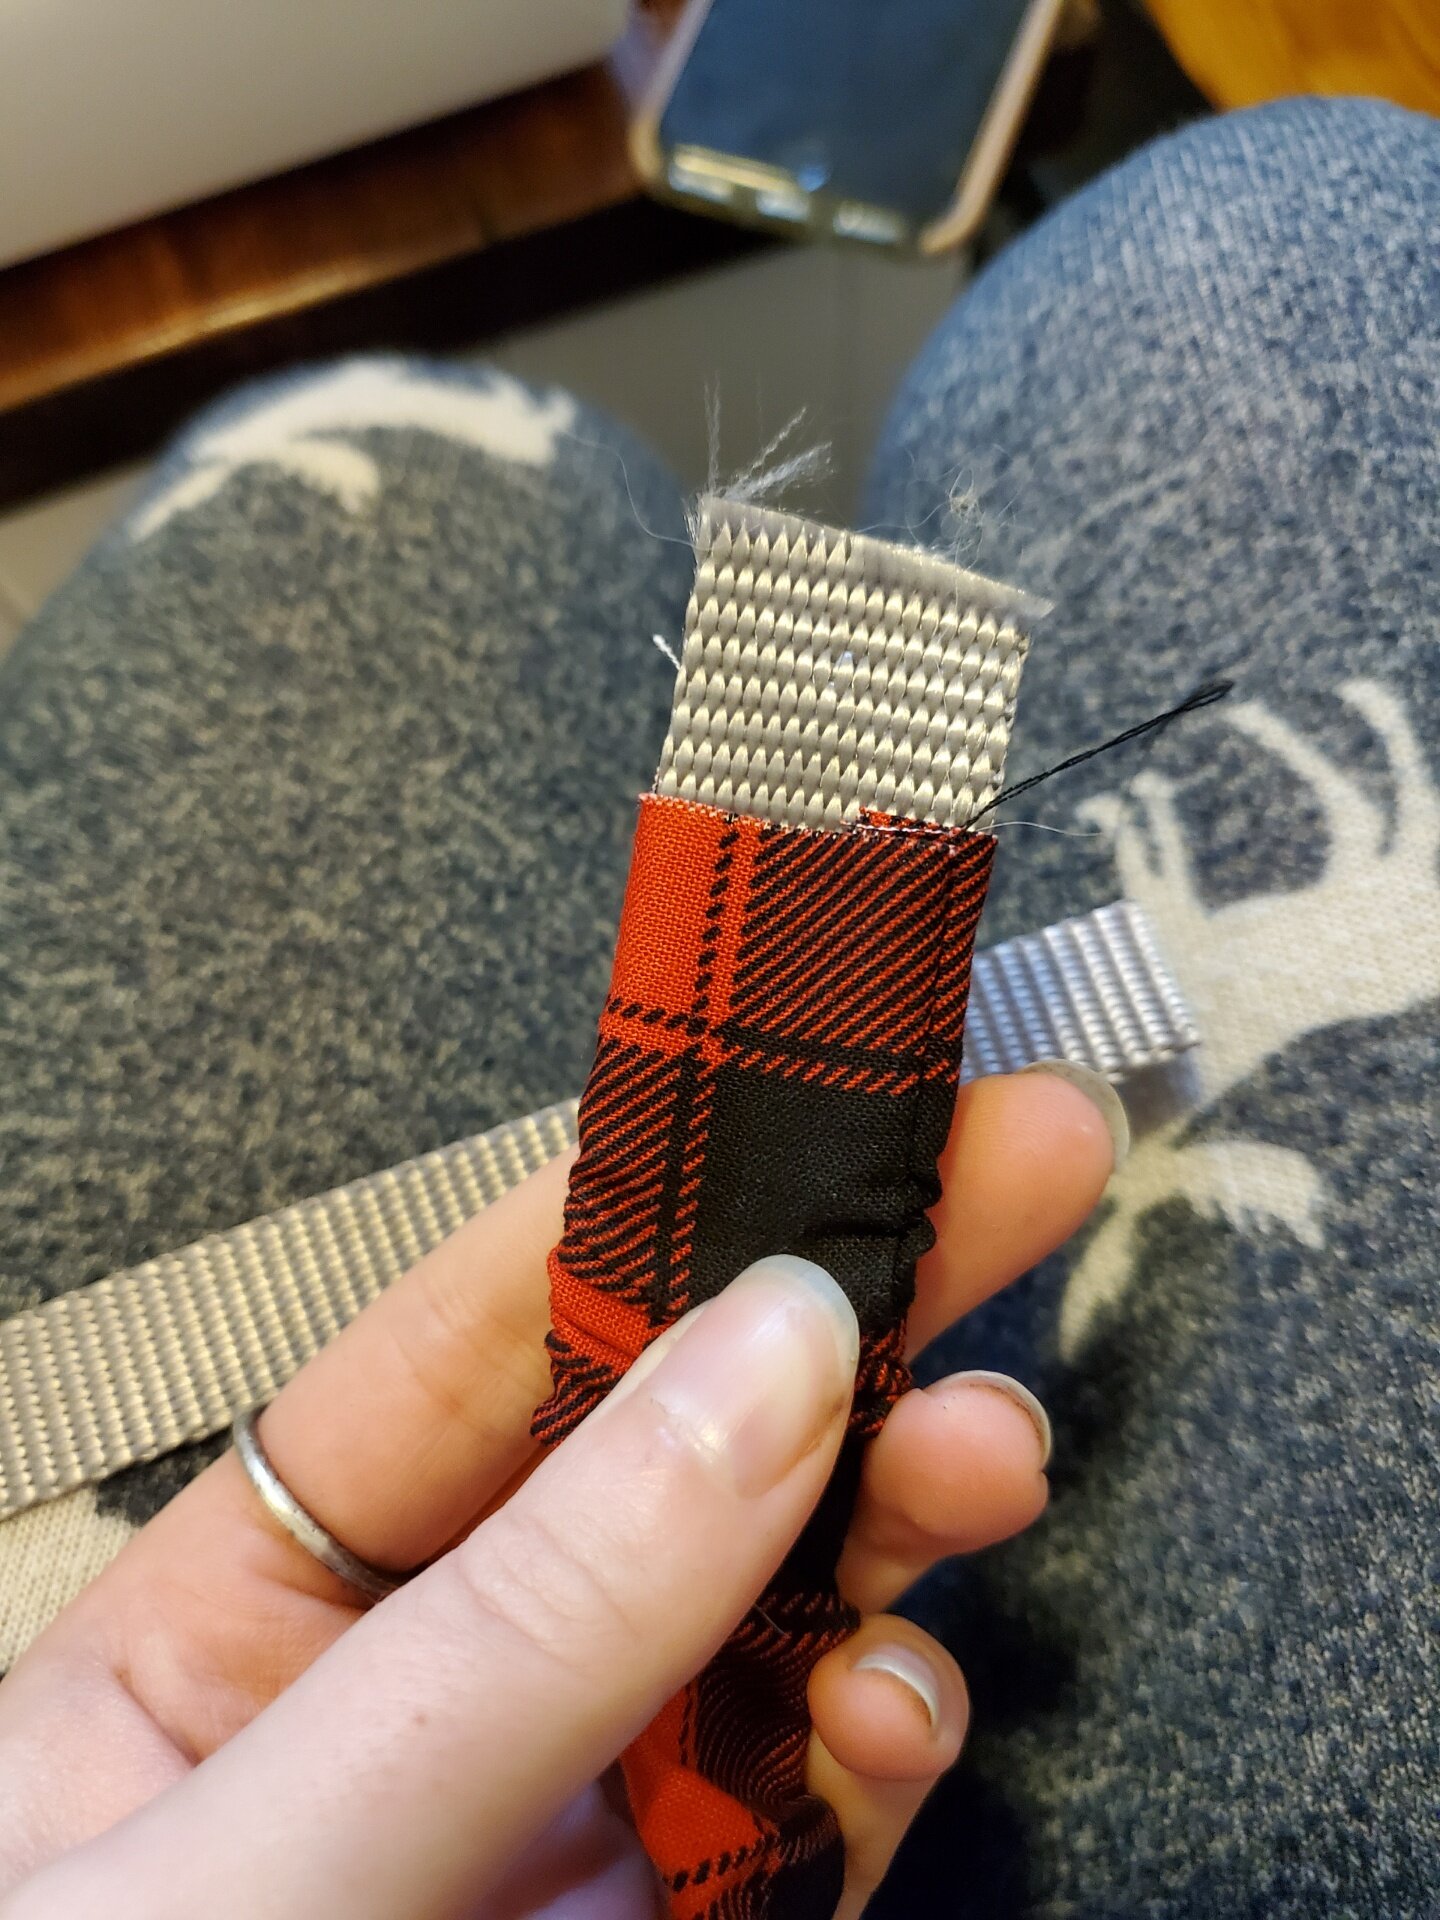
DIY: How to Make Your Own Dog Collar

Editor’s note: This week’s edition of #TOCDIY is brought to you by another amazing member of our #TOCFam, Suzie Stephenson. Suzie has two medium goldendoodle half-siblings named Tashmoo and Wrigley. No big deal but she also happens to be a PhD student in virology! (This community truly blows us away). Somewhere along the way she picked up sewing as a hobby so she could sew herself clothes. “Now I mostly sew dog collars, as well as make my two [dogs] their Halloween costumes,” she tells TOC. These days Suzie also sews collars for a small business she started with her friend called, Stitches for Steak, and today she is going to teach us how to make our own collars at home! Keep scrolling for all of the steps to follow to make your own collar, along with a discount code to buy one from Suzie’s small business!
📎 The Supplies That You’ll Need to Make Homemade Dog Collars

“Tashmoo and Wrigley (above with Suzie) are half-siblings who enjoy snuggling with us, each other and their toys (especially Tashmoo's toy possum),” Suzie tells TOC.
Quilting cotton
Heavy nylon webbing in preferred size (1", 3/4", 5/8", etc)
Sewing machine
Thread
Scissors or rotary cutter
Cutting mat
(Optional) Wide metal straw and skewers
(Optional) Large safety pin
⏰ Time Commitment
This can take an hour if it’s your first time and you haven't pre-cut the fabric. It usually takes me about 20-30 minutes for one collar.
⚖️ Skill Level
This project is for intermediate sewists, so it’s probably hard for someone who has never sewn before!
✅ Step by Step: How to Make Your Own Dog Collar
Cut fabric to appropriate size (about 3" x desired length)

Cut webbing to appropriate size (about 2.5" shorter than the fabric length)

Sew (using a straight stitch and regular thread) fabric right-sides together to form a fabric tube

Turn fabric tube right-side out (using optional tools)

Thread webbing into fabric tube (with safety pin) such that the seam is on the edge of the webbing on one side
Sew (using a straight stitch, regular thread and your needle all the way over) the fabric tube onto the webbing on each side

Thread the triglide onto the collar and box stitch (using topstitching thread) to attach

Thread one half of the buckle onto the collar and thread the collar through the triglide

Thread the D ring and the other half of the buckle onto the remaining free end and box stitch to attach using topstitching thread

10. Straight stitch (going forward and reverse a few times) to hold the D ring in place using topstitching thread

Put your collar on your dog and marvel at how amazing they look in their you-made collar

If this is too advanced of a DIY project for you or you don’t have a sewing machine, you can purchase Suzie’s custom collars and bandanas here. Use code TASHMOO15 for a 15% discount!
If you have something that you’d like to DIY for your #TOCFam, please fill out our form here.

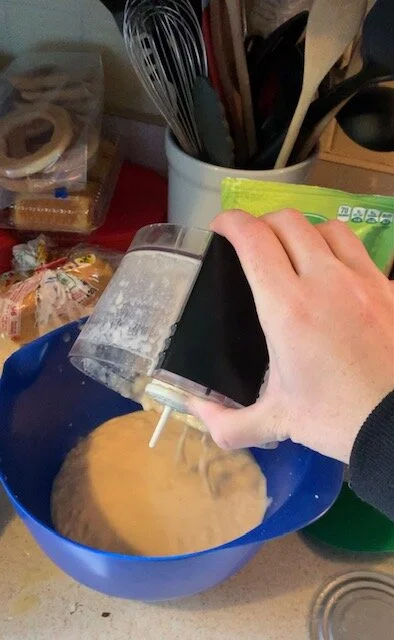
DIY: How to Make Your Dog Homemade Training Treats

Editor’s note: We are very excited to bring you this week’s edition of #TOCDIY brought to you by another amazing member of our #TOCFam, Erica Mello. For the last two years, Erica’s shared her life with her Pitbull mix, Bear, who she says is the most lovable creature, has a personality like no other, and struggles with reactivity. She decided to start making her own treats for Bear “after getting really tired of buying the same overpriced "training treats" from the stores, only for them to not really motivate Bear as much as say - cheese!” Her homemade treats feature ingredients that Bear LOVES and best of all he likes them just as much as that slimy cheese. “It has definitely helped our budgeting but ALSO with our training success” she tells TOC. Keep scrolling to see the steps that you can follow to make Erica and Bear’s treats. [Disclosure: This post may contain affiliate links, meaning TOC may get a commission if you decide to make a purchase through our links, at no cost to you.]
📎 The Supplies That You’ll Need to Make Homemade Dog Training Treats
Tools
Erica, seen above with her Pitbull mix, Bear, tells TOC, “Bear is a dog that just loves to love, he just doesn't always know the right way to do it. He's come SO far within the past year though and it just makes me the happiest watching him thrive more and more in this world!”
Food processor
Blender
Mixing bowl
Mixing tool
Plastic bag
Measuring cups
Sheet tray
Silicon mold (here’s one option I bought on Amazon)*
Ingredients
10oz can of canned chicken
2 eggs
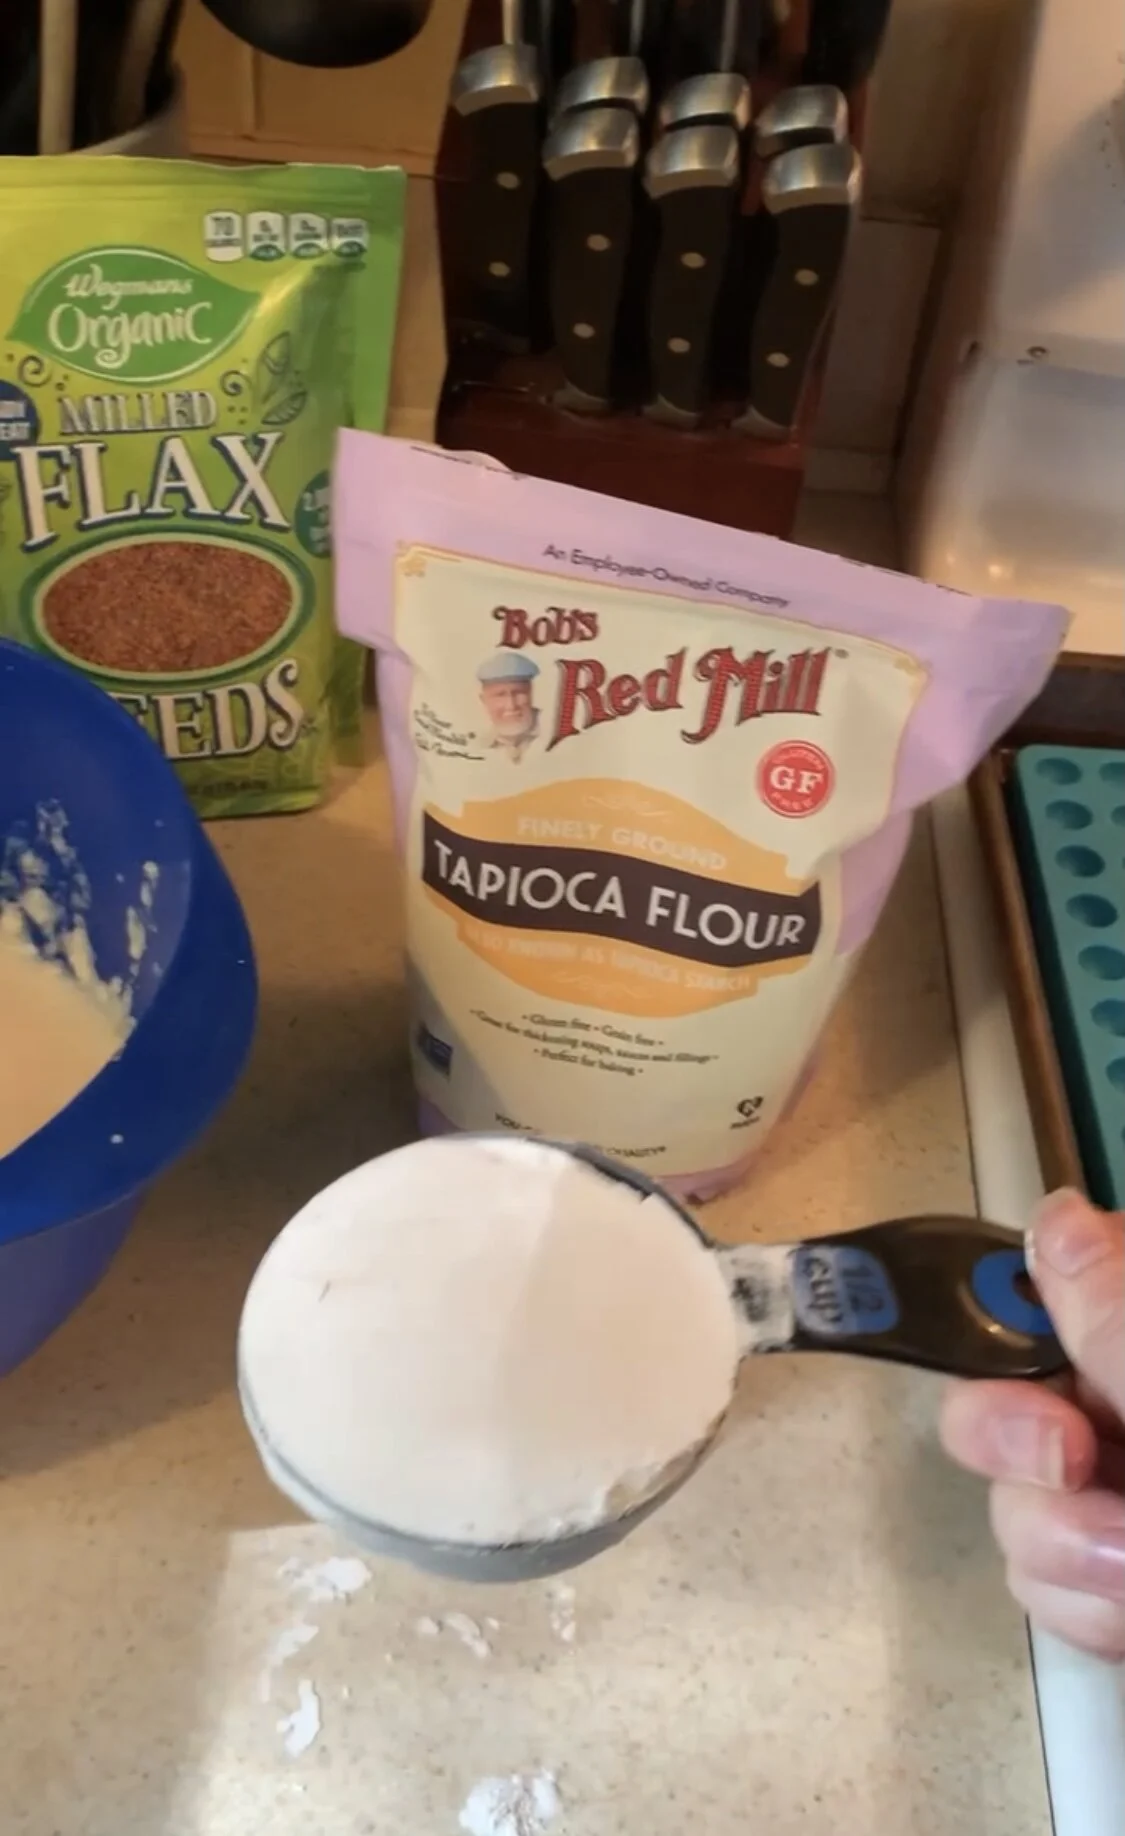
1/2 cup tapioca flour (or similar)
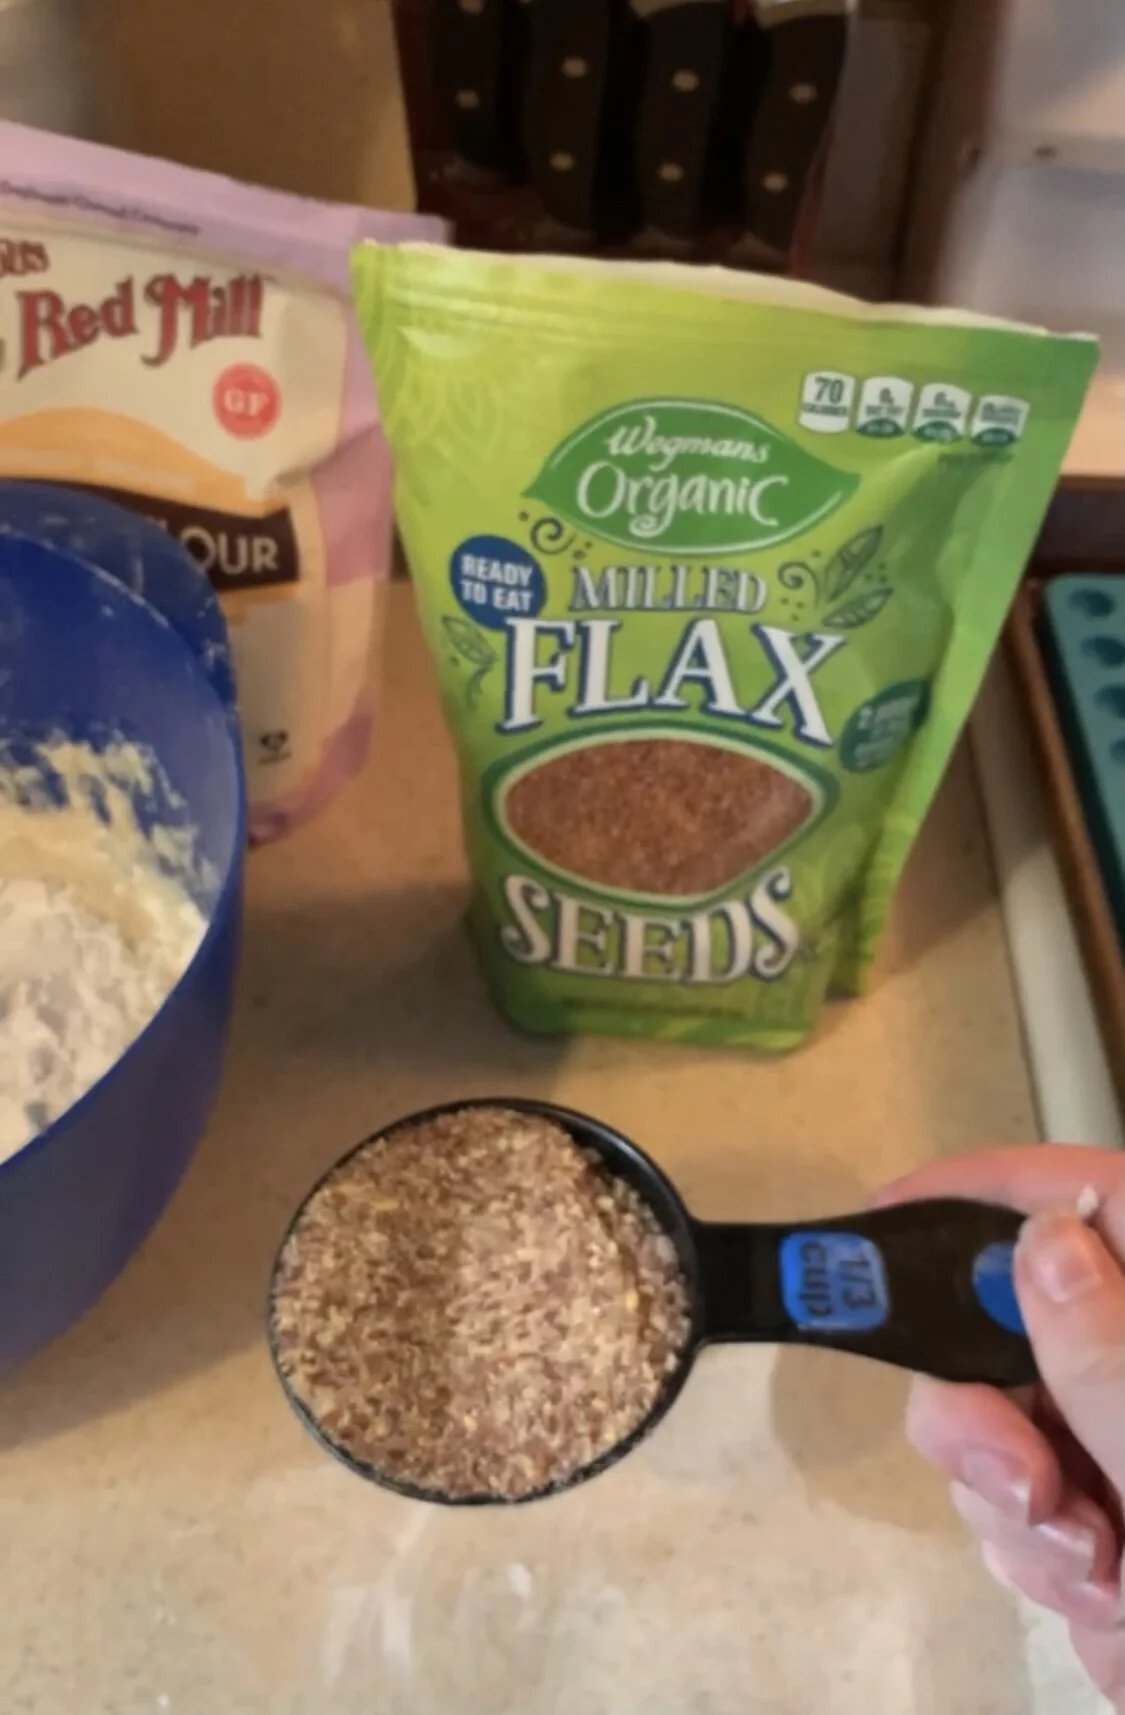
1/3 cup ground flax seed (optional)
Anything else you'd like to add for your pup!
⏰ Time Commitment
With five minutes of prep, and 15 minutes to cook the treats, all in, this DIY project should take around twenty minutes.
⚖️ Skill Level
Easy (as long as you've baked/cooked anything in your life before!).
✅ Step by Step: How to Cook Your Dog Homemade Training Treats
Gather all of the ingredients.

Pre-heat oven to 350 degrees F.
Crack two eggs into your food processor or blender

Add in the 10oz canned chicken (including the water in the can)
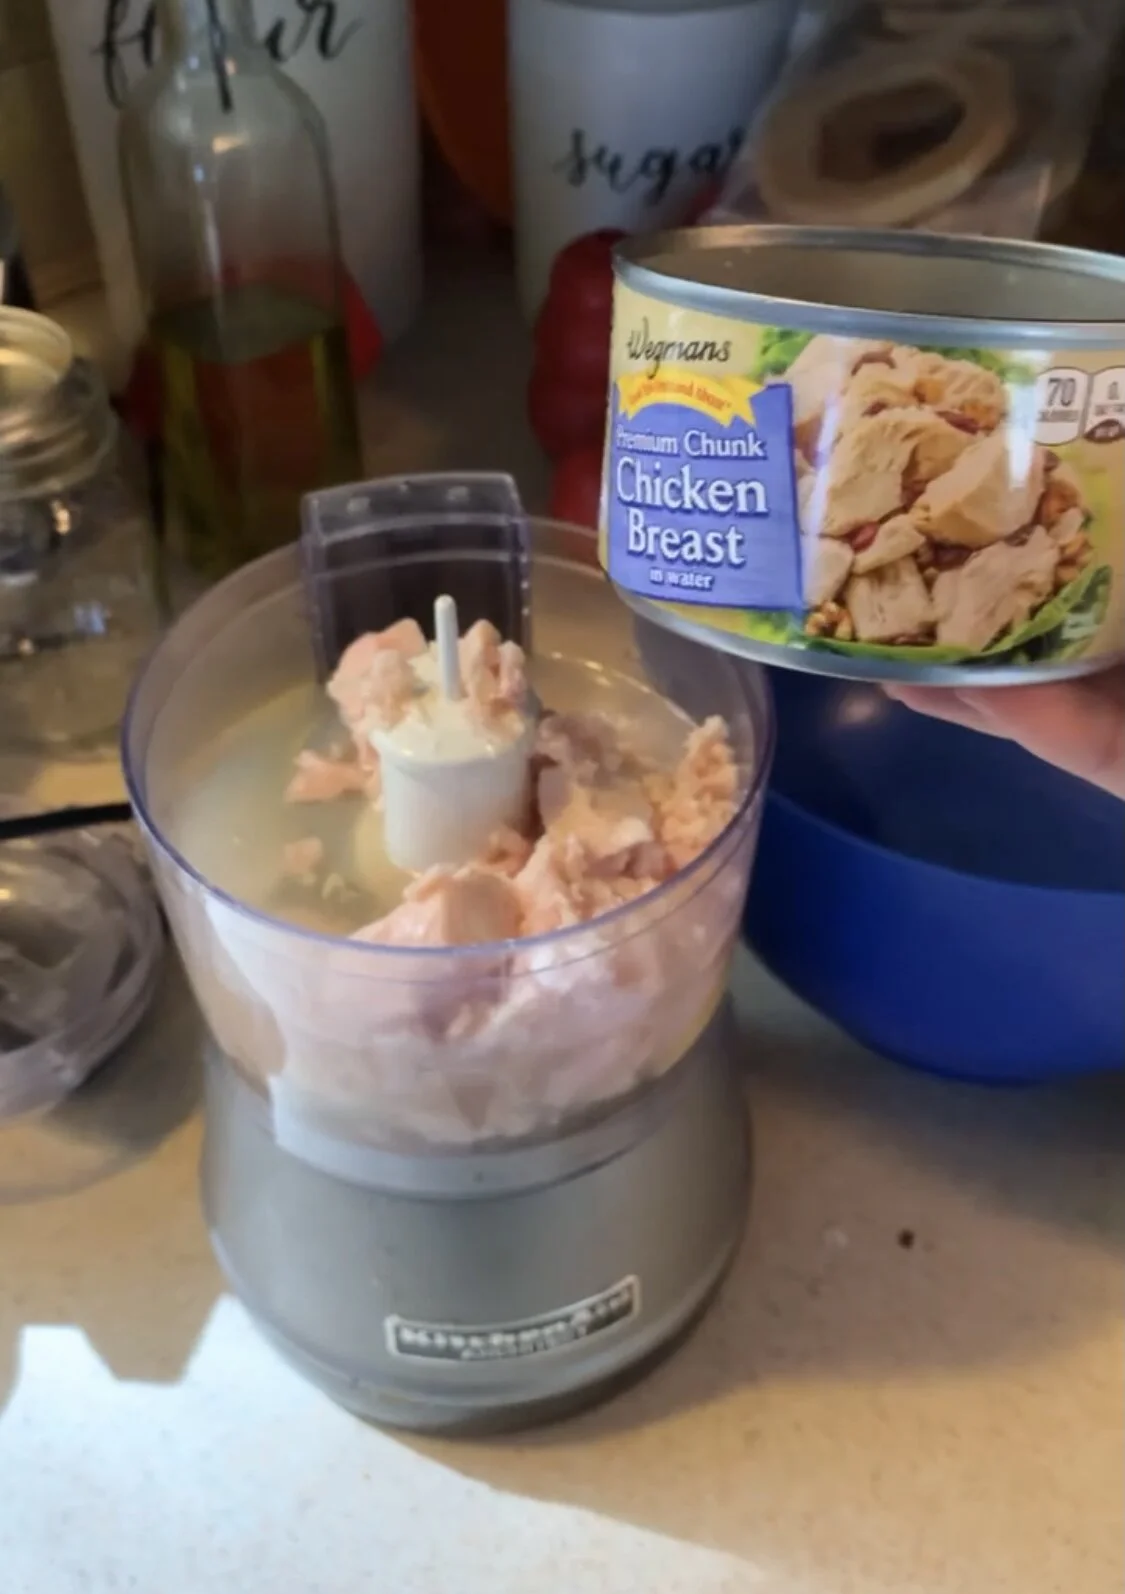
Blend together until smooth
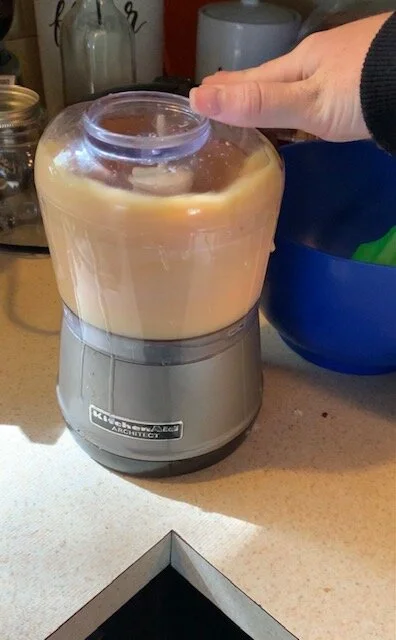
Pour mixture into a mixing bowl
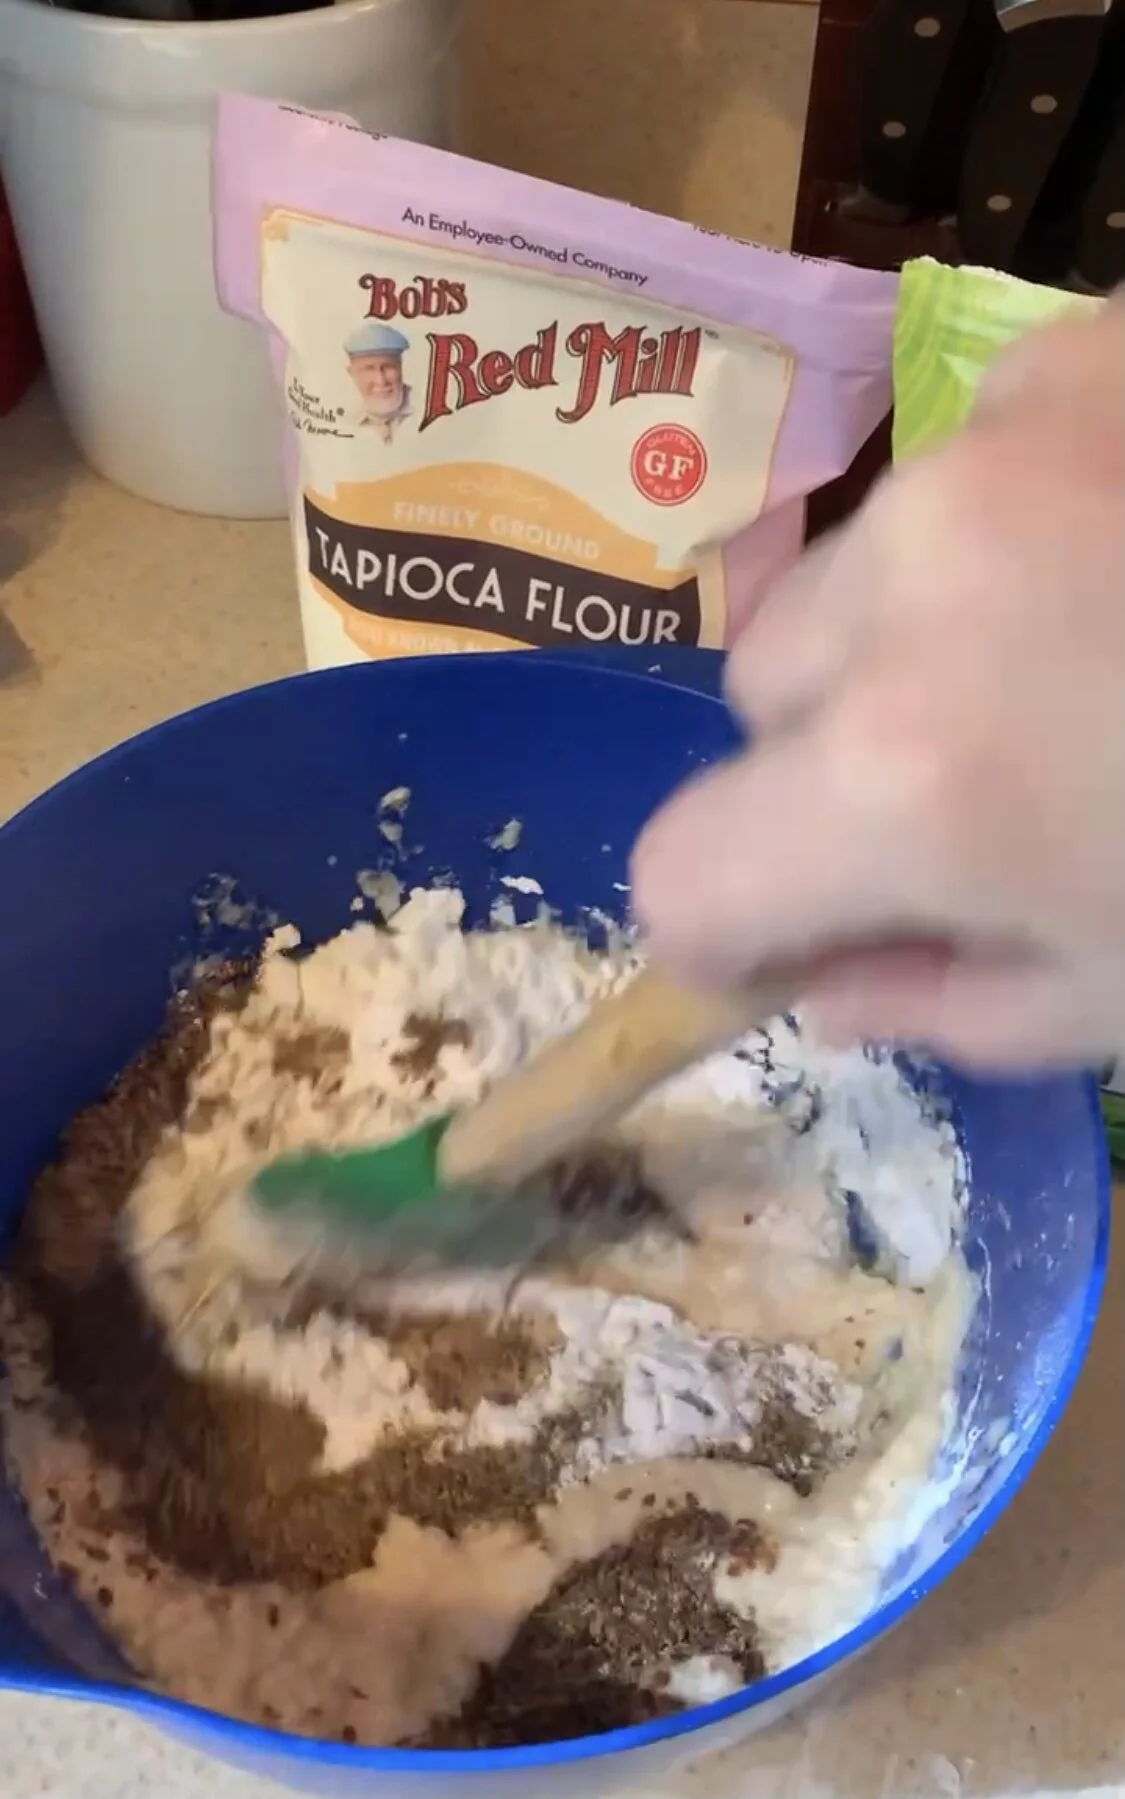
Add the 1/2 cup of tapioca flour to the bowl
Add the 1/3 cup ground flax seed (optional) to the bowl as well
Add any other ingredients like supplements, CBD oil, really anything that your dog likes and is safe for your dog because you can't ruin the recipe
Mix everything together
Assess the consistency of the mix because you want it similar to a pancake batter. It should not be too runny, but thin enough to squeeze out
Add additional flour to thicken or water to thin it out (the type of flour you can use here is flexible! Tapioca flour will help it give some "chew" and stop it from being too crumbly). I usually will use both Tapioca flour and whole wheat flour.
Pour the batter into a plastic bag (or a pastry bag if you have one!)
Cut the tip of the bag to make a small hole to squeeze batter out
Place your silicon mold on a baking sheet
Squeeze the batter into the mold (or you can always just pour it out and just spread it around)

Place the sheet into the oven and bake from 12 to 15 minutes
Your treats will easily fall out of the mold once cooked, so pour them into a bowl to cool down

ENJOY!! Depending on the ingredients you used, take a taste test yourself. What's better than a dog treat that you're comfortable eating!
NOTE: Store in an air-tight container in the fridge! They will last about a week or so... but if you're anything like us, you're always reaching for treats to reward those amazing dogs of ours!
If you have something that you’d like to DIY for your #TOCFam, please fill out our form here.
*[Disclosure: This post may contain affiliate links, meaning TOC may get a commission if you decide to make a purchase through our links, at no cost to you.]

DIY: Make Puzzle Toys for Your Dog Using Recycling
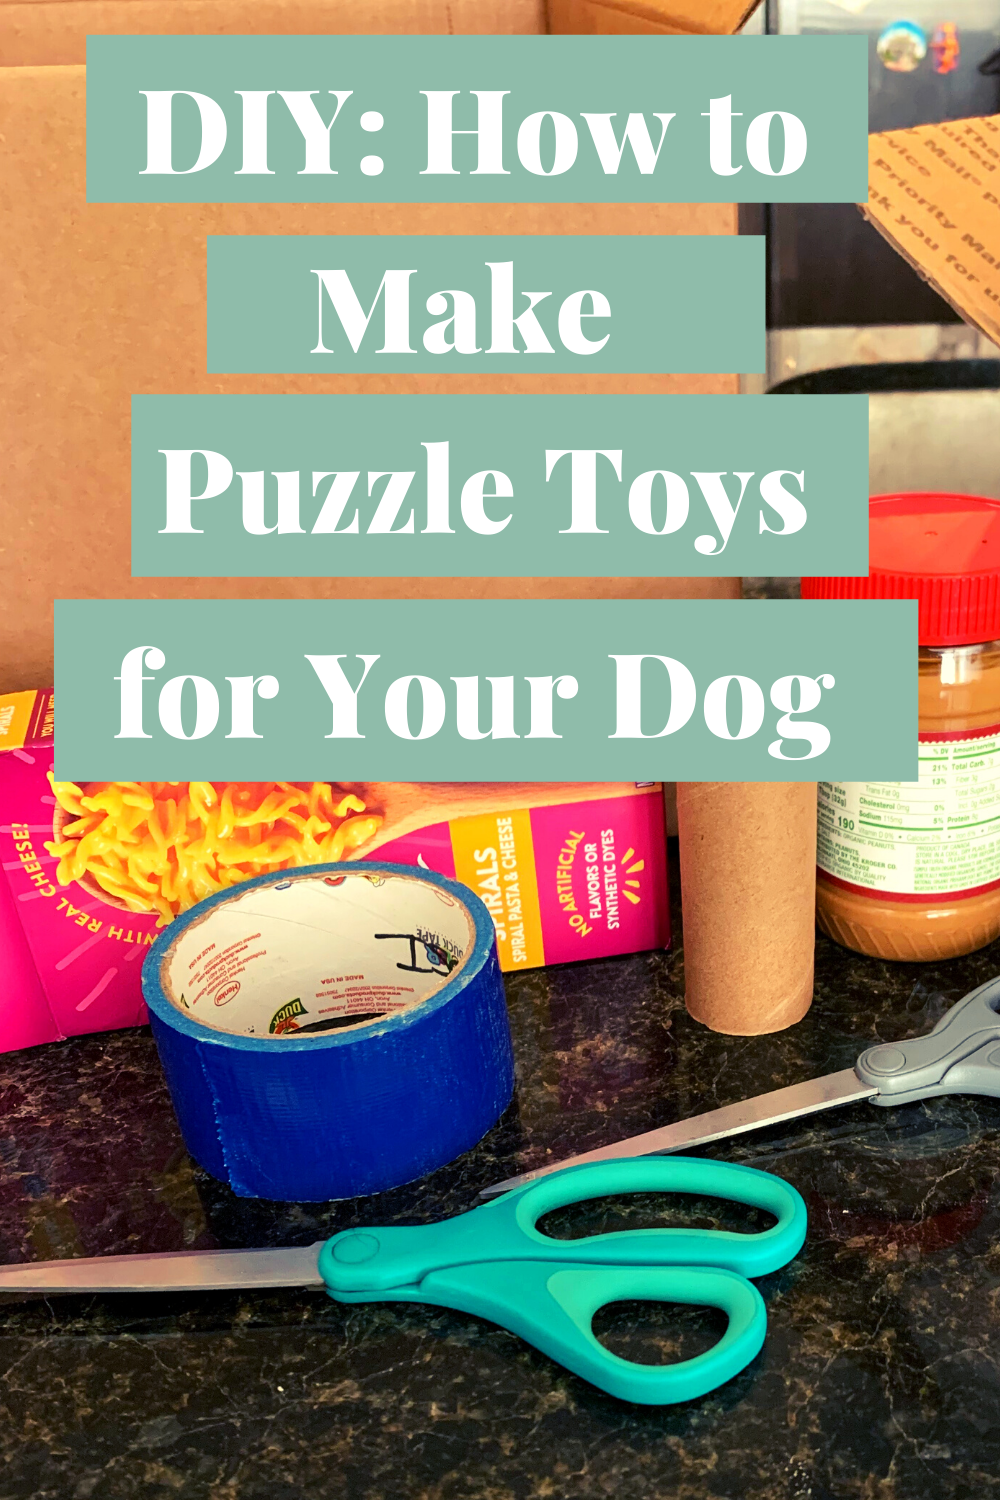
Editor’s Note: This month we posted a poll on Instagram about all things DIY and we were blown away by how many of you make things for your dogs at home. So this week we are trying something new and kicking off our first DIY series, where YOU will teach our #TOCFam how to make cool stuff. Meet Emily Ische, our first DIY-er. After losing her first dog, Gamora, a few months ago, she’s fostered a couple of pups, but is still looking for a new best friend who may also enjoy therapy dog work. Emily tells TOC, “As a kid, I systematically checked out every book on dog training from my elementary school library and would read them in front of my parents to try and convince them to get me a puppy. It never worked.” Her parents did send her to zoo camp though (we are so jealous!) where she made puzzle boxes for wolves. “It was really cool to watch them joyfully destroy the boxes.” Keep scrolling to learn how to make Emily’s puzzle toys for your dog!
📎 The Supplies That You’ll Need to Make the Recycled Puzzle Toys
Emily loves this photo of her with her last dog, Gamora, whom she lost a few months ago.
Cardboard boxes or toilet paper/paper towel rolls
Scissors
Tape
Dog treats
⏰ Time Commitment
All in, this DIY project should take around five to 15 minutes.
⚖️ Skill Level
Easy!
✅ Step by Step: How to Make Your Dog Puzzle Toys
Go through your paper recycling and look for paper rolls or boxes that are the appropriate size for your dog to play with.
For paper rolls, bend the ends in to seal off one side, add treats, and then bend the other end shut.
For small boxes, cut a slit large enough for the treats to come out. Fill the box with treats and tape shut if necessary
If you have numerous boxes, you can hide food/treats in smaller (open) boxes and let them rummage around to forage for food.
Be creative! If you have a dog that likes to destroy boxes you can seal them completely and let them go to town. Just make sure you don't make a box that is too challenging for your dog.
General Warning: Make sure to supervise your dog while they play with these toys as some do enjoy eating cardboard. While small amounts of cardboard typically don't pose a health risk to most dogs, ingesting large amounts of cardboard can cause GI blockage. If your dog seems to enjoy munching on cardboard, this enrichment is probably not for your pup.
If you have something that you’d like to DIY for your #TOCFam, please fill out our form here.

Management: The Fastest Way to Train Your Dog to Stop Jumping, Counter Surfing, and More
While we get so excited when we see people share awesome behavior changes in their dogs, we know that changing behavior can take time. Have you ever noticed that you don’t often see posts of a cute dog behind a baby gate with a caption like this:
“Check it out! I put Fido behind a baby gate with a Kong when my friends came over, and voila, no barking or jumping on them! I am a genius - I solved the problem in under two minutes!”
As a dog community, we seem to spend more time sharing and cheering on behavior modification than we do management. We totally get it - behavior modification has more wow-factor (and can take a lot of work that is very much worth celebrating), but management is kind of the unsung hero of it all. You can’t get the behavior changes without it, and in many cases, you can simply eliminate the need for behavior modification altogether with it. We thought it would be fun to sing management’s praises and invite all of you to do the same (you can tag us on social media). We have teamed up with some amazing professional dog trainers to talk about what management is, why it is awesome, and how they use it in real life (we will be sharing many of their stories on our Instagram and Facebook pages).
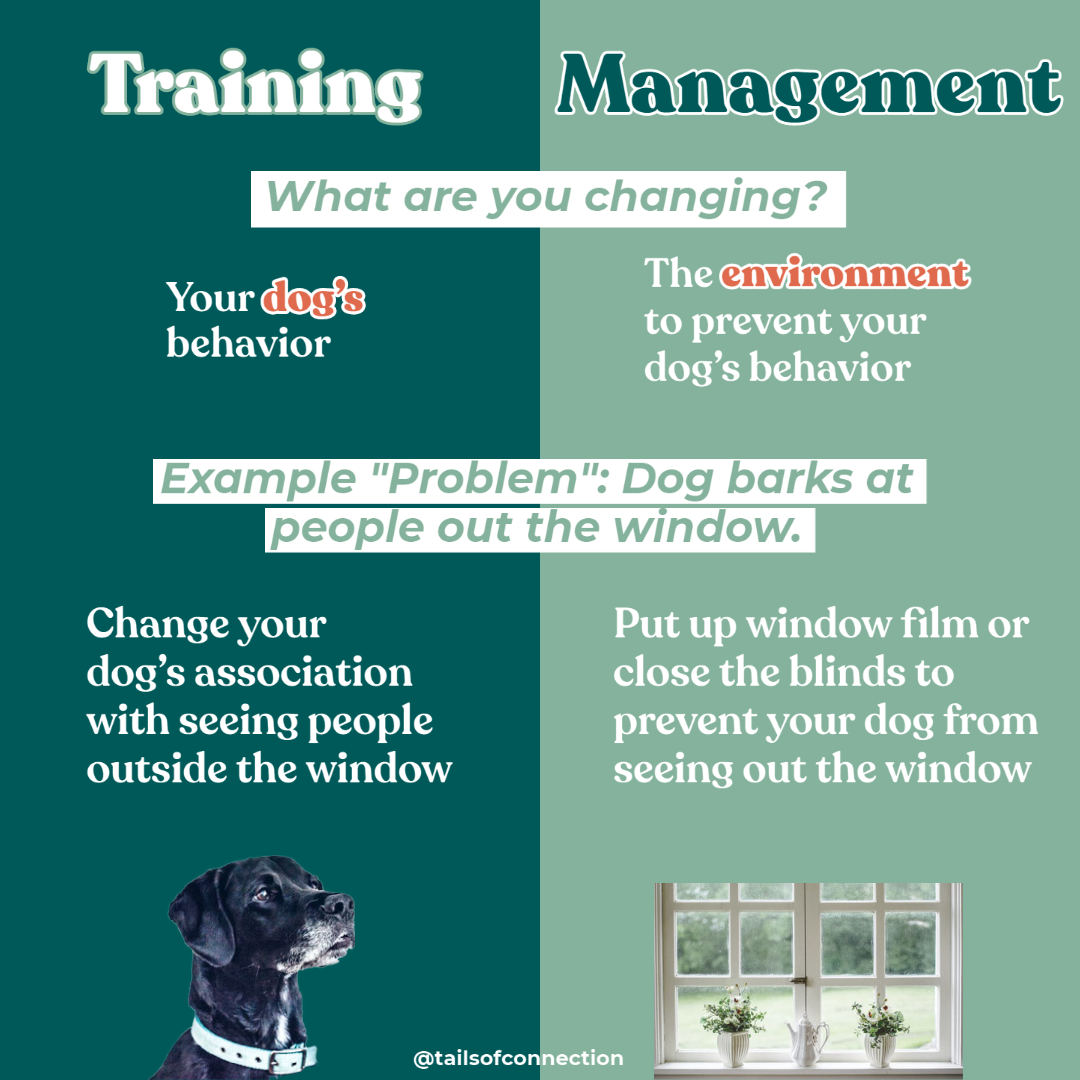
What is management?
Management is changing the environment to decrease the likelihood a behavior occurs. Put simply: you set the environment up to avoid the issue altogether. With “training,” you are working to change or build a behavior (aka the dog is learning something), but with management, you are simply setting up the environment to prevent a specific behavior in the first place. For example, if your dog is afraid of people coming into your yard and barks at them, you can manage this by putting your dog away in a room where they will be calm before people arrive -- in doing this, you simply take away the trigger that causes the problem behavior. Looking at the same scenario, training (behavior modification) would be working to change your dog’s association with people coming into their yard until they aren’t afraid and therefore don’t bark. In real life, management is always a part of training plans, but there are plenty of situations where people simply decide to manage forever (and that is fine!). While management and “training” are different, it can be helpful to practice management scenarios or prep ahead of time, but remember, this practice and prep is not aimed at teaching a different behavior (just preventing one from happening).
When and how should you use management?
You can think about how and when you will use management in two buckets:
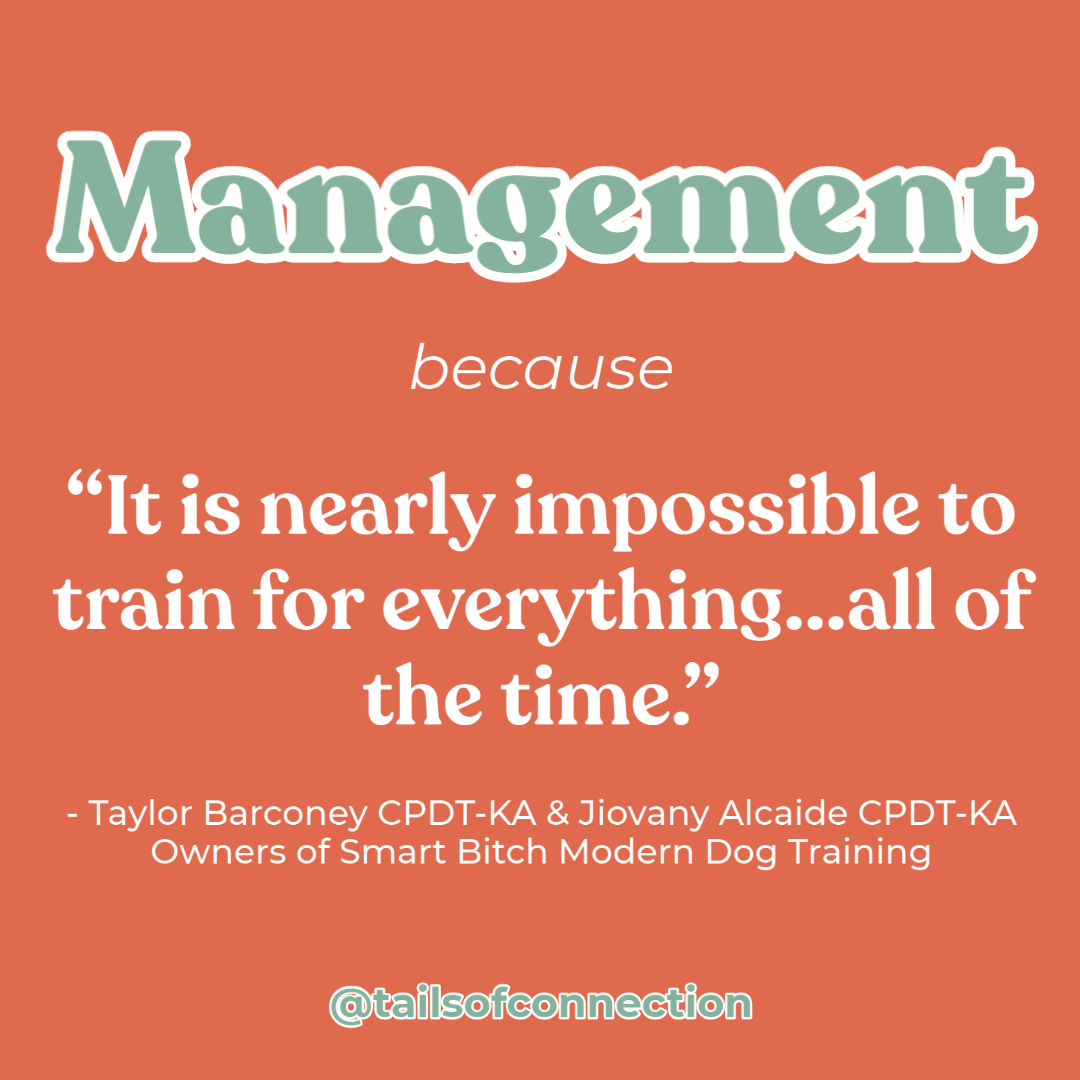
Any good training plan includes management. One of the most important steps to changing unwanted behavior is preventing the rehearsal of the behavior. Every time your dog practices the behavior you're trying to change, progress is being delayed. (As our friends at Smart Bitch Dog Training point out, management can also be incredibly important in making sure all of the training work you did sticks - we don’t need to make life harder for our dogs!).
Sometimes management solves the problem more quickly and easily than training would. Some people simply do not have the time, energy, resources etc. to train away a problem. Management can provide an effective solution that works for everyone (you, your dog, your family, etc.).
There are some important things to remember with management:
Your desire to use management involves some personal preference. Some people manage very strictly. Some people think it is a cop out (note: other people don’t get to define this for you!). You get to decide how much you want to focus on it. We think good management is worth celebrating!
Management can be temporary while you're working on a problem, or it can be permanent if everyone is living happily with it.
Not all management solutions will work for every dog. You need to find what works for your individual dog.
You don’t want management to be stressful or aversive to your dog (then it becomes training, and not good training at that). For example, if you put your dog away in a room when a repair person comes over and they just go nuts barking in there for 30 minutes, that is actually teaching your dog more problem behaviors (because remember, management is preventing the problem behavior to begin with).
If you're removing the opportunity for a behavior that served a purpose for your dog -- like entertainment, exercise, etc. -- make sure they get that need met in another way (e.g. restrict access to furniture to avoid chewing and give appropriate chewing outlets to fill that need).
Keep reading below for ideas about how to incorporate management into your training routine with your dog. You can share how management is a part of your life by tagging @tailsofconnection and using the hashtag #TOCmanagementseries on Instagram and Facebook.
Here are some real-life ways to problem solve using management
Management and training are both great and necessary (and often complementary) options in living with dogs. Management should always be a part of any behavior modification plan, but you don't always have to change behavior if management is doing a good job at preventing it and isn't causing you or your dog stress. It is also important to factor in your dog’s nature when thinking about how to use management in your life with your dog. There are certain things that are part of who that dog is and would be incredibly difficult to train away completely without any risks (for example, many dogs make amazing progress with resource guarding but will always have to be managed to avoid any issues -- and that is normal and okay!). Below, we have listed some common problems people face with dogs along with some potential ways you could manage and/or train the problem. Remember, this is not an exhaustive list; it is simply here to help paint a picture of how to think about both management and behavior modification when faced with a problem.
How do I stop my dog from incessantly barking out the window?
Management (immediate solution):
Close the blinds so your dog cannot see the things that make them bark
Put window film on the windows so your dog cannot see the things that make them bark
Training (longer term solution):
Potential rephrasing of the problem: How do I help my dog feel neutral about the triggers outside the window? How do I teach my dog to run to their bed when they see the mailperson appear?
Ideas:
Desensitize and countercondition triggers outside the window so that your dog is no longer triggered when seeing things outside the window
Work on cue transfer so that certain triggers actually tell your dog to go to bed. They may still let out a little bark, but then they will disengage and go to bed.
How do I stop my dog from counter surfing?
Management (immediate solution):
Block off the kitchen with a gate to prevent your dog from being able to access the counters
Don’t ever leave any food out on the counters or tables.
Training (longer term solution):
Potential rephrasing of the problem: How do I teach my dog to stay out of the kitchen? How do I teach my dog to go to their bed if they find food on the counter?
Ideas:
Teach your dog a “boundary” (aka teach them to stay out of the kitchen)
Put food on the counter on a stimulus control, so your dog defaults to a different behavior (like going to find you or going to their bed) when they find food on the counter.
How do I stop my dog from jumping?
Management (immediate solution):
Put your dog behind a baby gate if you have guests over until they calm down enough to greet the person.
Supervise all greetings closely and coach visitors on what to do.
Training (longer term solution):
Potential rephrasing of the problem: How do I teach my dog to greet people with all paws on the floor?
Ideas:
Train them to greet people with all paws on the floor by practicing controlled setups where you consistently and rapidly reward the dog for paws on the floor. You can start to make your setups more exciting (and therefore more difficult), but remember, you want your dog to succeed.
How do I prevent my dog from running away from me?
Management (immediate solution):
Use long lines to give your dog the ability to move around freely in nature while also keeping them safe.
Training (longer term solution):
Potential rephrasing of the problem: How do I teach my dog to stay relatively near me and check back in automatically? How do I teach my dog to come when called?
Ideas:
Capture offered attention to help build an auto check-in behavior.
Train a solid recall.
How do I get my dog to stop barking at skateboarders?
Management (immediate solution):
Avoid areas where skateboarders are likely to be.
Distract your dog the moment you notice a skateboarder until they are gone.
Have a rehearsed u-turn move you can do with your dog the moment you see one.
Training (longer term solution):
Potential rephrasing of the problem: How do I get my dog to feel calm around skateboarders? How do I get my dog to look at me after seeing a skateboarder?
Ideas:
Work under your dog’s threshold to counter condition your dog to skateboards.
How do I prevent my puppy from going potty inside the house?
Management (immediate solution):
Proactively take your puppy outside to go potty frequently.
Supervise your puppy, so you can scoop them up and take them out if they look like they are searching for a spot to potty inside.
Use crates, pens, and tethers (only use tethers if you are home) if you cannot closely supervise your puppy.
Training (longer term solution):
Potential rephrasing of the problem: How do I teach my dog to go to the bathroom outside?
Ideas:
Create a potty training program for your house where you take the dog out regularly and reward him for going potty.
How do I stop my dog from chewing my shoes?
Management (immediate solution):
Don’t leave shoes in a spot that is accessible to your dog.
Training (longer term solution):
Potential rephrasing of the problem: How do I teach my dog to chew on their own things instead of shoes?
Ideas:
Play a “this or that” game with a toy and shoes. Only reward the dog for choosing the toy.
Teach an implied leave it with shoes.
To learn more management strategies from five professional trainers, check out our @tailsofconnection Instagram account all this week.
PS: Pin this article for later!


Training Tutorial: Learn a More Painless Way to Give Your Dog Eye Drops
Editor’s Note: Not long after I adopted my dog Sully, I had to give her eye drops, and I was nearly in tears. She was so afraid that she was snarling and snapping, and I wished I’d had the time to make the experience more pleasant for her before actually needing to give her eye drops. This week we’re so excited to bring you a special training tutorial focused on desensitizing your dog to eye drops from our friend Lisette Rossman, who lives with her eight month old red and white parti goldendoodle, Lucy, in Washington, DC (she is currently an apprentice trainer under our friend and owner of DogTrained, Gwen Podulka, CPDT-KA). We hope that after watching and reading Lisette’s work, you can partner with your dog to make the whole eye drop process more painless well before they would ever actually need the drops.
✅Step by Step: How to Desensitize Your Dog to Eye Drops
When people get a new dog, have you noticed that cooperative care is rarely at the top of the list of things they are excited to do? It tends to be something they save for later, but there are so many reasons why it is something worth prioritizing! Spending time working on cooperative care can save you and your dog so much heartache and stress if and when your dog needs a medical procedure in the future.
Step One: Work on Consent Behavior With Your Dog
Lucy, Lisette’s Goldendoodle, offers her eye contact at their apartment in Washington, DC.
When Lucy was a puppy, the first thing that we worked on was consent behavior. For Lucy, that meant giving me eye contact, so I knew that she was ready to engage with me. You can go with whatever consent behavior makes sense for you and your dog, but if you want to use eye contact too, simply wait until your dog gives your eye contact and then mark and reward them with a treat. We will turn this behavior into a “start button” in the next step.
Step Two: Introduce Your Hand Coming Toward Their Face Using a Start Button
This first step is simply getting them used to your hand coming toward their face. Wait for your dog to look at you (this is the “start button” your dog will use to tell you they are ready) and then start moving your hand in your dog’s directions and mark and reward them (go nice and slowly here if you need to). If at any time your dog looks away or gets up and leaves, let them do that because that means that they 1) aren’t ready to engage; 2) it is too much for them; or 3) they just want a break. (Pssst...You can toss a treat when they opt out too!). Here is the order: Your dog looks at you → you present your hand (possibly move it toward their face) → mark and treat. You should also give them some treats for not looking at you to make sure they know they have a choice.

In step two, after Lucy looks at Lisette, Lisette shows her hands and then gives Lucy a treat.
Step Three: Work On Getting Your dog Comfortable with General Face Handling
In step three, Lucy rests her head on Lisette’s hand as a way to tell her that she is ready for more face handling. Then Lisette begins touching her face and rewarding her.
As soon as they are comfortable with your hand coming toward their face, move onto actually touching their face. For Lucy, the main areas that I worked on were her muzzle, her eyes and then the top of her head. You can still use eye contact as a start button behavior. If your dog has a chin rest, that can be an awesome constant behavior or start button for face handling. Either way, wait for consent and then touch your dog’s face gently, mark, and feed. Note: Lucy is used to this but your dog might not immediately put their head in your hand. This takes time.
Step Four: Select and Present the Eyedropper Tool to Your Dog
Next, find the object that you are going to work with. When Lucy was a puppy, I used a close-capped pen because that is what I had around, but you could also use a cotton ball or any object that you think would be helpful for this exercise. Because Lucy did get conjunctivitis, I do have an empty eye-dropper bottle here, which I will use, but again choose whatever object you want to for this exercise. You want to do some basic classical conditioning to create a positive association with the object, so present the object and then give them a treat. Ultimately, your dog should have a positive or neutral response to the presented object as it is part of their normal routine (we don’t want this bottle to turn into something crazy exciting).
In step four, Lisette shows Lucy the eye dropper and then gives her a treat to create a positive and calm association with the object.
💡Tip: One thing to note is that when I was working with Lucy as a puppy, we worked really hard to capture calmness. Whenever you are doing a medical procedure, calmness is really important. For example, if Lucy was super excited to see this eye-dropper bottle and was moving everywhere, that would ultimately make it really hard for me to put in her eye drops. So calmness, in conjunction with having a positive association with whatever object you are using, is crucial.
Step Five: Work on Moving the Eyedropper Object Toward Your Dog’s Face
Once your dog is comfortable with seeing the object, work on moving it towards their face. Move it a couple of inches and give them a treat. Again, Lucy is used to this, but look for your dog to give you eye contact to let you know that they are still comfortable with what you are doing (you could also use a chin rest as you consent behavior, which will give you a very clear indication of how your dog is doing). The order you want here is: your dog offers you consent/start button behavior → you move the object toward your dog’s face → mark and give your dog a treat. Remember, if they pick their head up or look away, stop (and still give a treat because opting out is a fine choice and actually makes it more likely for them to opt in).
Step Six: Simulate Using the Eyedropper Object on Your Dog

In step six, Lisette’s hard work with Lucy culminates with her simulating administering an eye drop to prepare Lucy for the future.
Once they are comfortable with the object coming toward them, work on simulating putting in the eye drops. In the beginning, when Lucy was a puppy, her consent behavior was giving me eye contact. As she got older, we transitioned that consent behavior to a chin rest. If your dog doesn’t have that behavior yet, it is fine (you can stick with eye contact/looking at you). Simply wait for the start button, begin your simulation, and then give your dog a treat. When you are simulating eye drops, it is really important that you work on both eyes. You don’t want your dog to just get comfortable with doing their left eye for example, and then be funky about their right. I made sure when Lucy was little that we did both sides to prepare her for what I would need to do in the future.
To follow Lucy’s adventures with Lisette, click here.
PS: Pin this article for later!


Training Tutorial: How to Teach Your Dog to Orbit Around Your Body
Editor’s Note: This week we’re so excited to bring you a special training tutorial from our friend Emily Anderson, who has been training professionally for seven years. She lives with her two dogs Ripley (a Border Collie and Terrier mix) and Nova (a cattle dog and hound mix).
✅Step by Step: How to Teach Your Dog the Orbit Trick
Orbit is a fun, impressive looking trick where your dog rotates around, or “orbits,” your body, while walking backwards. It requires a lot of patience from you, as well as some really good rear end awareness from your dog. This trick is great to build into your next freestyle training routine if that is your thing!
Step One: Make sure your dog has good rear end awareness, which is critical for mastering this trick.
There are a couple of activities that you can do to build more rear end awareness:
Work on getting your dog to move backwards (try teaching them to back up and target something behind them).
Work on getting them to pivot - aka taking steps in a circle (try having them pivot while standing on top of a food bowl or a book).
Focusing on building solid rear end awareness is going to benefit your dog in so many ways and will ultimately play a big role in how easily you can teach this trick to your dog!
Step Two: With food in both of your hands, work to lure your dog backwards around your body in a circle (reward multiples times along the way).
To start, focus heavily on luring your dog with food through the motions. You’ll want to start to introduce your dog to the feeling of walking backwards around your body and maintaining a somewhat tight circle in the process. To do this:
Start with a treat in both hands. A medium value treat is probably best, but you know your dog! Just make sure it’s interesting enough to follow for a lure, but not so exciting that your dog gets frustrated.
Line your dog up on the side of your body where you’d like them to begin the orbit (I start on my left side).
With the treat at their nose, you’re going to bring your hand from their nose back towards their outside ear (so the treat would travel from their nose to their left ear, in this case).
Make sure they are following the treat lure, and as you move your hand toward their ear and out away from your hip, they should be stepping backwards.
The number of times you reward is really going to be dependent on your dog’s comfort with walking backwards; but, you want to make sure your rate of reinforcement is high to help them understand what you’re looking for and reduce any confusion or frustration! I would recommend rewarding your dog as they line up at your side and take their first step backwards, behind your body, and on your opposite side.
Always try to finish the orbit back on the original side where you started. Don’t forget to use your marker when they get there (I use a YES instead of a click from a clicker because of the treat luring) and give your dog a treat.
Keep working on this, so your dog builds confidence and becomes more fluid following the lures around your body.
As your dog begins to gain confidence with this step, add your verbal cue before you begin luring (I say “orbit”). Some people may prefer to use a hand cue rather than a verbal cue.
You can begin adding in multiple rotations and incorporating some speed (still using lures). When you add in multiple rotations, still reward at each necessary step! I like to use a “good!” or “go!” to encourage my dog to continue doing what they’re doing, and a “yes!” on the final rotation.
As I work on adding rotations, I also look for my dog to begin to take independent steps. While still keeping treats in both of my hands, I start to move the lure away from their nose and see if they can follow the lure from more of a distance.
💡 Tip: Starting with some type of barrier behind you or beside you (like a wall or a chair) can help with creating a tighter circle if your dog is backing away.
Step Three: Once your dog can confidently orbit around your body following treat lures in both of your hands, move to using only one lure to get them to complete the rotation.
Begin by getting your dog to start orbiting around you using a treat lure.
When your dog gets behind your back, instead of switching to a treat lure in your other hand, just use your hand (with no food) as a lure to get your dog back around to where they started.
When your dog is ready, try to get them to complete two or three orbits around your body. You can use a continuation marker like good or simply some praise along the way, but when they complete the two or three orbits, use your final marker followed by a treat to let them know they are done (I use “yes!”).
Our goal here is the same as above - look for independent steps where you don’t need to lure as heavily. As you add rotations, remember not to push your dog too quickly!
Step Four: The final step - no need to use treats!
When I fade away from using a treat lure, I still lure with my hands pretty heavily. You may even need to go back to using both hands to complete the rotation here. That is totally okay!
Go back to rewarding on your side after a single rotation, really building your dog’s confidence and understanding.
And then repeat the steps above, but with no treats!
Again, I like to use verbal praise or “good” and then “yes!” and reward when they complete the final orbit and have returned to the starting side.
As they gain that understanding, start to make your hand luring less obvious and work towards using a verbal cue only (trainer preference!).
🔧 How to Troubleshoot Teaching Your Dog to Orbit
This can be a difficult trick, and can take time! It took my dog, Nova, two years, on and off, for it to really click and I have still not completely faded her from one treat lure. You may need to bounce back and forth from two treats, to one, to hand luring, back to two treats, especially as you increase the difficulty here! Don’t rush your dog - and most importantly, have fun!
To learn more about Emily (who is launching her own professional training business soon) and her life with Ripley and Nova, follow her on instagram here.

What to Do for a Dog With Separation Anxiety
In this video you’ll see a time-lapse of Logan Buie, a dog trainer from Raleigh, N.C., working with her dog, JJ, in a real life separation anxiety training session.
Editor’s Note: We were so blown away by your responses to Logan Buie’s piece on our site “Dogs and Coronavirus: Will My Dog Get Separation Anxiety After the Quarantine,” that we decided to sit down with her for a follow up. As a dog trainer from Raleigh, N.C, Logan graciously offered a realistic plan for you to help your dog tackle separation anxiety. Even if you may have thought it wouldn’t be possible, she tells us in her guide below (keep scrolling) that there is definitely hope.
If you are like me and have a dog with separation anxiety (SA), being able to run an errand without your dog panicking is a big deal. The good news is that over time you can help your dog with SA feel calm when left alone by using a process called desensitization, where you gradually expose your dog to the scary stimulus (in this case, your absence), so that it ultimately becomes boring to her. Desensitization is the most effective method for training dogs with separation anxiety to be left alone because the process actually changes your dog’s emotional response to your departure. The key to this process (which we’ll breakdown for you) is to keep your dog below threshold, which means that you’ll practice leaving your dog for small increments in special training sessions and return before she starts showing signs of of stress like lip licking, pacing, panting, scratching, salivating, and digging.
My Guide for Separation Anxiety Training Sessions that You Can Do at Home
Through a series of structured SA training sessions, your dog is going to learn that it is no big deal when you leave. The time it will take for your dog to feel this way varies widely depending on the dog, but if you do this work, SA dogs have a great prognosis. In order to get started with the actual separation anxiety training sessions, you’ll need to pick a location to leave your dog where 1) your dog feels comfortable while you’re home; 2) you think your dog will be safe; and 3) you limit your dog’s exposure to avoidable departure cues (more below). For my SA training sessions with my dog JJ, I train in my bedroom. Once you’ve picked your location, you’re ready to begin!
1. Figure out your dog’s baseline.
In order to know where to start with your SA training, you’ll want to get a baseline for how long your dog can be left alone without getting stressed. To determine this, set up a doggy camera (if you have two people in your home you could even leave one person’s phone pointed at your dog, FaceTime that phone, and then leave the house). As soon as you see even the slightest sign of stress (for some dogs this is as small as just staring really intently at the door, so pay attention!) come back inside. Take note of the exact number of minutes/seconds that you were out before your dog got stressed. Don’t panic if this number is zero seconds or very tiny; some dogs may even panic before you leave the room. If this is the case, you may not even get a baseline number since you’ll be able to tell that your dog is panicking before you get out the door. In this situation, you’ll want to work on door desensitization (more on this below) so that the door is no longer scary.
2. Create a training plan for your session.
You will want to have a plan for each training session that maps out how many departure reps you plan to do and how long each rep will be. For your first SA training session, you will use your baseline to help you build that plan. We will explain what you should write out ahead of time in step five below.
3. If possible, eliminate or desensitize your dog to departure cues that could stress him out during your training sessions.
Logan, seen above with JJ, says some dogs who have never shown symptoms of separation anxiety can develop it after a big life change like moving or a large shift in routine, like self-quarantining.
Departure cues are any of the little things that we do before we leave the house (think picking up the keys, putting your shoes on, taking a shower, packing your bag, brushing your teeth, changing your clothes, turning on the radio/TV, etc). My recommendation is that you eliminate as many of these avoidable departure cues from your training sessions as possible to make your practice more manageable. For example, I leave JJ in our bedroom so that she doesn’t see me getting my keys or putting shoes on. If I have to change clothes, I try to do that at least an hour before I train, or I throw my clothes downstairs and change out of sight.
However, some cues are unavoidable, like closing the baby gate, turning the car on, and setting up the doggy cam for training. If you can’t remove a cue and that cue stresses your dog out, you will need to desensitize her to the cue before you begin training. For example, your dog might become anxious at the sight of the camera being set up. You’ll have to use the camera to train, so do a training session where you practice setting the camera up a few dozen times without leaving the room. Once your dog becomes bored and uninterested in the camera, move onto leaving after setting the camera up. Or as another example, if your dog gets stressed before you’ve even left the room, work on door desensitization before you try leaving. This just means opening and closing the door several times until your dog is no longer bothered. Then try opening the door, stepping out, closing the door, and immediately returning. You may need to go through this process with the front door as well as an internal door if you are leaving your dog in your bedroom or another room with a door.
While treats are commonly used in other types of desensitization work, you don’t need to use treats for these SA desensitization sessions; we don’t necessarily want our dogs getting excited when they see you opening the door, we just want them to be calm (I want to see a dog who is uninterested, so I just watch my dog’s response as I open and close the door). The process for desensitizing to other departure cues is the same. It’s a bit tedious, which is why I like to only desensitize to those cues that we absolutely must incorporate into the training sessions.
4. Put your dog in the room, prep the space, and make sure you have everything you need for your session.

Here’s a quick checklist to run through before you start your training session.
About ten minutes before my SA training sessions, I head up to my bedroom with JJ to get ready. To get the room ready for training, I make the bed, shut the bathroom door, close the baby gate, turn white noise on, and close the blinds. The actions you take will depend on your own room and your dog’s preferences. All these little preparatory steps will also eventually turn into cues that tell your dog that you are doing separation training and that all of your departures will be safe and not scary. If your dog begins to show anxiety toward any of these actions, you will need to desensitize your dog to the cue through the process above. This could also be a sign that your training has become too stressful, and that you should take a step back. More on this later.
I also make sure I have my camera set up (so I can observe JJ during each departure), along with a stopwatch to track how long I have been gone, my training plan that lists out my reps and durations (more to come!), and a notebook or laptop to take notes on each departure.
5. Once everything is set up, you can start executing your training plan.
Your training session is basically a series of repetitions which consists of you leaving your dog and returning to your dog before she gets stressed.
A typical SA training session has three main phases: warm up, goal duration, and cool down. Whether you do a warm up and/or cool down and how many reps you do depends entirely on your dog. It will definitely require some trial and error and paying attention to how your dog responds.
The Warm Up (2 - 7 reps):
Warm up reps are much shorter than our goal duration rep and should feel a bit random (your duration should fluctuate up and down randomly to prevent your dog from thinking that each rep is going to be longer than the one before it). The warm up has two main purposes. The first is to add many short, easy repetitions to the “bucket” of positive experiences that your dog has with your departures. The second is that the warm up reps serve as a cue for your dog that tells her that we are doing the strange thing where we just come in and go out again and there is nothing to worry about.
Goal Duration (1 rep):
The goal duration rep for a single session is the longest duration that we will leave our dogs for. We will only do one of these reps per session. Your starting goal duration should be a few seconds shorter than your baseline number. For example, if my dog’s baseline was 45 seconds, I would want my goal duration rep for my first session to be 35 seconds. Remember: we want to end training reps and sessions before our dogs get stressed, not right as they are getting stressed.
Cool Down (1 - 2 reps):
If you find it helpful for your dog, you could add one to two short departures after your target duration rep so that the session doesn’t always end with the hardest repetition.

Pictured Above: A sample Separation Anxiety Training Plan for a single session with your dog.
When I do separation anxiety training, it basically looks like several repetitions of this:
I leave the room, telling JJ “be right back!”, and shutting the door behind me.
I walk down the stairs, exit the front door, and stand on the front steps for the duration of the rep in the plan that I am working on. While I stand on the porch, I watch JJ closely on the camera.
After the duration of that rep is up (e.g. seven seconds, 35 seconds, three minutes), I open the front door, walk back upstairs, and enter the room JJ is in.
When I enter the room, I have a habit of giving JJ two gentle ear scratches if she is laying on the floor by the baby gate. If she’s lying far away from the gate, I don’t bother greeting her, since it sometimes makes her too excited. (Note: You don’t need to totally ignore your dog, but don’t give them the zoomies, either! The exact greeting you do will depend on your own dog).
Then I sit down and enter my notes from that repetition in my spreadsheet and check my duration for the next departure. After about 30 seconds to 45 seconds (or however long it takes JJ to settle back down) of sitting at my desk, I stand up and leave again for my next departure rep.
Repeat this for all the reps in the training plan!
After the session is over, I take a look at how JJ did that day and then I construct my training plan for the next session (either later that day or the next day).
As a note, I don’t recommend that you use treats, chews, or food puzzles when initially doing this work. For many dogs, the food only serves as a bit of a distraction, and then the dog resumes being anxious about your absence once the food is gone. My own dog, JJ, would eat the contents of a frozen food toy then scratch at the door and scream until we came home. So my goal with training is to get her to relax when we leave without the presence of a food toy. Once you’ve reached a good duration of a few hours, you can try adding food toys back into your departures if you want.
6. What if something doesn’t go right during my training session (aka my dog looks frustrated or my neighbor interrupts us)?

When I wait outside during a departure rep, I watch JJ on my phone and keep an eye on the time on my watch.
Your plan is simply that: a plan. Don’t panic if you have to adjust or stop your session altogether. The most important thing here is to be prepared to respond if your dog becomes stressed. I’m not necessarily talking about your dog having a full blown panic attack here; I’m referring more to the small signs that the duration is too long. For JJ, this means small vocalizations like grumbles, excessive yawning, pawing even just once at the baby gate, staring too hard at the baby gate, or tucking her ears back against her head. When I see these things, I immediately come back into the house and return to the room where I left JJ. If my dog is too amped up when I come back into the room, I see if I can wait a few minutes for her to calm down before trying another (shorter) repetition. If she’s still stressed out when I try to leave the room again after a few minutes, then that’s a sign that I should end the session and try again tomorrow. I would most definitely make tomorrow’s session easier (i.e. the target duration and warm up reps will be shorter durations).
If something in your external world interrupts your training (like a neighbor showing up), just end your session. If your dog also struggles with reactivity like my dog, you have to be extra careful about not doing SA training when their triggers appear (for JJ, I have to stop an SA session if the lawn crew arrives).
7. How often should I do SA training sessions?
I wouldn’t do more than two training sessions per day, five days a week. If your SA sessions are over 15 minutes in length, I recommend only doing one session per day instead of two. Our dogs need breaks - and we do too!
I usually aim for one session per day, four to five times per week.
8. How do I know when to increase duration for the next training session?
If your dog is super chilled out and bored-looking during training (relaxed eyes, neutral ears, maybe laying down, etc.), then you can progress to the next step. Don’t jump in duration too quickly though! When you are under a few minutes, your goal duration increases from one session to the next should be only 10-30 second increments. Once you start acing longer durations (several minutes) then you can start jumping by a minute or so. Once you reach about thirty minutes or so, you can try increasing the goal duration by about five minutes, and so on. I know this seems like such small steps, but progress will be faster if we go slow and respect our dogs’ pace.
9. How do I track our progress?
During an SA training session, when I return after a departure rep, I sit down at my desk to enter my notes on that rep into my spreadsheet. Then I look at how long my next departure should be. After about 30 to 45 seconds (or however long it takes JJ to settle back down) of sitting at my desk, I stand up and leave again.
I am a spreadsheet geek, so I suggest that you use a basic spreadsheet where you can plot your progress. At the very least, I would have one that tracks: date, time, and the longest duration achieved for that session (this would be your goal duration, unless your dog only achieves a portion of that time). I also like to track how many reps I do in each session (usually 6-7 for us) and the total length of that session, from start to finish. Then you can plot your duration versus your date for a nice plot of your progress! Check out this sample spreadsheet I created!
10. Reminder: Start where you are. It is okay if you can’t even make it out of the house.
We all have to move at our dog’s pace. If you have to shut an internal (i.e. bedroom, office) door before you shut your front door, you may want to get a few minutes of duration with just the internal door before you move onto leaving the front door. Lots of people think,“will this be helpful if I’m not even leaving the house?” The answer is yes! It’s a great confidence builder for both you and your dog. Plus, some dogs can’t handle you making it all the way to the front door yet. Baby steps!
11. Something is better than nothing.
And sometimes, even with our best intentions, our time just slips away and we don’t have enough hours in the day to sneak in a full SA training session. This is an opportunity to do something easy for both you and your dog; how about two minutes of door desensitization?! Or maybe you do three warm up reps but no goal duration rep. There’s no harm in a few minutes of super, super easy practice!
12. Management
The scariest part of separation anxiety training for most people is the fact that you can’t leave your dog over threshold. This means that if I’m working on leaving my dog for three minutes during our practice sessions, I can’t leave her for an hour to go to the store. Yes, really. I know. This is scary and hard. But you’ll never make the progress you need to while you’re still leaving your dog to panic. This is because every time we do departure training, we are essentially telling our dog, “Hey, you can trust me. I’ll be back soon, and I’ll be back before you need to panic.” If we add in departures where our dogs go over threshold and panic, how can they trust that those training departures are safe?
So if you are going to commit to separation anxiety training, you have to make a promise to your dog that you will always do your best to never leave them over threshold. This means ordering groceries online for delivery and getting a sitter for date nights. This means taking your dog to daycare during the day instead of leaving them at home alone while you work. Some people have even found college kids or retired folks in their neighborhood to watch their dog a few days a week. You might have to get creative with your support system -- you’ll need one. It requires a lot of management and a lot of scheduling to make sure that you’re never leaving your dog to panic alone. But I promise that it’s worth it. Management in real life gives your training the space it needs to actually work.
13. Finding a qualified trainer
I highly recommend finding a certified separation anxiety trainer (CSAT) if you can swing it. I recommend CSATs in particular because they undergo an intensive training program that focuses on treating separation anxiety using the methods that I’ve discussed here. I also recommend working with SA Pro Trainers™. They have to complete an in depth-course and are assessed by CSAT Julie Naismith before they are granted the SA Pro Trainer™ certificate.
If you have a positive reinforcement trainer that you’d like to work with, I suggest asking them how they address separation anxiety cases. You’ll want someone who uses systematic desensitization to departures (everything I’ve talked about here!) and never trains with aversive tools like a bark collar. I have found that the hardest aspects of separation anxiety training are reading body language (our dogs can be subtle!) and staying motivated. A CSAT or an SA Pro Trainer™ are a second pair of eyes to make sure your dog isn’t stressed, and they can help you stay on track!
There are also a few programs that are self-guided (and more affordable) to help you get started with training on your own. The ones I know about are Mission Possible, Home Alone: Treating Separation Anxiety, and Subthreshold Training.
I also recommend Julie Naismith’s book, “Be Right Back.” It’s a great starting place for owners who have dogs with separation anxiety. She provides some sample training plans, as well!
You can follow Logan’s work and her adventures with her dog, JJ, on Instagram.
PS: Pin this article for later!
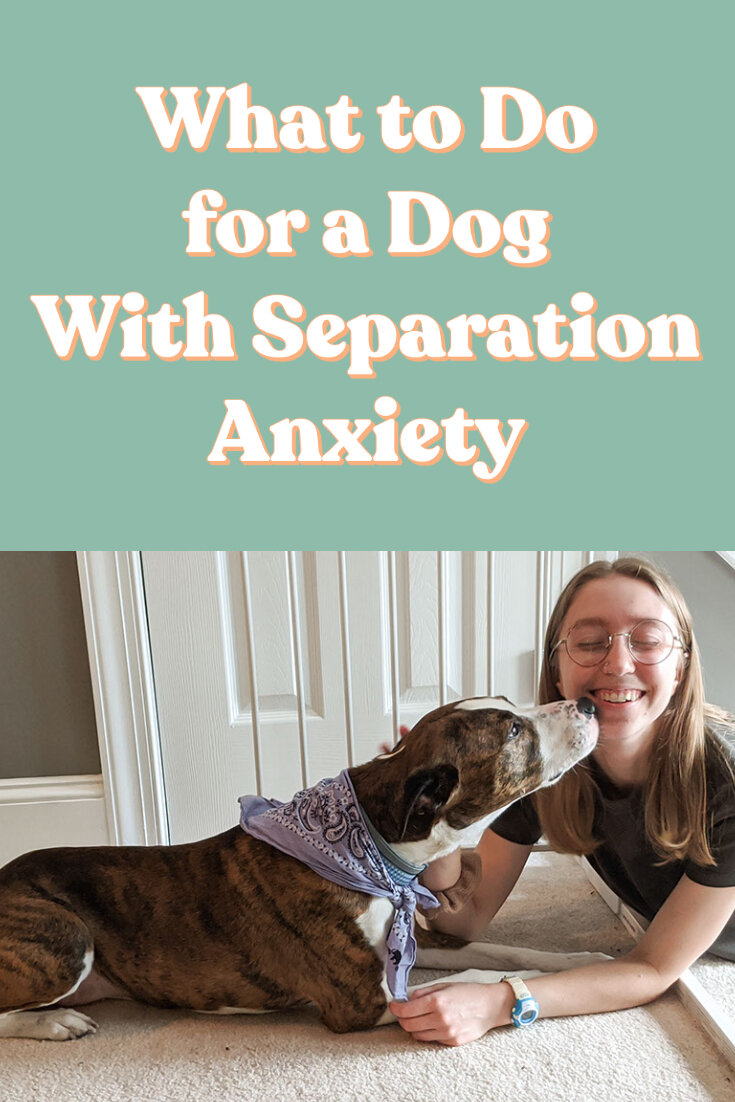
The Kindness I Learned From My Dog Otis
“You should be able to handle this. You are weak.” This is the song that plays a lot on the radio inside my head. It plays at a nice low volume -- almost imperceptible, but I feel its reverberations throughout my entire body. I feel it in the tightness in my chest that makes breathing difficult. I feel it in the giant lump in my throat that keeps me from speaking. Without thinking, my system starts shoving the fear and shame down, as it's been doing for a lifetime, and I carry on with my day, mistaking my persistence for bravery.
I walk my then seven month old dog, Otis, and I get beet red as he starts barking at a young child on a scooter fifteen yards away. This is not a playful bark. It’s a back-the-fluff-up bark, and I decide I have had it: “This is not acceptable, I have to fix him.” I am not sure I recognize it then, but I know now it is another hit song on that same radio station inside my head. I begin walking down a metaphorical road of trying to shove my dog into the “good dog box,” where only easy, happy, obedient dogs can fit.
After some time, I look over at Otis to find a dog who looks flat from all of my metaphorical shoving. There is less life. Less joy. But that damn fear is still there. It just looks a little different. I realize that what I am doing doesn’t feel loving at all.
I decide in that moment that I am going to help Otis from a place of love. I have no idea what that actually looks like though. So I start to learn.
How Partnering with Otis Changed Our Relationship

Otis (seen here with the author, Christie Catan) is an 80-pound Sheepadoodle, which is a cross between an Old English Sheepdog and a Poodle.
First, I listen and accept. Instead of telling Otis that he shouldn’t be afraid, I ask him what he is afraid of. And when he tells me, I show him that I really hear him by walking to the other side of the street where we can watch scooters pass from a safe distance. I tell him that he is allowed to have feelings and needs and promise him that it is safe to tell me about them. I look at who he is, and I learn to love every part of him. Even the parts that drive me nuts. Because they are just the shadowy sides of the things that make him so beautiful to me.
Second, I “hold his hand” and tell him we are in this together. We take baby steps, and I listen to him carefully so I don’t push him too hard. We sit in the grass, and he eats chicken while we watch scooters pass by from a safe distance. I am a bit bored, but I smile because the whole experience feels like love. I realize I can honor his feelings while also helping him. And I learn that sitting beside him and helping him feels a lot different than fixing him.
Third, I add things into his life that fill up his cup. I pay attention and learn what sort of things he enjoys and what sort of things calm him. I very intentionally start adding those things into his life and feel incredibly grateful to be able to give him this gift. I notice that he starts to communicate more and more as he learns that I will at least always listen (even if I can’t always give him exactly what he wants).
How Training Otis Helped Me Find Acceptance in Myself

As I sit here at my desk with a now three-and-a-half year old Otis at my feet, I start to feel that old classic hit song reverberating in my body again. I decide I don’t like this song very much, and almost as though by muscle memory, I change the station. This action is new for me, and yet somehow, it feels familiar.
The song on the new station goes something like this: “I know you are afraid to feel what you are feeling, but I promise it is safe. We can handle it together.”
Looking at these past few years working with Otis, I realize it was never just about training my dog. In the many many hours I spent training him, I strengthened some really important muscle groups: acceptance, compassion, humility, grace, and love. The more I use those muscles in my relationship with my dog, the better I get at recruiting those same muscles for my relationship with myself.
I am very slowly learning how to accept and honor some of my own fears and feelings. It turns out that what I have wanted all along is what I give to my dog: someone to listen and accept me and what I am feeling, someone to sit with me and help me when I am ready, and someone to enjoy life with. It turns out that I am capable of being that someone for myself - I have had lots of practice. Just ask Otis. I am his favorite someone.
You can follow Christie’s adventures with Otis on Instagram here.

Why Teaching Your Dog to ‘Read the Room’ Can Help Simplify Your Life
Imagine if you could get your dog to read the inside and outside world and make smart decisions that make both of your lives easier? It’s definitely possible and we’re going to break down how to do this. In the how-to video above you’ll see me teach Otis to lie down (without any human instructions) when I open the dishwasher. If you keep scrolling down below we have even more quick and fun examples from our friend and professional trainer, Juliana Willems. Once you learn this concept, you can apply it in so many ways to prevent or solve problems or even just create a more harmonious life with your dog.
How to Be the Translator that Helps Your Dog Read the Room
For more on cue transferring, check out this IG live we did with Juliana on April 20.
Do you remember what it was like to start a new job? Imagine that it’s your first week at a new company, and when you show up to your first morning meeting, your boss Johnny walks in. Sarah, your peer who has been at the company for several years, turns to you and says, “Close your laptop.” Sarah translated what Johnny entering the room indicated, so that you would know how to behave (she knows from her years of experience working for him that Johnny’s pet peeve is when his employees are distracted and looking at their computers during meetings). Now, when Johnny walks into your morning meetings, you automatically close your laptop without Sarah having to translate for you. From a behavioral perspective, Johnny walking into the meeting became an environmental cue for you to close your laptop.
If we want our dogs to behave in certain ways around environmental cues, we will have to channel your hypothetical colleague Sarah and translate for our dogs until their new learned behaviors become automatic. In dog trainer speak, we are doing something called a “cue transfer.”
How a Simple Acronym Will Help You Be an Effective Translator for Your Dog
OOO. SMART. SHIT Sandwich. Don’t you just cringe at all of those weird corporate acronyms that people love to throw around at work?! Well we figured we’d keep the party going here and give you one for this context! LOL!!

In this graphic, I break down NOB with the example of teaching my dog, Otis, to lie down when I open the dishwasher.
Here is the acronym you need to remember when you serve as a translator for your dog (a.k.a. when you want to transfer a cue): NOB
New Cue - This is the new environmental cue that your dog doesn’t really know yet. In our office example, the new cue was Johnny walking into the morning meeting.
Old Cue - This is a cue that your dog already knows. In our office example, the old cue was Sarah saying “close your laptop.”
Behavior - This is the behavior your dog does based on the cue you give him. In our office example, the behavior was closing your laptop.
This order matters, which is why we’ve given you the NOB acronym to remember the sequence!
Here are some basic steps for your NOB (a.k.a. cue transfer) training sessions:
Make sure you clearly define your desired behavior and what specific thing in the environment you want to serve as the cue. (Hot tip: “Not barking” is not a specific behavior. Focus on the behavior you want rather than on the one you don’t want.)
Present your dog with the new cue (the environmental cue).
Wait a second and then present your dog with the old cue (the cue they already know).
When they offer the behavior you want, reward them.
Repeat.
Then pause for a longer period of time after presenting the new cue to see if your dog will automatically offer the behavior without you having to give the old cue. If they don’t, no problem - just present the old cue.
Reward when they offer the behavior.
Repeat these steps until your dog automatically and consistently offers the behavior when presented with the new cue.
Three Amazing Examples of How Dogs Learned to Read the Room
When Opening the Back Door Becomes a Cue to Go to Bed
Open your back door.
About one second later, say “go to bed” (Note: This must be a known cue for your dog).
Reward your dog when he gets into the bed.
Reset (release or do a reset toss) and repeat.
When you think your dog is ready, open the back door and wait a bit longer silently to see if your dog will go to his bed on his own. If he does not, simply say your old cue “go to bed.”
Either way, reward your dog when he gets in bed.
Repeat until your dog consistently and automatically goes to bed when you open the back door (without you having to say “go to bed.”)
When Opening the Dishwasher Becomes a Cue to “Go to Your Crate”
Open the dishwasher door.
About one second later, say “crate” (Note: This must be a known cue for your dog.).
Reward your dog when he gets into his crate.
Reset (release your dog or do a reset toss by tossing a treat away) and repeat.
When you think your dog is ready, open the dishwasher door and silently wait a bit longer silently to see if your dog will go to his crate on his own. If he does not, simply say your old cue “crate.”
Either way, reward your dog when he gets into the crate.
Repeat until your dog consistently and automatically goes into the crate when you open the dishwasher door (without you having to say “crate.”)
When Ringing the Doorbell Becomes a Cue to Come Sit in Front of You
Ring the doorbell.
About one second later, say “come.”
Reward your dog when he comes to sit in front of you.
Reset (toss a treat away) and repeat steps one through four.
When you think your dog is ready, ring the doorbell and wait silently for a bit longer to see if your dog will come and sit in front of you on his own. If he does not, simply say your old cue “come.”
Either way, reward your dog when he sits in front of you.
Repeat until your dog consistently and automatically comes and sits in front of you when he hears the doorbell (without you having to say “come.”)
Why Reading the Room is the Gateway to Problem Solving with Your Dog
If you hate nagging your dog then you’ll love cue transferring. Eventually you’ll be able to remove yourself from the equation and let the environment tell your dog what to do. This concept can be used in so many situations! Here are just a few of the ways we’ve seen it used to help:
Reduce problematic barking
Reduce the risk of a dog running out of an open door
Stop annoying behaviors like sock stealing or getting onto an open dishwasher
Teach your dog to automatically look at you when he sees a [insert cue...dog, person, squirrel, deer, car, etc.]
Teach your dog to automatically sit and wait before crossing the street
So What Happens in Real Life When We’re Outside of Our Training Sessions?
Most of our dogs will encounter "new environmental cues" outside of training sessions before we have fully completed our work as their translators. In some cases, you may even have an environmental cue that you find difficult to replicate in a training session. So what do you do then? You have two options:
1. Try to get the ideal behavior as quickly as possible after your dog perceives the "new cue." Let's use a real life example from my own experience working with my dog, Sully. She is completely fine with our vacuum cleaner, but she cannot stand the one that the caretaker uses to vacuum our apartment building hallways every single day (that hallway vacuum is a completely separate environmental cue for her). At first, when she heard the hallway vacuum, she would go nuts barking at the door. I decided I wanted that scenario to tell Sully to run to her bed instead of barking at the door, so I had to translate the environment for her. While I never knew exactly when the vacuum would show up, I could predict it was generally in the afternoon. I made sure to have some very high value treats that I could grab in a moment’s notice. The second Sully noticed the vacuum, I would cue her to go to her bed. At first, I often had to stick a smelly treat in front of her nose and lure her away from the door and to her bed, where I made treats rain from the sky for as long as that vacuum was in our hallway. Over time, I no longer had to lure her away from the door when she heard the vacuum. Instead, I could redirect her pretty easily with a verbal cue asking her to go to her bed (aka the "old cue"). And eventually, I no longer needed to lift a finger. Now when Sully hears the vacuum she will walk away from the door and to her bed and I don’t have to say anything! (Side note: Because the hallway vacuum only appears once a day and it is a real life situation that involved some reactivity, my progress was much slower initially than it would have been if I was able to do actual training sessions on a more neutral cue. But it still worked!)
2. Manage the situation by keeping your dog from being able to practice the behavior you don't like around the new cue. Let's use my same hallway vacuum example from above. Some days I had important calls in the afternoon that I couldn't easily step away from to work with Sully if the vacuum appeared. On those days, I would put Sully into the bedroom (farther away from the hallway) and play a little white noise or music to reduce the chance that she would actually hear the vacuum. I wasn't making progress with her by doing this, but I also wasn't allowing the situation to get any worse.
We can’t wait to see you start to translate the environment for your dog and help him read the room. Be sure to tag @tailsofconneciton on Facebook and Instagram.
A big thank you to Juliana for chatting with us about this fun topic! If you want to learn more about Juliana, you can visit her website.
PS: Pin this post for later!

How Can I Get My Dog to Stop Barking During a Zoom Conference Call?
“Can the person with the barking dog please go on mute?” These days what used to make for a funny story over drinks with friends, has become a near constant headache for many dog parents who simply can’t figure out how to get their dogs to stop barking during their marathon of Zoom meetings. For help we sat down with Gwen Podulka, a certified professional dog trainer - knowledge assessed (CPDT-KA), who recently joined us for a special Instagram Live devoted to all things reactivity. During the Live she told us in passing that reducing barking during Zoom meetings is the number one topic on her clients’ minds these days, so we knew we just had to follow up with this special Q&A.
Let’s start from the beginning, Gwen, because barking is actually really fascinating. Why do dogs bark in general?
Because they can! It is totally normal for dogs to bark and not all barking is bad. Barking is also an amazing form of communication. If you take it away and tell them never to do it, you have to be incredible at reading dog body language, and typically humans are not great at that. If our goal is a quiet conference call, we have to first understand what kind of barking our dog is practicing before we come up with a plan to help.
I like to break down barking into nine different categories. In training, we try our best to stick to describing behavior rather than interpreting for our dogs, but for the sake of simplicity, I am going to insert a bit of human thinking here to make it easier for people to get the basic gist. Here’s what our dogs are trying to tell us:

So why do dogs bark during Zoom conference calls?
This is a loaded question, and there isn’t one simple answer. I do think it is an important question for people to think about with their own dogs because it helps them to understand what is driving that barking behavior if they want to teach a different one. For the purposes of this article, let’s talk about some of the factors that could be at play.
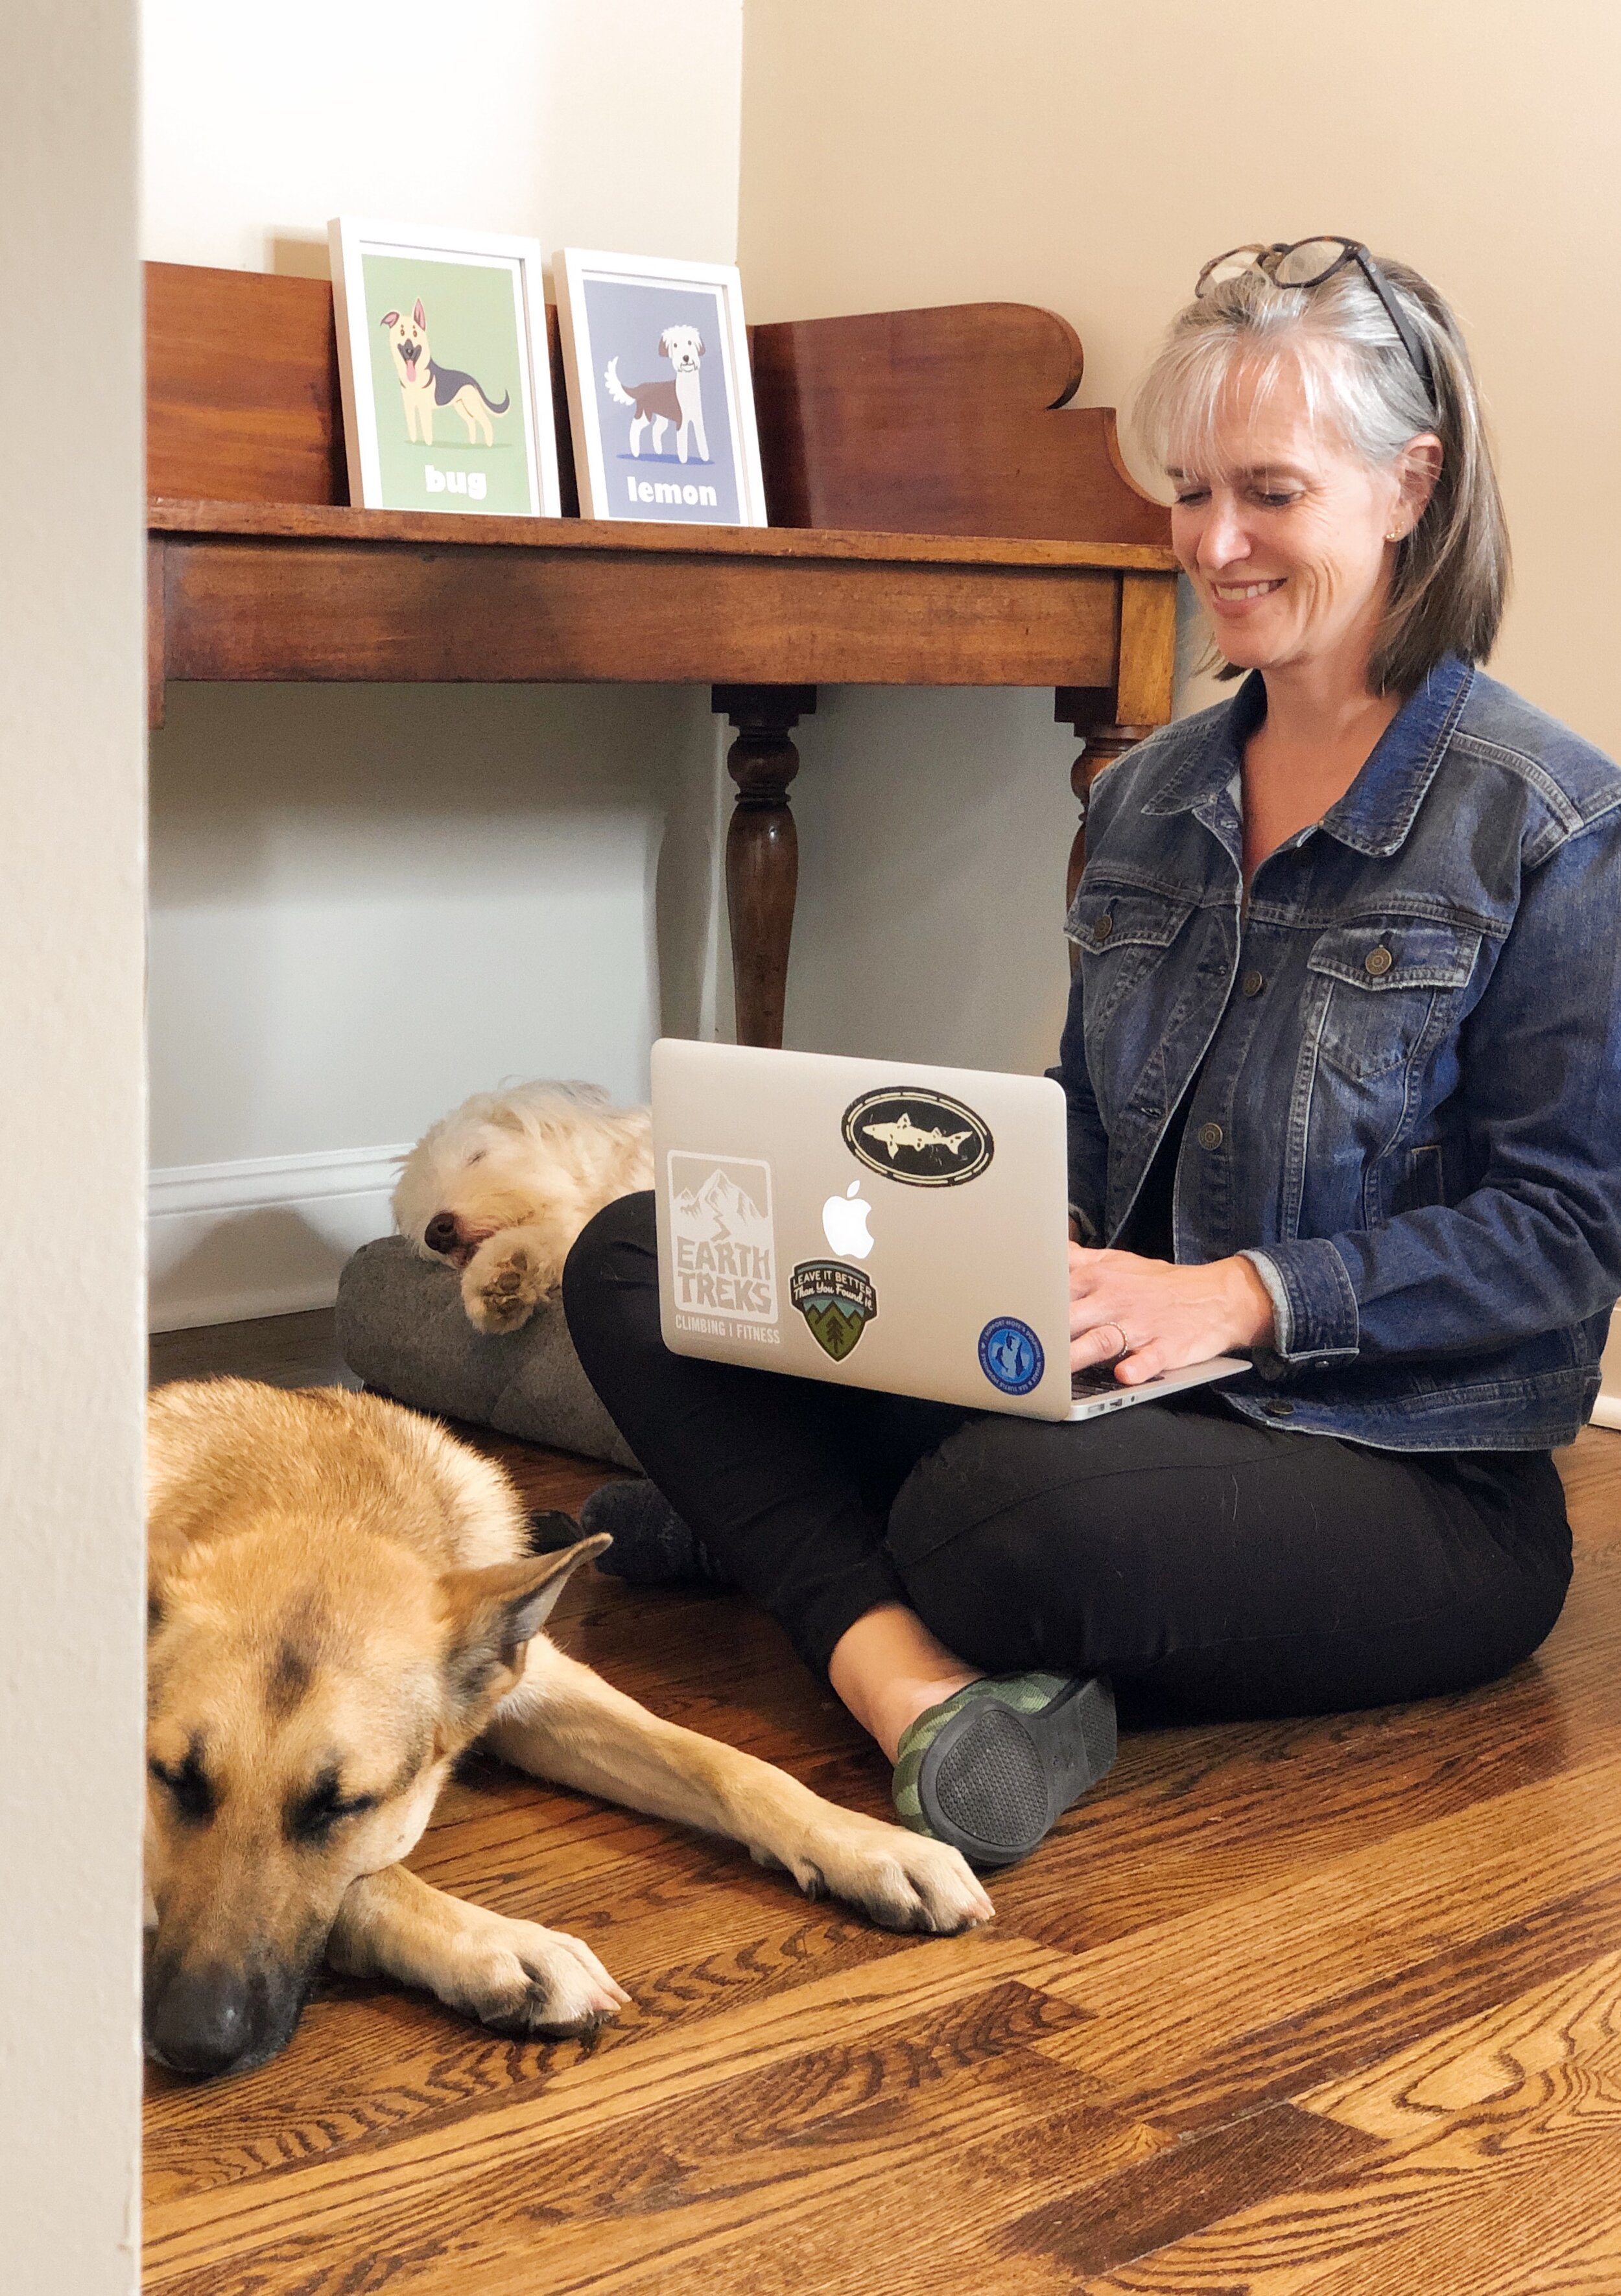
Gwen, seen here with her dogs, Lemon and Bug, has over 20 years of experience as a certified professional dog trainer.
Your dog may be excited or frustrated and want your attention. In video conference calls, we tend to be fairly engaged. Your dog might be responding to your tone and energy on the call and could be getting excited or frustrated that you are engaging with a silly screen instead of them. Your dog may have initially made more subtle plays for your attention that went unnoticed and now is amping up to barking. And if you think about it, when your dog barks while you are on an important call, it tends to immediately get your attention as you attempt to prevent a giant racket. Barking quickly increases as soon as your dog realizes he has the power to shift your attention from the screen in front of you.
Your dog may be noticing and reacting to things on the video conference call. If you are on speaker, your dog may hear another dog bark on the call and start responding to that. Your dog may even be responding to the tones of other voices on the call. Some dogs even pay attention to what they are seeing on the screen, and that could lead to barking.
Your dog may be reacting to triggers totally separate from the call. Some dogs are very sensitive to noise and motion outside of your windows and doors and will bark when they see or hear things. This type of barking may have been happening long before today, but it is only becoming something you notice as an issue now that you are home all day.
Your dog may be sensitive to your complete change in routine. The world likely feels quite different to your dog -- both inside and outside of your home. If you’ve never been home 24/7 like this, you’ve never really engaged with the world in this way in front of your dog, so it is a completely new “picture” for him that he is trying to sort out. Depending on how your routine has changed, your dog may also be feeling a bit uneasy or may not have the same mental, physical, and social outlets that he used to have.
So how can I get my dog to stop barking while I am on my video conference calls?
Like most everything that we work on with our dogs, we want to think about both training and management. Training is where you will proactively teach the behavior you want, but since that can take some time and we are realists here, you also need some management tactics to help you get through your calls in the interim.
What should I do in the moment if my dog starts barking during a call and I haven’t had the opportunity to train around this scenario? If possible, mute yourself and then quickly and calmly find a way to redirect your dog to something that is not barking (for example, you could give them a chew or pull them up into your lap to love on them). You could also put your dog in his crate or in a separate room as long as that is not something that will increase the level of barking when it comes to your dog. If your dog has a strong “go to mat’ behavior that is associated with calm, you could also cue that. You are human and doing the best you can in this bizarre new situation, so just pick the least aversive option to manage your dog’s behavior in that moment and keep yourself sane.
Now think of this call as a test that you and your dog took. Your dog barked a whole lot, so you failed. But that is totally okay! This is the kind of test you get to take again. You now get to use what you learned from this failed test to prepare for your next test (aka your next call).
But If I give my dog attention or a chew to manage his barking during a meeting like this will this behavior from me reward his barking? Probably. But in the moment, you just need to get through your important call, and that is okay. However, let’s clarify one thing: If the barking is fear-based reactivity, giving your dog attention or a chew will not “reward your dog for barking” (that is a false premise since fear is an emotion, not a behavior, and therefore cannot be reinforced).
What kind of training can I do to prevent my dog from barking during my calls?
Training is your chance to be proactive and really teach your dog the behavior you want from them when you are on these calls. Let’s talk about just a few of the things we can do to try to create more peaceful calls.
Train during pretend Zoom calls. Have you ever done a training session while you are on a Zoom call? If not, that “picture,” meaning what your dog sees and experiences while you are on a call, feels new to him, and dogs are not good at generalizing behaviors. You can try to replicate the picture of a Zoom call in a training session and teach your dog the behavior you want. This may mean going into the room where you work, turning on the computer, putting down your coffee, and starting to talk and gesture at the computer screen while you reward your dog for the desired behavior. You may want your dog to lie down calmly on a mat while you are on calls, so practice that. Start talking to your computer and drop treats on your dog's mat pretty frequently as long as he is calm. As you practice more, you won’t need to give as many treats. Then when it comes time for a real Zoom call, your dog will recognize this picture and likely make a choice that works better for you. (Tip: Have some treats ready to reward him for calm on a real call when you are first working on this.)
Proactively teach with an element of management. You may want to include a leash, crate, or baby gate into your practice training sessions in case you need to put your dog behind a gate on a real call. This way, if you have to use management, you and your dog already feel good about it.
Start working toward a settle on practice calls. Grab a good amount of food or treats and walk with your dog over to where you work (it may be good to have them on a leash here too). Say “settle” once as a way of letting your dog know that you plan to be here for a while. Then start capturing all of the behavior you like as you work toward a dog who is lying down and relaxed. To be clear, this is not a moment to be stingy. Find anything to reward. Is your dog standing up quietly? Give him a treat. Did your dog just sit down? Give him a treat. Did your dog lie down? Give him a treat. Is your dog still lying down? Keep giving treats. Then you can start talking at the screen like you would on a call. Did your dog stay quiet? Give him a treat. Tell your dog all the things you love by giving him treats during these moments.
Think about how you can pay your dog. If your dog is calmly lying on his bed, you can give a chew as a big reward (this also tends to keep dogs quiet since it gives them something to do). Don’t be afraid to also drop some treats in front of your dog to reward him for quietly chewing. Think about it: that is an awesome behavior to reward! No matter what, make sure you have lots of food or treats available for practice on real calls. We don’t want to miss the opportunity to reward our dog for something we like -- especially as we are first working on this.
Set up a Zoom happy hour with friends to create a more realistic practice for your dog. Just remember to bring your treats and reward your dog.
Keep your dog successful. If you are doing a practice call and your dog starts barking, I would probably just end the game. This tells you that you are not paying him at the level he needs. You need to shift how frequently you give paychecks (treats) and/or what you are paying them with (maybe they like a different type of treat more).
I've also noticed that my dog is barking a lot more out the window during the quarantine. Is there any way to help reduce this too?
For more on reactivity in general, check out this IG Live we did with Gwen on April 6.
This is a good question because this type of barking can require a different approach.
First, if your dog is barking out the window, you can try calling him over to you or asking him to go to his bed. If he responds to you and leaves the window, reward him since he did the behavior you asked.
If your dog is barking out your window a lot, I would look to do some management since we don’t want our dogs practicing a behavior we don’t like. You can add a white noise machine so he doesn’t hear as much noise outside or use a cover to block his view out of the window. You can buy film on Amazon that still lets some of the light in but obstructs your dog’s view outside. As a more DIY option, you could use tin foil, wax paper, etc. to cover the part of the window your dog can see out of.
It’s also important for you to see if you can identify why your dog is barking in order to find the right resource to help. Can you try to study his body language to see if he is offering you physical cues? Would some desensitization and counter conditioning help?
You can find out more about Gwen by visiting her website here.
PS: Pin this article for later!


Dogs and the Coronavirus: Can Dogs Smell COVID-19?
Imagine that instead of opening wide for a mouth swab you could get tested for the coronavirus simply by standing still and letting a dog gently sniff you. This scenario might soon become a reality thanks to the work of the U.K. organization and charity Medical Detection Dogs and its partners at the London School of Hygiene and Tropical Medicine (LSHTM) and Durham University.
Dogs’ sense of smell, which is 40 times more perceptive than our own, is already a terrific medical resource, alerting humans to oncoming seizures, low blood sugar, and even cases of malaria. The COVID-19 detection dogs could be used in public in as little as six weeks “to help provide a rapid, non-invasive diagnosis towards the tail end of the epidemic,” according to Gemma Butlin, a spokesperson for Medical Detection Dogs. She adds, “Dogs could be used to identify travelers [at airports] . . . infected with the virus or be deployed in other public spaces. The aim is that dogs will be able to screen anyone, including those who are asymptomatic and tell us whether they need to be tested.”
How Dogs Could Be Trained to Smell the Coronavirus
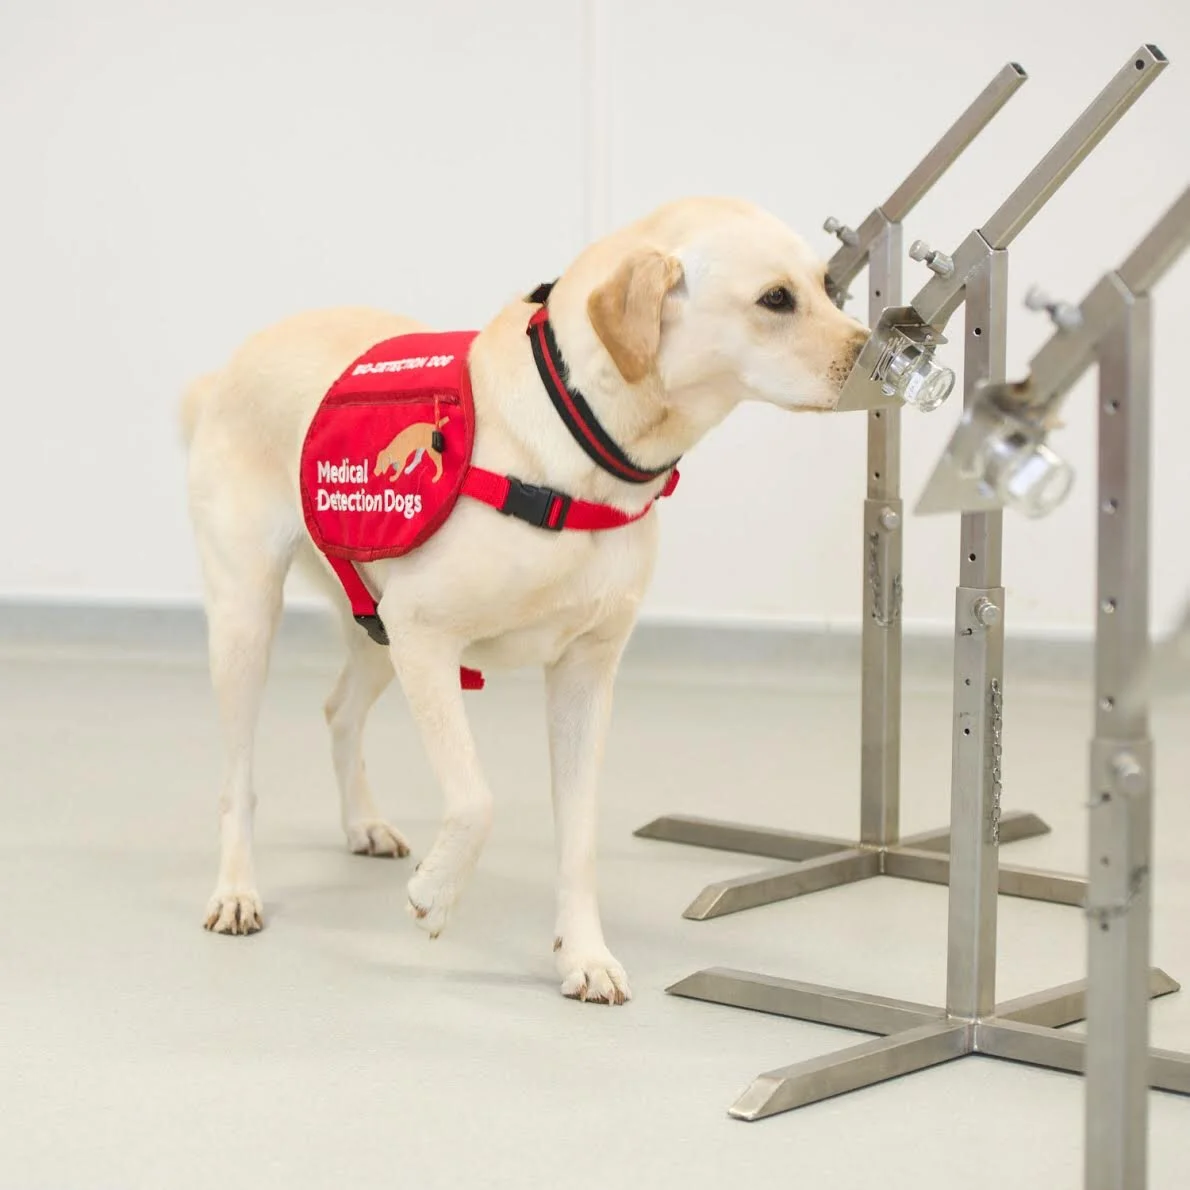
A bio detection dog trains at the Medical Detection Dogs facility in Milton Keynes, England. (Photo Credit: Bex Arts).
The dogs training to detect COVID-19 would go through the same training as other bio detection dogs: “By sniffing samples in the charity’s training room and indicating when they have found it. Following this training we would then transfer to detecting on individuals.” That the dogs could identify the virus on a non-human surface suggests that they could also aid in clearing businesses for reopening, indicating a space is safe for customers.
Though a tiger at the Bronx Zoo was recently diagnosed with the coronavirus, Medical Detection Dogs is confident in the science that indicates that dogs cannot contract the disease. As an extra assurance, “The dogs will be trained on non-infectious samples and will not need to make contact with the individuals they are screening,” Ms. Butlin says.
So Will the Dogs Be Able to Sniff This out After All?
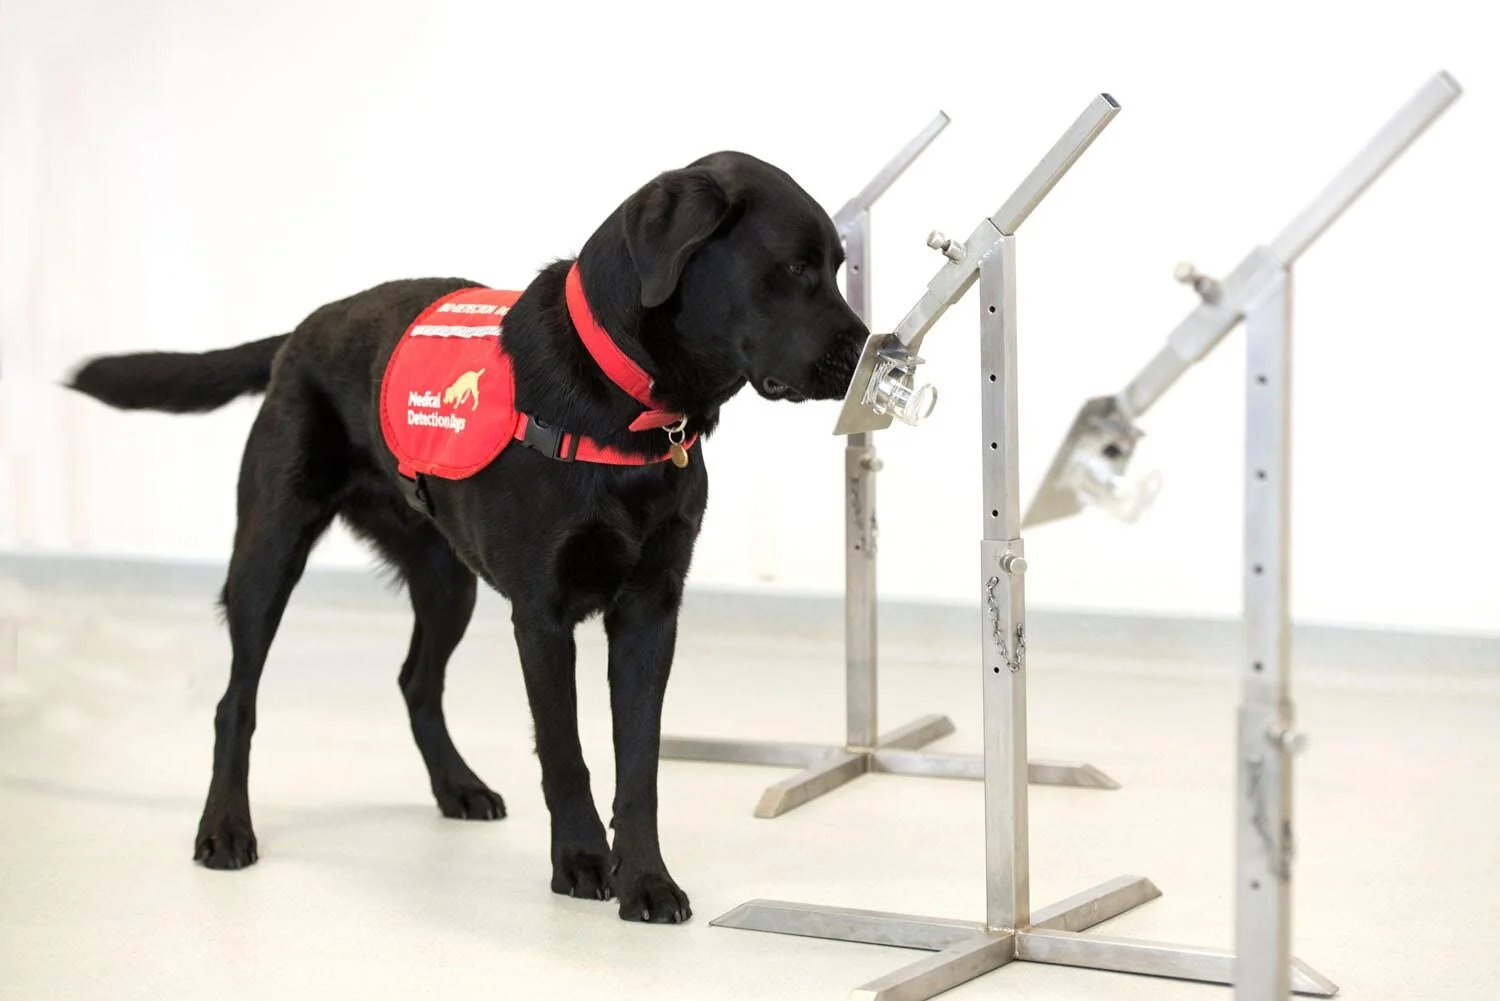
These medical detection dogs like the one pictured above can screen up to 750 people per hour and could support ongoing efforts to test for COVID-19. (Photo Credit: Bex Arts).
All of this work is contingent on the premise that COVID-19 changes a person’s smell and body temperature significantly enough for a dog to detect the difference. ARCTEC (Arthropod Control Product Test Center), which has laboratories at LSHTM, believes there’s a “very high chance” that the coronavirus has a unique smell. If already-trained medical detection dogs can distinguish COVID-19 in scent samples from both infected and uninfected patients, the intensive training program will begin. Much hope rests in the four paws - or, rather, the 300 million olfactory receptors - of these amazing pups.
If you’re interested in learning more about and supporting this work, click here.

Dogs and Coronavirus: Will My Dog Get Separation Anxiety After the Quarantine
In this video you’ll see a time-lapse of Logan Buie, an assistant dog trainer from Raleigh, N.C., working with her dog, JJ, in a real life separation anxiety training session.
Editor’s Note: Over the last couple of weeks we’ve received questions from members of our community wondering if their dogs can develop separation anxiety from spending too much time with them during self-quarantine. For answers, we sat down with Logan Buie, an assistant dog trainer from Raleigh, N.C, who is especially passionate about separation anxiety education. She is also a co-host of our recent Tails of Connection Training Party.
Can my dog get separation anxiety from spending too much time with me during the quarantine?
The answer is a definitive … maybe. Some dogs who have never shown symptoms of separation anxiety can develop it after a big life change like moving or a large shift in routine, like self-quarantining. But some dogs are able to seamlessly return to their old routine after a big change. I don’t know that there’s any way to predict which dogs will struggle with a life change, and it is likely related to a set of genetic factors, the same way that certain puppies are predisposed to separation anxiety very early in life.
Please do not panic about this, though! We can’t control everything about our dogs, and we certainly can’t control how long we are under social distancing precautions in our communities. We can just do the best we can, right now.
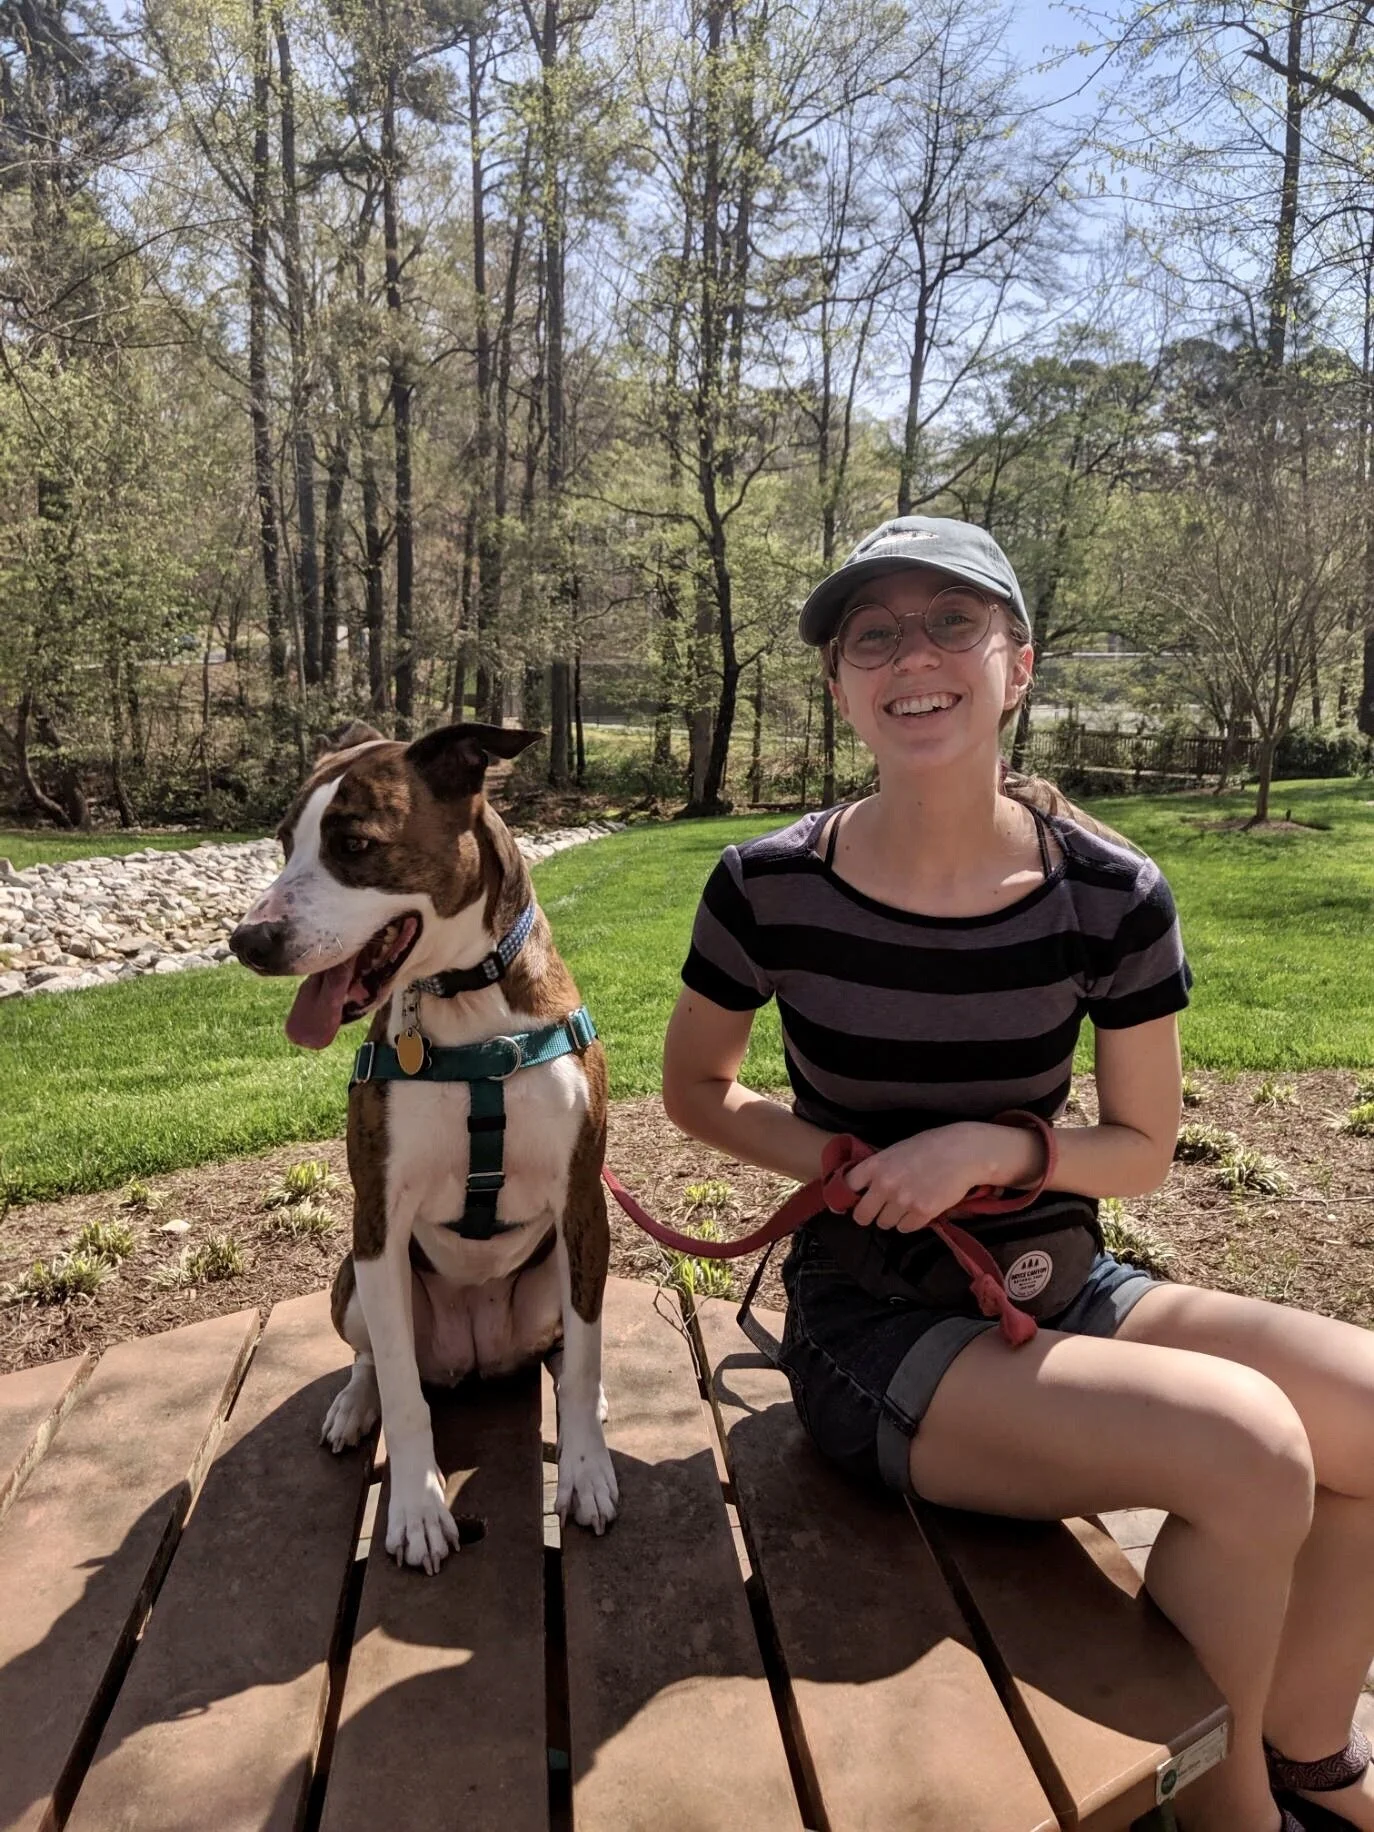
When my partner and I adopted JJ, (pictured above), in October of 2017, it soon became clear that she had some behavioral problems. She is reactive to almost all dogs and has separation anxiety.
What are the steps to reduce the possibility of that happening? Is there something I should do with my dog for a few minutes every day?
The good news about my answer to the first question is that we can practice departures with our dogs to maintain a sense of normalcy. You can practice short departures around the time of day that you would normally leave for work, driving around the block if you can, or just sitting on your front porch. You can also practice these short departures at different times of day, so that your non-separation anxiety dog is reminded that sometimes you just randomly “pop-out” and it’s absolutely no big deal. This could be a great time to work on a project in the garage, mow your lawn, or take a walk around your neighborhood without your dog.
Even if you don’t have a dog with separation anxiety, I would suggest monitoring your dog on camera for these departures. You can use a laptop webcam or an old phone; it doesn’t have to be fancy. The change in routine can be hard for our dogs, so even if your dog has never shown signs of anxiety during previous absences, it’s a good idea to check on them via camera to make sure that they are still comfortable with you leaving. If they show any signs of discomfort, like whining, barking, crying, scratching/digging at the door, pacing, etc., they need to be left for a shorter period of time the next time you leave. And don’t forget to use the camera to check on your dogs when you go back to work, too. If they do end up showing any signs of separation anxiety, you’ll want to know immediately, so that it can be treated!
What if my dog already had separation anxiety prior to the quarantine, and we’d been making strides to reduce his anxiety? How do I make sure he is not set back by this? What should we be working on every day?
I won’t lie, this was the first thing I thought about when my partner and I both moved to working remotely. I know I had bigger problems to worry about, but instead I was focused on this: “What if my dog, JJ, can’t handle us going to work after all this is over?” Since then, my worry has decreased a bit, for a few reasons. One is that I just can’t control how long we’re stuck at home or how JJ will respond to going back to her old routine. So I try not to dwell on that stuff.
Another reason my worry is a little lower now is that I am trying to get back into the swing of separation anxiety training! If you can, keep training exactly the way you were training before self-quarantining started. If you aren’t able to get in your car and go out (your city doesn’t allow it, you are avoiding the grocery store for safety reasons, etc.) you can practice leaving your dog while you hang out on the front porch with a cup of tea or a book.
And like I mentioned above, the change in routine has been hard on most of our dogs. So even if you are training at the same time of day as usual and following the same training plan, you might see a bit of a setback from where you were two weeks ago - that’s okay! Go at your dog’s pace. Focus less on the duration you’re getting, and try to focus more on the number of good, safe departures that you are giving your dog each time you practice. It can be easy to aim for departures that are longer than our dogs are comfortable with, so have some flexibility. It’s always important, but especially now.
This might also be an awesome opportunity to train your dog to be left alone at times that you normally can’t train. During normal life, I can only get in about one separation anxiety session a day (aiming for five days a week.) I’m hoping to use this time working at home to do one practice session in the morning and one practice session in the evening.
I just brought a puppy home. We are working from home right now, so my puppy only knows what it's like for us to be around all of the time. Is there anything I can do to help prepare my puppy for a more “normal” routine? Any advice for small things we can work on together?
YES! You can work on the exact same thing that I mentioned above - practice departures. You can do a pared down “getting ready for work routine,” and then leave your dog while you take a walk or sit on the front porch and get some fresh air, which we all need right now. Or maybe you need to go (safely!) pick up groceries from your local market - try to fit this in here, like you’re “going to work.” This won’t be the same as getting them ready for the entire workday, because we can’t be out of our homes all day long right now, but it is a great chance to prepare them for the fact that you’ll leave at a particular time each day.
Many people also don’t have enough time to gradually ease their puppies into being left for several hours at a time, due to the limitations of going to work. So the silver lining of this is that you probably have more time to train your puppy to be okay with your absence than you normally would!
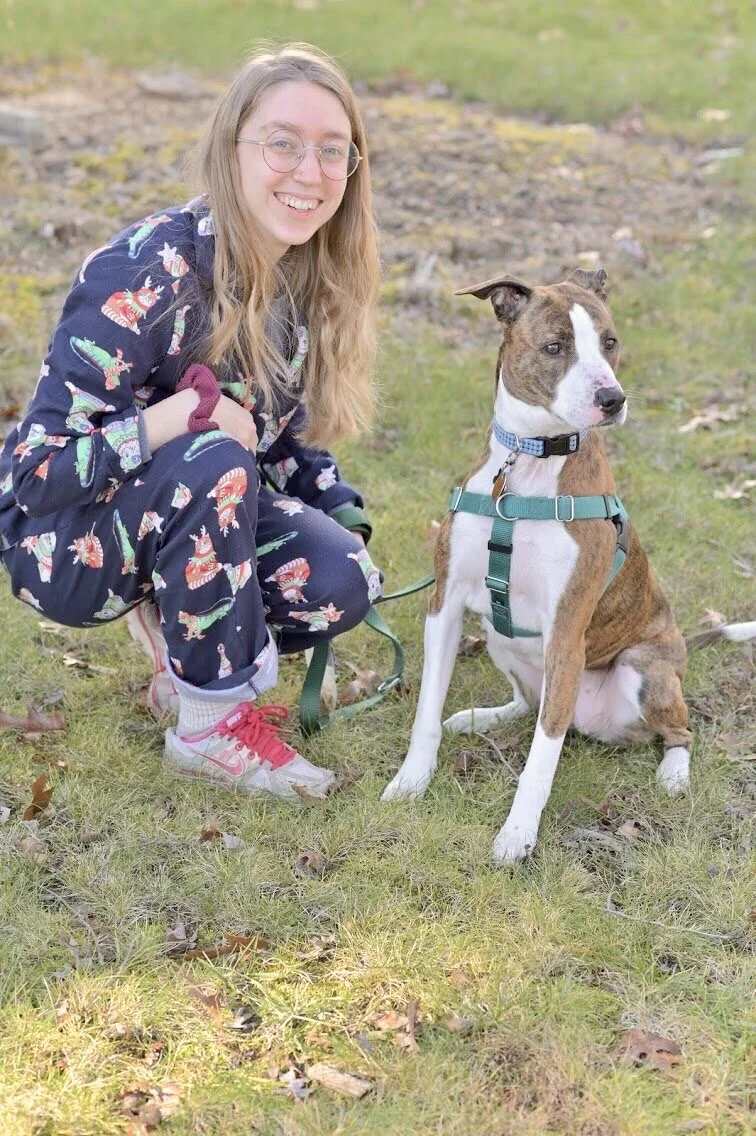
JJ has taught me immense amounts of patience and compassion, and it is safe to say that without her, I would not have discovered my passion for animal behavior and dog training.
If you’re planning to crate train your puppy, you can work on that now, as well as training them to be okay with being in a separate room from you. Again, we all know that this isn’t the same as the training that happens when you actually go to work, but it’s important to add all this into the “trust bank” that you have with your puppy. And when you do go back to your normal routine, don’t expect them to be okay with you being gone for six hours immediately. You’ll want to slowly work up to the full amount of time, to set them up for success and avoid panic. When you do go back to work, be sure to check on your puppy periodically via camera, so that you can identify any possible signs of stress, if needed.
Is it possible to “cure” separation anxiety?
I love this question. No good dog trainer will ever promise you a cure that’s 100% guaranteed. But there’s also an outdated myth that a dog with separation anxiety will always panic, for the rest of his life, end of sentence. This just isn’t true! There’s a good prognosis for most dogs with separation anxiety if it’s treated properly: with a desensitization plan that makes the owner’s absences “No Big Deal” instead of “Super Scary All The Time.” This means always practicing departures that keep your dog under threshold (i.e. returning to the room before they panic). Many dogs with separation anxiety can eventually be left alone for a few hours, like a “normal” dog. It just takes dedication.
A Special Note From Logan
I want to add a little author’s note on taking care of ourselves. If you are feeling tired, overwhelmed, and anxious, and you can’t picture fitting training into your life right now, that’s okay. The maximum we can train for separation anxiety is generally two times a day, for five days a week (but that can vary by dog.) And oh boy - that feels like way too much for me, as a human, right now. Aim for something easy. Maybe just once a day, a couple times a week! Maybe it’s just once a week right now, or you just pop out for a few minutes to check the mail every couple of days. Maybe you work it into your morning routine, right before you start working from home. Or maybe you sleep in a little instead, because we’re all trying to cope. Please do not feel like you have to pressure yourself to be the perfect trainer or dog parent right now. We are all just trying to survive. Now is not the time for perfectionism. We should all be considering how we can set our dogs up for success when we get back to normal, but we also need to be taking care of ourselves. Take a few deep breaths, do what you can, and give your dog a big hug for me.
You can follow Logan’s work and her adventures with her dog, JJ, on Instagram and on her website here.

Can My Dog Get the Coronavirus?
Editor’s Note: Late last week we read reports about a dog in Hong Kong that tested “weak positive” for the coronavirus. As the virus continues to spread among humans around the world, we wondered if it could impact dogs. For answers, we sat down with Tamara McNealy, a member of our TOC Community, who also happens to be a microbiologist focused on infectious diseases.
How does the COVID-19 coronavirus spread (e.g. air, shared water, etc.)?
The virus spreads primarily via droplets and fomites (inanimate objects – think door handles, surfaces, objects which after you touch them allow you to transfer the virus to your nose and mouth and possibly become infected). There is not currently evidence that it stays suspended in the air for long.
Can my dog get the COVID-19 coronavirus?
There is currently no evidence that COVID-19 infects dogs. The news about the dog in Hong Kong that tested weakly positive is still being looked into. Current information from the WHO suggests continuing to wash your hands after playing with you dog or cat – good information for anytime. Dogs can however be infected with certain other coronaviruses. Here’s a reference for OTHER respiratory coronaviruses that can infect dogs.
Can my dog transmit the COVID-19 coronavirus to me?
If a dog has a respiratory infection and licks your face, or hands and you then touch your face, it is technically possible for them to transmit the virus. The good thing is that many of the coronaviruses carried by dogs are what we call species specific – meaning that they only infect dogs. And vice versa – the human coronaviruses don’t typically seem to infect dogs. It’s never a bad idea to wash your hands after playing with your dog.
Can a dog be a carrier for the COVID-19 coronavirus even though he doesn't show symptoms?
Possibly – for example the Hong Kong case could be a situation where the dog – through sniffing surfaces – picked up some virus on its nose and inhaled it a bit. The virus may be present, but likely will not survive long or lead to symptoms. If the virus cannot infect dogs, the virus will not likely survive long enough for the animal to become a true carrier. But the virus could be on the dog’s nose temporarily. Wash your hands. ☺
How do I prevent my dog from getting the COVID-19 coronavirus?
There’s presently no vaccine for any coronavirus in dogs and none for dogs or humans for COVID-19. If your dog is showing signs of respiratory illness, call your vet and keep him/her away from other dogs and places where other dogs gather to limit the spread.
Here is some good advice from a recent article in the New York Times, with one additional comment from me in italics: “If you are sick with COVID-19 and have a pet, the small animal vet association suggests that you wash your hands and you (not the dog) wear a face mask around the pet, as you would around a person, and keep them inside, just to avoid any chance of spreading the virus.”
Would you recommend that dogs wear face masks?
No. Unless it’s Halloween then maybe, but probably not this Halloween.
What would my dog's symptoms for the COVID- 19 coronavirus be?
In the Hong Kong case in the news, the animal has no symptoms. Other canine coronaviruses tend to lead to typical respiratory signs such as coughing, sneezing, and nasal discharge.
Can humans give dogs the COVID- 19 coronavirus?
Probably not, but we really don’t have the data to determine this yet.
How dangerous is it for dogs?
For COVID-19, probably not very dangerous and there’s no current evidence to show this virus infects dogs at all. Other canine coronaviruses do cause symptoms and can sometime be severe - you should talk with your vet if you’re concerned that your dog has been exposed to a coronavirus or is exhibiting respiratory infection symptoms.
Is there anything I should do to keep my dog safe? (Really, do I need to care about this?)
If your dog is just at home with you and you are not in a place where COVID-19 is actively spreading – then you probably just want to do all of the things you normally do. Keep the both of you well fed, cleaned and exercised – be happy. If you are in an area with infection concerns, take care of both you and your dog similarly – you may want to avoid large gatherings/dog parks/etc., particularly if other dogs/people are showing symptoms. If you get sick, wash your hands often, wear a mask, stay inside, eat healthy. If your dog shows respiratory symptoms – call your vet and let them know that you’re sick as well. Your vet is the expert for this situation and should be able to advise you.

What’s the Real Cost of Owning a Dog?

Editor’s Note: We get a lot of questions about how much it costs to own a dog. In order to track down some answers, we turned to our friend and TOC community member, Eryn Schultz, who also happens to be a Harvard Business School graduate and the co-founder of pHERsonal finance day, a community for women to take action and improve their finances. Eryn offered to look at her own spending on her poodle, Challapeno, and consult with her brother Devyn, a fourth year veterinary student, to breakdown their advice about the hidden costs and benefits of having a dog.
Hi, I’m Eryn, proud dog mom of a two-year old Standard Poodle named Challapeno (think Challa like the bread, peno like the pepper!). Outside of being a dog mom, by day, I work as the head of sales operations for a B Corp expanding healthy school lunch across the US. By night, I write about women and money.
Below, I’ll share with you my actual expenses from owning a dog. Since I have the added benefit of being the sister of a fourth year veterinary student, I also included advice from my brother, Devyn, based on what he’s seen in his years of working with animals. (So proud of him for living out his kindergarten dreams!)
So, How Much Does a Dog Cost All-In?
For me, it’s around $2,312 per year. On top of this, in my first year of being a dog mom, I incurred an additional $1,550 in one-time expenses driven by adoption costs and training. Below is a detailed breakdown of all of those expenses.

Challapeno came from a rescue organization that specializes in poodles. My adoption costs were $600 which included the cost of spaying and all of her shots. These costs were higher than going through a lot of other shelter options since Rescue Poodles of Houston assesses higher fees on young, popular standard poodles to cover the veterinary care for the older, non-purebred poodles in their care.
How to Budget for Pet Deposits
I did NOT have to pay a pet deposit. When I first got Challa, I lived in an older quadplex in a hip neighborhood in Houston. Since my landlord never made some of the improvements I requested in writing as a condition for moving in, I got them to waive the pet deposit in exchange for not making those repairs. Some buildings will charge a pet deposit OR they will you charge you additional monthly rent. Try to negotiate. The worst they can do is say no!
Adoption Advice From My Brother the Vet Student
Eryn is so proud of her brother, “Dr. Devyn” (second from the right), for becoming a veterinarian. This photo is from when their family celebrated his white coat.
When adopting a dog, pay attention to age, pre-existing health conditions, and breed, which are all factors that could increase your overall lifetime cost of ownership. Young dogs have more upfront vet bills (think spaying, neutering, and vaccinations) and older dogs may require a big medical bill upfront (for things like bloodwork and teeth cleaning). Be sure to ask your rescue organization if they will take care of any of these medical costs on the front end, especially if your dog has a preexisting condition like heartworm. Spend time researching breeds as well, and make sure to set aside more money for breeds like Bulldogs, Dachshunds, German Shepherds, or giant breed dogs like Great Danes that can come with higher vet bills.
How I Budgeted for Training My Dog

In addition to the adoption fees, I also paid for two separate rounds of training totaling around $850. Challa was six months old when I adopted her, and like most poodles she had a ton of energy and needed a LOT of help. The training helped although I didn’t reinforce it nearly enough (hence, my excitement to learn about Tails of Connection!). If I could do it again, I would have just done group classes instead of one-on-one training. They were cheaper and gave me better discipline.
My Annual Dog Boarding Costs
For me, the highest cost is boarding Challa when we travel. Our boarding costs were $1,250 in 2019, which was 54% of our overall total cost of having a dog. Since we moved to Boston in 2019, my parents’ free dog boarding services ended. I’m blessed to get to work from home (one day a week I go into the office and on that day my boyfriend works from home), so I rarely have to pay for a weekly dog walker. That $1,250 was driven by spending around $40/night on a local dog sitter over the course of five days of travel for Thanksgiving, nine days of travel during the week of Christmas (when we had a wedding in Hawaii), and four other weekends away for weddings or visiting friends. This also included five dog walks for days when we both were stuck at work or went on a long, non-pet friendly hike over the weekend. If we had to add on weekly dog walking OR doggie daycare, those costs would be much higher.
My Yearly Veterinary Costs
Taking Challa to the vet represented the next largest part of our budget. All dogs should take a regular heartworm medicine and most should have a flea and tick prevention. In different parts of the country this takes on different levels of importance. We are less likely to get heartworm in Boston (which was very common in Houston), but ticks are much easier to come by in New England. We pay about $280 per year for all of our preventative medicines, and spend another $270 on a well checkup, parasite and heartworm tests, and a few vaccines. I found it fascinating that the shots we needed and the costs of different tests vary widely by region.
What I Spent on Grooming My Dog in a Year
Poodles have coats that are, um, high maintenance. Her haircut cost more than mine! It’s been $125 on more than one occasion. A short-haired dog may have $0 in grooming fees, but that’s not so in the poodle and doodle family! Contrary to the advice of some of my mother’s friends who insist that I should groom my poodle bimonthly, I’m content with a twice or thrice haircut as long as I trim her face (to make sure she can see) and can brush her regularly. This cost about $285 in 2019. Caveat: for many dogs grooming is more than cosmetic. Dogs with long hair can get matted. This can translate to sores that are very painful and can get infected leading to other health issues. You can also invest in some inexpensive grooming shears and do a lot at home. With my brother’s assistance, we shaved her once. It took five hours so it’s not easy.
What If My Pet Gets Sick?
The above costs are based on one year of a healthy pet. Sometimes accidents happen (they get hit by a car, eat a razorhead or a bag of dark chocolate, etc.). Sometimes pets get sick. What would your plan be if you had an unexpected $5,000 vet bill? I am planning to buy pet insurance this year. My parents are big advocates since they have had pet insurance cover the cost of some big bills (ACL tears, cancer treatment). To date, I would have spent more on pet insurance that I would have gotten back. In the future, I want to be protected if I’m not so blessed.
A Vet Student’s Take on Pet Insurance and Planning for Emergencies

When Devyn is in town, Eryn is grateful for his help with Challa. This is a picture of him cleaning her teeth.
When you have a medical emergency, the last thing you want to think about is how much is my dog worth. $2,000? $5,000? When you have pet insurance, you get to think more about the well-being of your pet and less about how much the treatment they need costs. It makes the conversation a lot easier on the owner.
From a financial health perspective, I advocate having an emergency fund that will cover the cost of unexpected medical bills for you OR your pet. This is generally six months of living expenses. If you have an older pet or one that is prone to health issues, make sure you have enough tucked away so money doesn’t drive a key health decision.
Hot Tip: Some smaller dogs require frequent teeth cleaning. If you’re thinking about a small dog breed where this is a frequent expense, some pet insurance plans will cover teeth cleaning as part of their package. They come with higher monthly premiums, but all of your preventative care is covered!
How Having a Dog Can Save You Money
Before wrapping up, I also want to call out the many ways having a dog has SAVED me money. First, so many social events with friends involve spending money. Brunch, drinks, etc. Going to the dog park and taking a walk with your dog are FREE and are also great social activities. Assuming I’ve swapped two $30 social events for two free events each month, that translates to $720 in forgone social costs per year. Second, not wanting to leave my dog with a sitter probably leads to two or more weekends per year where we opt to stay close to home. Those weekends generally spent hiking in the woods with her are some of my favorites and probably save me $1,000 or more per year.
In conclusion, yes I spend $2,312 per year caring for Challapeno, but she also saves me around $1,700 per year, and that doesn’t even count the value of free cuddles.
You can learn more about pHERsonal finance day by visiting Eryn’s website here.

#TOCStories: Why Having a Dog Is Essential for This Scientist’s Mental Health
This past Tuesday we sat down with Tamara McNealy and her Border Collie and Pointer rescue, Darby, at their apartment in Washington, D.C. Tamara opened up about why having Darby is so important to her mental health, for the second installment in our special series profiling members of our TOC community.
When Tamara McNealy, a microbiologist focused on infectious diseases, first saw a picture of her Border Collie and Pointer rescue, Darby, she knew that she was her dog. Darby was only ten weeks old and living at a shelter outside of Atlanta when Tamara brought her home.
A couple of years earlier, Tamara’s beloved Border Collie rescue, Jessie, died unexpectedly. Jessie was 14 years old when she came down with either meningitis or complications related to a medical condition that she had earlier in the year, which resulted in the removal of her spleen. “I was devastated when I lost her. She was just my world,” Tamara remembered.

A year after her last dog, Jessie (right), passed away, Tamara’s veterinarian sent her this letter from Jessie, which she described as a basic poem from a dog to their owner after they've passed. “I bawled. I cried so hard, but it was the sweetest thing,” Tamara told TOC.
Tamara’s veterinarian at the time told her, “When you're ready for another dog, Jessie is going to send you the right one.” Even though Tamara admits that as a scientist, she “likes facts,” she said that she still gets goosebumps thinking about that conversation. When she saw Darby, “it was kind of this gift that I was receiving from Jessie.”
How Having Opposite Personalities Helps Tamara and Darby
In a lot of ways, Tamara and Darby are opposites. Tamara is a self-described introvert who works from home most of the time. Darby is a social butterfly and wakes Tamara up every morning with a little dog kiss. Tamara loves the water, but when they go hiking, Darby searches for rocks to cross over streams, just so she doesn’t get her paws wet.
Today, Tamara can’t imagine life without her. “I've dealt with a lot of issues over the years and had a very dysfunctional childhood … [With a] dog, ... you come home [and] they're happy to see you. They give you a purpose, [and] they give you something to do ... Darby in particular because she's social, you know we go to the dog park and I've told numerous people there, if I didn't have a dog and ... a great dog park, I would know nobody in D.C. But through the dog park, I have this whole community that has expanded into a hiking group, and it's expanded into a book club, and it's all because of Darby. It's because I have a dog,” Tamara said.
How Training Helps Darby and Tamara
Tamara shared the recipe card for Darby’s homemade treats with TOC (see above) and told us that Darby loves inspecting her cooking.
When it comes to training, Darby is extremely food motivated (it helps that Tamara makes her homemade pumpkin and peanut butter treats) and she loves to learn. “I think that most people forget that their dogs have this very stimulating brain that needs to do something. So I think the more you work with them, the more they're connected with you, the better behaved they are, and then the better your whole community is …” Tamara said.
Training Darby has also been transformative in helping Tamara cope with her own anxiety. Recently she and Darby completed the first 14-day Tails of Connection Challenge.
“The Tails of Connection [Challenge] ... gives you something very discrete to do. If you're having one of those moments where your head is spinning and you can’t focus, you can just go [work] with your dog and have something that you're going to focus on. It focuses your brain and then it stops some of that other spinning that’s going around, and so I think it definitely benefits not only the dog, but also the person as well,” Tamara told TOC.
Even though Tamara thinks that Jessie was a more driven dog, she told us that Darby is more affectionate. “I often tell people that my last dog was the dog that my soul needed at the time, but Darby is like the dog that my heart needed when I got her ... In the morning, she is always waiting right there beside me until the alarm goes off. She's just the sweetest dog. I've never had a dog quite so sweet.”
You can follow Tamara’s life with Darby through their instagram account. If you're interested in future Tails of Connection Challenges, let us know here.
Help: How Do I Get My Dog to Stop Biting Things Around the House?
Editor’s Note: We get a lot of questions from dog parents in our Slack community about how to get their dogs to stop biting and playing with household items like toilet paper and paper towel rolls. In order to get help, we turned to our friend and professional dog trainer, Juliana Willems, to write the special guest blog below.
It’s very common for dogs to steal, destroy, chew on, and play with household items like paper towel rolls and toilet paper. Though this behavior can be hilarious at first, it eventually becomes incredibly frustrating. I’m going to help you with an easy way to tackle it.
Step One: Restrict Your Dog’s Access to the Household Items in Question
Focus on restricting your dog’s access to the items in your house that you don’t want him to steal. Every time he steals, plays with, chews on, or even destroys a paper towel roll, he’s getting something out of it and becoming really good at doing that bad behavior. This step is all about management, which often goes hand in hand with training.
Step Two: Search for the ‘Why’
The second thing you need to think about here is why your dog is stealing this stuff in the first place. Why is he chewing these items? What is he getting out of them? Does he have a need to chew that you may not be fulfilling? Does he have a need to play that you might not be satisfying? Think about why your dog is stealing these items and how you can help fulfill his needs in other more appropriate ways that work for both of you.
Step Three: Train Your Dog to Stop Stealing and Biting Household Items
While step one was focused on managing the situation in real-time, step three is all about teaching your dog a new, better behavior. In order to train your dog to stop stealing and biting these items, first think about what you want him to do around them and reinforce that behavior in a series of short training sessions. While teaching the “leave it cue” is definitely worthwhile, you’re not going to use a cue in these sessions. Instead capture the behavior you like (e.g. ignoring the paper towel roll), since you want that to become your dog’s default behavior. In this way you are teaching your dog to make the choice you like around the paper towel roll, even if you are not there to say “leave it.”
Follow these steps below to practice training this with your dog in a fun, game setting:
Start your dog in a sit.
Hold the paper towel roll behind your back and then bring it out in front of your dog so he can see it. Mark and reward the moment he notices the paper towel roll and doesn’t try going for it.
You can make this game more challenging by bringing the paper towel roll increasingly closer to your dog or moving it around when you present it.
Remember to take baby steps here, so your dog enjoys the game and is successful.
If your dog starts going for the item, simply don’t mark and reward. Take a step back to make the game a little easier before progressing again (in other words, make that item less tempting by holding the paper towel roll further away or by moving it less).
Keep these sessions nice and short (just a few minutes at a time). Feel free to play multiple times a day!
To join our Tails of Connection Slack Community, click here.
PS: Pin this post for later!

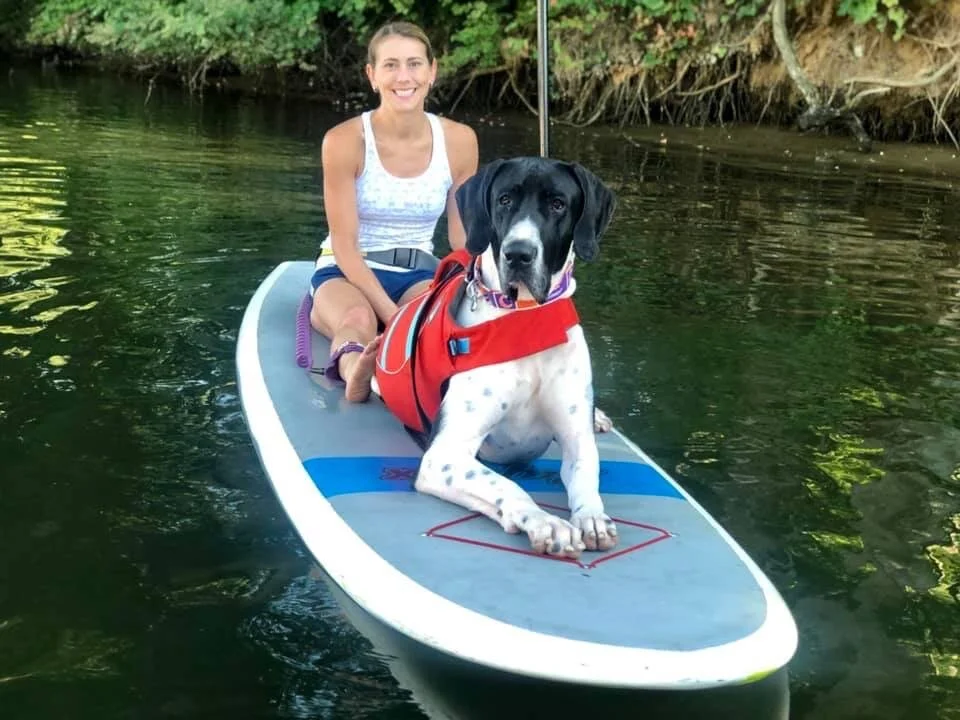
#TOCStories: What It's Like Living with a Great Dane
This past Monday we sat down with Leeanne Sciolto and her one and a half year old Mantle Great Dane, Jude, at their home in Washington, D.C. Leeanne opened up about the "hilarious and humbling" nature of her life with Jude for this first installation in #TOCStories, our special series featuring members of our TOC community.
When Leeanne Sciolto first met her Great Dane, Jude, he was only six weeks old. She drove two hours outside of D.C. to a breeder, and even though he was in a litter of ten other dogs, she immediately fell in love. "He just had a kind of exuberant free spirit to him and he liked to play. He was a big love bug and he still is today," she gushed.
Before getting Jude, Leeanne was going through a tough time. "I had just had a really devastating breakup that still chokes me up to this day talking about it ... and I had a bad situation at work. I was working 12 plus hour days. I needed something for myself. I needed something that was going to make me leave the office. I needed something that was going to make me get out of bed on the weekends and not just close myself in and cuddle with my cat," she remembered. It wasn't long before she realized that Jude had “saved her life.”
How Problem Solving and Consistency Are Key to Jude’s Training Routine
Jude has an incredible wardrobe of hats, snoods, bow ties, collars and more.
Because of Jude's size (he's 125 pounds and still has about 20 pounds left to grow), Leeanne quickly decided that training would be an integral part of their daily lives. In the beginning, she hired professional trainers. After that she continued to work with him everyday to maintain what he learned and grow their bond.
When it came to training Jude at home, Leeanne faced a big challenge: he is not food motivated. After buying him pretty much every treat on the market (think soft, hard, smelly, and non-smelly) she discovered that he only really enjoys cheddar cheese and ham. When Jude is stressed, he will not eat. To complicate things, he is also reactive to sounds, so if he and Leeanne stand outside of their front door, he likely won't take cheese or ham out of her hand because there are too many things going on outside around them.
“I've really had to figure out what motivates him, what makes him tick, and work with him as he presents himself with whatever else is going on ... That's one of things I was drawn to with the Tails of Connection Challenge ... It really emphasizes that you just need five minutes a day, and it gives you something to focus on with your dog every day. It's a great reminder and a good excuse to spend five minutes working with this big little guy working on our relationship.”
Why Leeanne and Jude Find Joy on the Water

In the summer, Leeanne and Jude like to go to Annapolis or to Baltimore and meet up with friends and go standup paddle boarding.
According to Leeanne, even though Great Danes are known for being giant couch potatoes and not needing a lot of exercise, Jude is always up for an outdoor adventure, especially if it involves the water. The pair have road tripped up to Cape Cod and stayed on the beach, and one of the things that they like to do in the summer is standup paddle boarding. From the beginning, Leeanne worked hard to help Jude fall in love with the water. Now he loves the water so much that there's been more than one occasion that he will actually jump in the shower with Leeanne. Jude also has his own kiddie pool for the summer, and when it rains, he loves playing in the "liquid sunshine."
You can follow Leeanne's life with Jude through their instagram account. If you're interested in future Tails of Connection Challenges, let us know here.
PS: Pin this article for later!

Behind the Scenes: The Making of the Tails of Connection Challenge
Picture our first day of shooting this challenge: As I sit in one of those high barstool chairs, three large studio lights are about two feet from my face. The camera is so close that I worry it must be capturing every single pore. My co-founder, Jess, counts down with her hands, “three, two, one,” and I sit in silence, completely unaware that I missed my cue. She chuckles and begins her countdown again: “Three, two, one.” Silence. This time I know I am supposed to speak, but I lose all ability to form words. Eventually, the words come, but so do some very (and I mean very) awkward eye movements. “What in the world is happening to my face? It has a mind of its own!” Before we continue with this director’s cut and the story of my meteoric rise to on-camera stardom (I hope by now you’re picking up on my sarcasm), I want to go backwards and tell you the story of how we landed on launching a challenge in the first place.
Why We Never Dreamed of Launching a Challenge
This is a look behind the scenes at one of our first days of filming the challenge in my living room.
When Jess and I envisioned Tails of Connection (TOC), we weren’t thinking of a challenge. We’d already assembled an awesome community of dog parents on Slack and wanted to keep taking steps toward our larger goal of launching the dog community of our dreams. Truth: our initial ideas for progress were more like building a jet and flying halfway around the world than taking a baby step forward. Perhaps it was the wisdom from our mentors - both those we met in person and those we felt we knew personally thanks to podcasts (Alli Webb, if you are reading this, we basically believe you’re our friend) - or maybe it was the fact that we couldn’t (yet) afford to build our metaphorical jet, but thankfully we course corrected, so to speak. We eventually hunkered down to figure out how we could produce something realistic that would provide value and give us a chance to get some feedback from our audience. Our brains immediately arrived at building an ecourse of sorts.
How I Ended Up on Camera
We realized that in order to move forward, I needed to be on camera. I never wanted to be “the talent” and had been fighting this concept for months. I even dismissed countless mentors who told us that this was the best way to start. Since we were out of options, I finally agreed, with the following conditions:
We create an ecourse that feels more collaborative than a “me-telling-you” thing.
The focus is on having fun and helping people make training a regular part of their lives. I did not want to promise perfection.
We are clear that I’m not a professional trainer. Don’t get me wrong, I have learned A LOT over the years (and wow do I wish I’d known so many of the simple dog training concepts I learned later in life much earlier), but being transparent and authentic mattered to me.
Our Creative Process for Producing the Challenge

The ex-consultant in me created this spreadsheet to organize our initial concept for the daily topics for the challenge. This definitely evolved as we filmed!
We sat down at The Wing in Washington D.C. to storyboard the content for the course, and as we were going back and forth we tossed out the idea of a challenge, where users could learn together during a set period of time for five minutes a day. We realized that format would allow us to create something fun with community (similar to what we’d built on Slack) around the information that we presented. As a recovering ex-consultant, I built a spreadsheet of all the dog training things I wanted to share, categorized them according to the type of skill (i.e. foundation, basic obedience, advanced obedience, and tricks) and then drilled down into those categories even more. The list got big in a hurry. We initially thought about creating a month-long challenge, but it didn’t take long for us to realize that a 30-day challenge (with new content every single day) might overwhelm people (later, we realized that it would have meant double the amount of work for us - ha!).
So we landed on a two-week challenge and worked to narrow down all of the topics that we wanted to cover. We knew we had to pick the right mix of entertaining and informative activities to fill the 14 days and then provide some space for more experienced people/dogs to progress. I always enjoyed revisiting foundations, so we decided to slot those in on some days as a value-add for any dog, regardless of their experience level with training. Format wise, each day we decided to help make this challenge work for a variety of levels by providing both a “how-to” section that explains how you teach the behavior or game to a dog who doesn’t know it and a “#ShakeItUp” section where we show fun ways to progress and offer other options participants can try to advance a behavior even further. We also invite users to show us the special way that they like to practice each skill in our private Facebook group dedicated to the challenge. Just like Slack, how cool would it be if people started sharing their own videos and other participants could really get motivated and inspired?
What It Was Like Filming the Challenge in My Apartment
Otis and Sully were amazing to shoot with during the challenge. Sometimes they would beat me to their marks “on the set.”
Each day, we transformed my apartment into a set and shot videos in my living room. We decided to invest in a professional camera and lights (which we stored next to my bed - hurray for city apartment living).
Luckily for my relationship with Jess, I got significantly more comfortable on camera. Jess also played the role of wardrobe supervisor and raided my closet. She had me wear the same shirt for every day of the challenge (it’s now collecting dust in my dresser).
In general, filming with dogs made for some interesting bloopers. On more than one occasion, Otis was sitting next to me as I nailed a segment, and then suddenly decided to leave the shot to kiss Jess. For the most part though, Otis and Sully actually did really well. We had to watch the schedule and their behavior to make sure they were willing to continue filming. To keep things realistic, we chose to embrace imperfect takes. In fact, you will notice in the challenge that we used a #ShakeItUp video where Otis fails to do the exercise I set up. We easily could have reshot that segment to capture Otis succeeding, but we wanted to show real dogs having fun rather than being perfect all of the time.
Why We Kept the Daily Challenge Videos Short

Here’s a peak at Jess’s edit bay at home. She spent hours editing the challenge after we finished shooting every day.
From the beginning, we filmed each daily challenge segment separately (e.g. the intro, how-to, perks etc.). We initially did this to reduce the number of “lines” I had to deliver in a given take and give Jess a chance to reframe shots if necessary. We actually envisioned splicing those segments together into a single video for each day of the challenge, but as Jess edited them, we realized that people might also like to watch them separately. For the most part, I improvised each segment and Jess constantly harped on keeping it short (no wasting words) and human (less technical “trainer speak” and more conversational advice). So often when I watch a long dog training video, I need to go back to a specific section of the video when I actually go to teach my dog. However, I can never find the 45 seconds I need in the 29 minute YouTube video. We hope that by creating a better experience, it’s easier to finish the challenge.
This is Just the Beginning
While our vision extends far beyond this challenge, we are really proud of what we have built and are so excited to launch. What we created is far from perfect, but after testing the challenge with a group of dog parents like you, we know how fun and effective it is.
We hope that you will join us!