Pandemic Puppies: Training Tips and Tricks
We are so honored to introduce our first ever Expert in Residence for our Show & Tell series. Meet Karishma Warr (they/them) who is here to share all sorts of training tips and tricks for your PANDEMIC PUPPIES! As the head of training and behavior at Calm Canine Academy, Karishma is a certified professional dog trainer specializing in treating complex behavior concerns in an urban environment. Keep scrolling for all of Karishma’s amazing content from their Show & Tell residency with TOC!
How To Think About Your Pandemic Puppy’s Routine
So you just got a pandemic puppy?! YAY! What comes next?! Did you know that with a young puppy, it can be helpful to stick to a predictable schedule that meets their biological needs and encourages healthy behavioral habits? There's no single playbook when it comes to scheduling every dog - what your dog's day looks like depends on breed, age, location, resources etc. We encourage you to think about “The Puppy Triangle” when organizing your day with them. As your puppy gets older, they tend to spend less time resting, and have longer periods of activity and enrichment. Potty training and feeding take place within this schedule as needed!
The Puppy Triangle
1: ACTIVITY
When your puppy wakes up from sleep or from a nap they will need to go straight to potty before engaging in an activity that meets their needs, and builds the skills they need.2: ENRICHMENT
After a period of activity and the chance to use the bathroom, we often give puppies a little 'project' to work on. It frequently involves food of some kind, but the idea is to give your puppy some time to do their own thing, use their brains, and settle themselves down after a period of activity. You can use their allocated daily calories in enrichment toys, or you can simply let your pup sniff around, self play or chew on a bone. Many people will choose to have their puppies in their puppy pens, gated into a room, or tethered to a heavy piece of furniture to keep them in their sight and help condition containment systems.3: REST
Did you know that puppies under five months need 18 to 20 hours of sleep PER DAY? With all of us home 24/7 it can be hard to not interact with your puppy all the time, but lack of proper rest can lead to increased mouthing, whining, barking, and hyperactivity - which is NOT cute when you're on an important Zoom call! After their needs are met through activity and enrichment - and they've had a chance to use the bathroom - puppies must be given time in their puppy pen or crate with a white noise machine to rest and recuperate before it all starts again!
Five Training Ideas to Help Socialize Your Pandemic Puppy Indoors
Many of us are struggling to get our pandemic puppies out and about due to COVID restrictions. However we can do a lot at home to get them comfortable and ready for life post pandemic.
1. CONFINEMENT
Conditioning your dog to confinement systems like crates or puppy pens can help set them up for success when you start to practice leaving them alone in preparation for returning to work or other life obligations!
2. OBJECTS AND SURFACES
To build confidence and prepare them for the unpredictable human world, you can work on new surface and object acclamation. You can use items like exercise equipment, kitchen tools, furniture, couch cushions, vacuums and more! Pairing these items with food, play and attention can help puppies learn that objects that move strangely and look a little bit odd are nothing to be feared.
3. SOUNDS
Acclimate and habituate your dog to new sounds that they will be expected to deal with when the world returns to normal. Plays sounds like sirens, motorcycles, children, dogs barking, construction noise, thunder, fireworks, etc. at a low volume on your phone or speaker and pay them with primary reinforcers like food, play, and praise.
4. HANDLING
Your pups will be expected to tolerate being touched, inspected, injected, brushed, washed, and wiped, which can be very challenging for young puppies and can lead to a lot of nipping. By pairing these things with high-value food like cream cheese and hot dogs, we can start to teach them that it’s nothing to fear!
5. TRAINING
If you want your pups to be able to walk on a loose leash, give you attention, and settle in busy urban environments, at parties, and around people and dogs, training starts indoors. This video shows me playing a fun walking game with my dog around my house! Definitely enroll in an online puppy class or work with a certified trainer to get your pup the skills they need in a low distraction environment before returning to a busy post-pandemic world. BTW Calm Canine Academy offers The Puppy Program, which is a LIVE four-week digital puppy raising course!
Training Tips and Tricks for Prepping Pandemic Puppies for Alone Time
When it comes to preparing our puppies for post pandemic alone time, the biggest advice we can give is to START NOW! Start helping your pup adjust to solo time weeks or even months before a significant absence - aka returning to the office. You’ll do this through a systematic desensitization process - aka slowly exposing your pups to the experience of being home alone in small increments that they can handle without panicking.
For many dogs this starts with simply stepping out of the door for one second, building up to two seconds, then five seconds, then one minute over a series of days. Those minutes will become hours with systematic daily practice, but we are often talking a matter of months not weeks for some pups to get truly comfortable with regular long periods of alone time.
To ensure our pups are always comfortable with our incremental absences it’s vital that we set up a camera or viewing system of some sort to observe and document their behavior. That way, if you have built up to two minutes of alone time, you can watch your pup through your camera and be sure to come back BEFORE you see signs of panic. This teaches your pup that absences are SAFE and that you'll never leave them for longer than they can handle.
Important management tip: While our puppies are still learning to be comfortable when left alone we need to avoid letting them cry it out! Imagine someone who’s afraid of water being pushed in the deep end of a pool - that might actually make them MORE nervous to be around a pool in the future! Well that's what it can feel like to many pups who are 'thrown in the deep end' with regards to isolation. It’s vital we take it at their pace, knowing that's the only way to truly get them safe and avoid sensitization.
For many the thought of breaking down a four hour absence into seconds and putting in place a systematic desensitization protocol seems overwhelming and that's where the professionals come in. We HIGHLY recommend reaching out to a CSAT (certified separation anxiety trainer) to get the coaching and support you need to successfully see improvement with this challenging behavior.
For many more training tips and tricks for pandemic puppies, check out this live interview we did with Karishma on Instagram.
How to Use the Dog Park to Train Your Dog
We love dog parks - just not for the reason you might think. Let us explain. Other dogs can be a huge distraction (or even a trigger) for your dog. Maybe you have a super social dog who pulls you on the leash toward other dogs. Or maybe your dog lunges and barks out of fear when they see other dogs. Or perhaps your dog simply has a hard time giving you any attention around dogs. In order to help your dog feel more neutral or be able to offer behaviors you want around them, it is really important to find opportunities to work around dogs where you can control the distance between your dog and the other dogs. And that is where dog parks can be helpful: the fence around the park becomes your teammate. Instead of going into the dog park, you and your dog can work outside of it -- adjusting your distance to meet your dog’s individual needs (or perhaps even staying in the car). It gives you the ability to work around distractions/triggers while keeping your dog under threshold. It is easy to focus on your dog engaging with other dogs, but what might happen if you shift that focus a bit to your dog engaging with you around other dogs? While this list is certainly not exhaustive, we wanted to share six ideas of simple activities you can try outside of your local dog park.
Play the Engage/Disengage Game Outside of the Dog Park
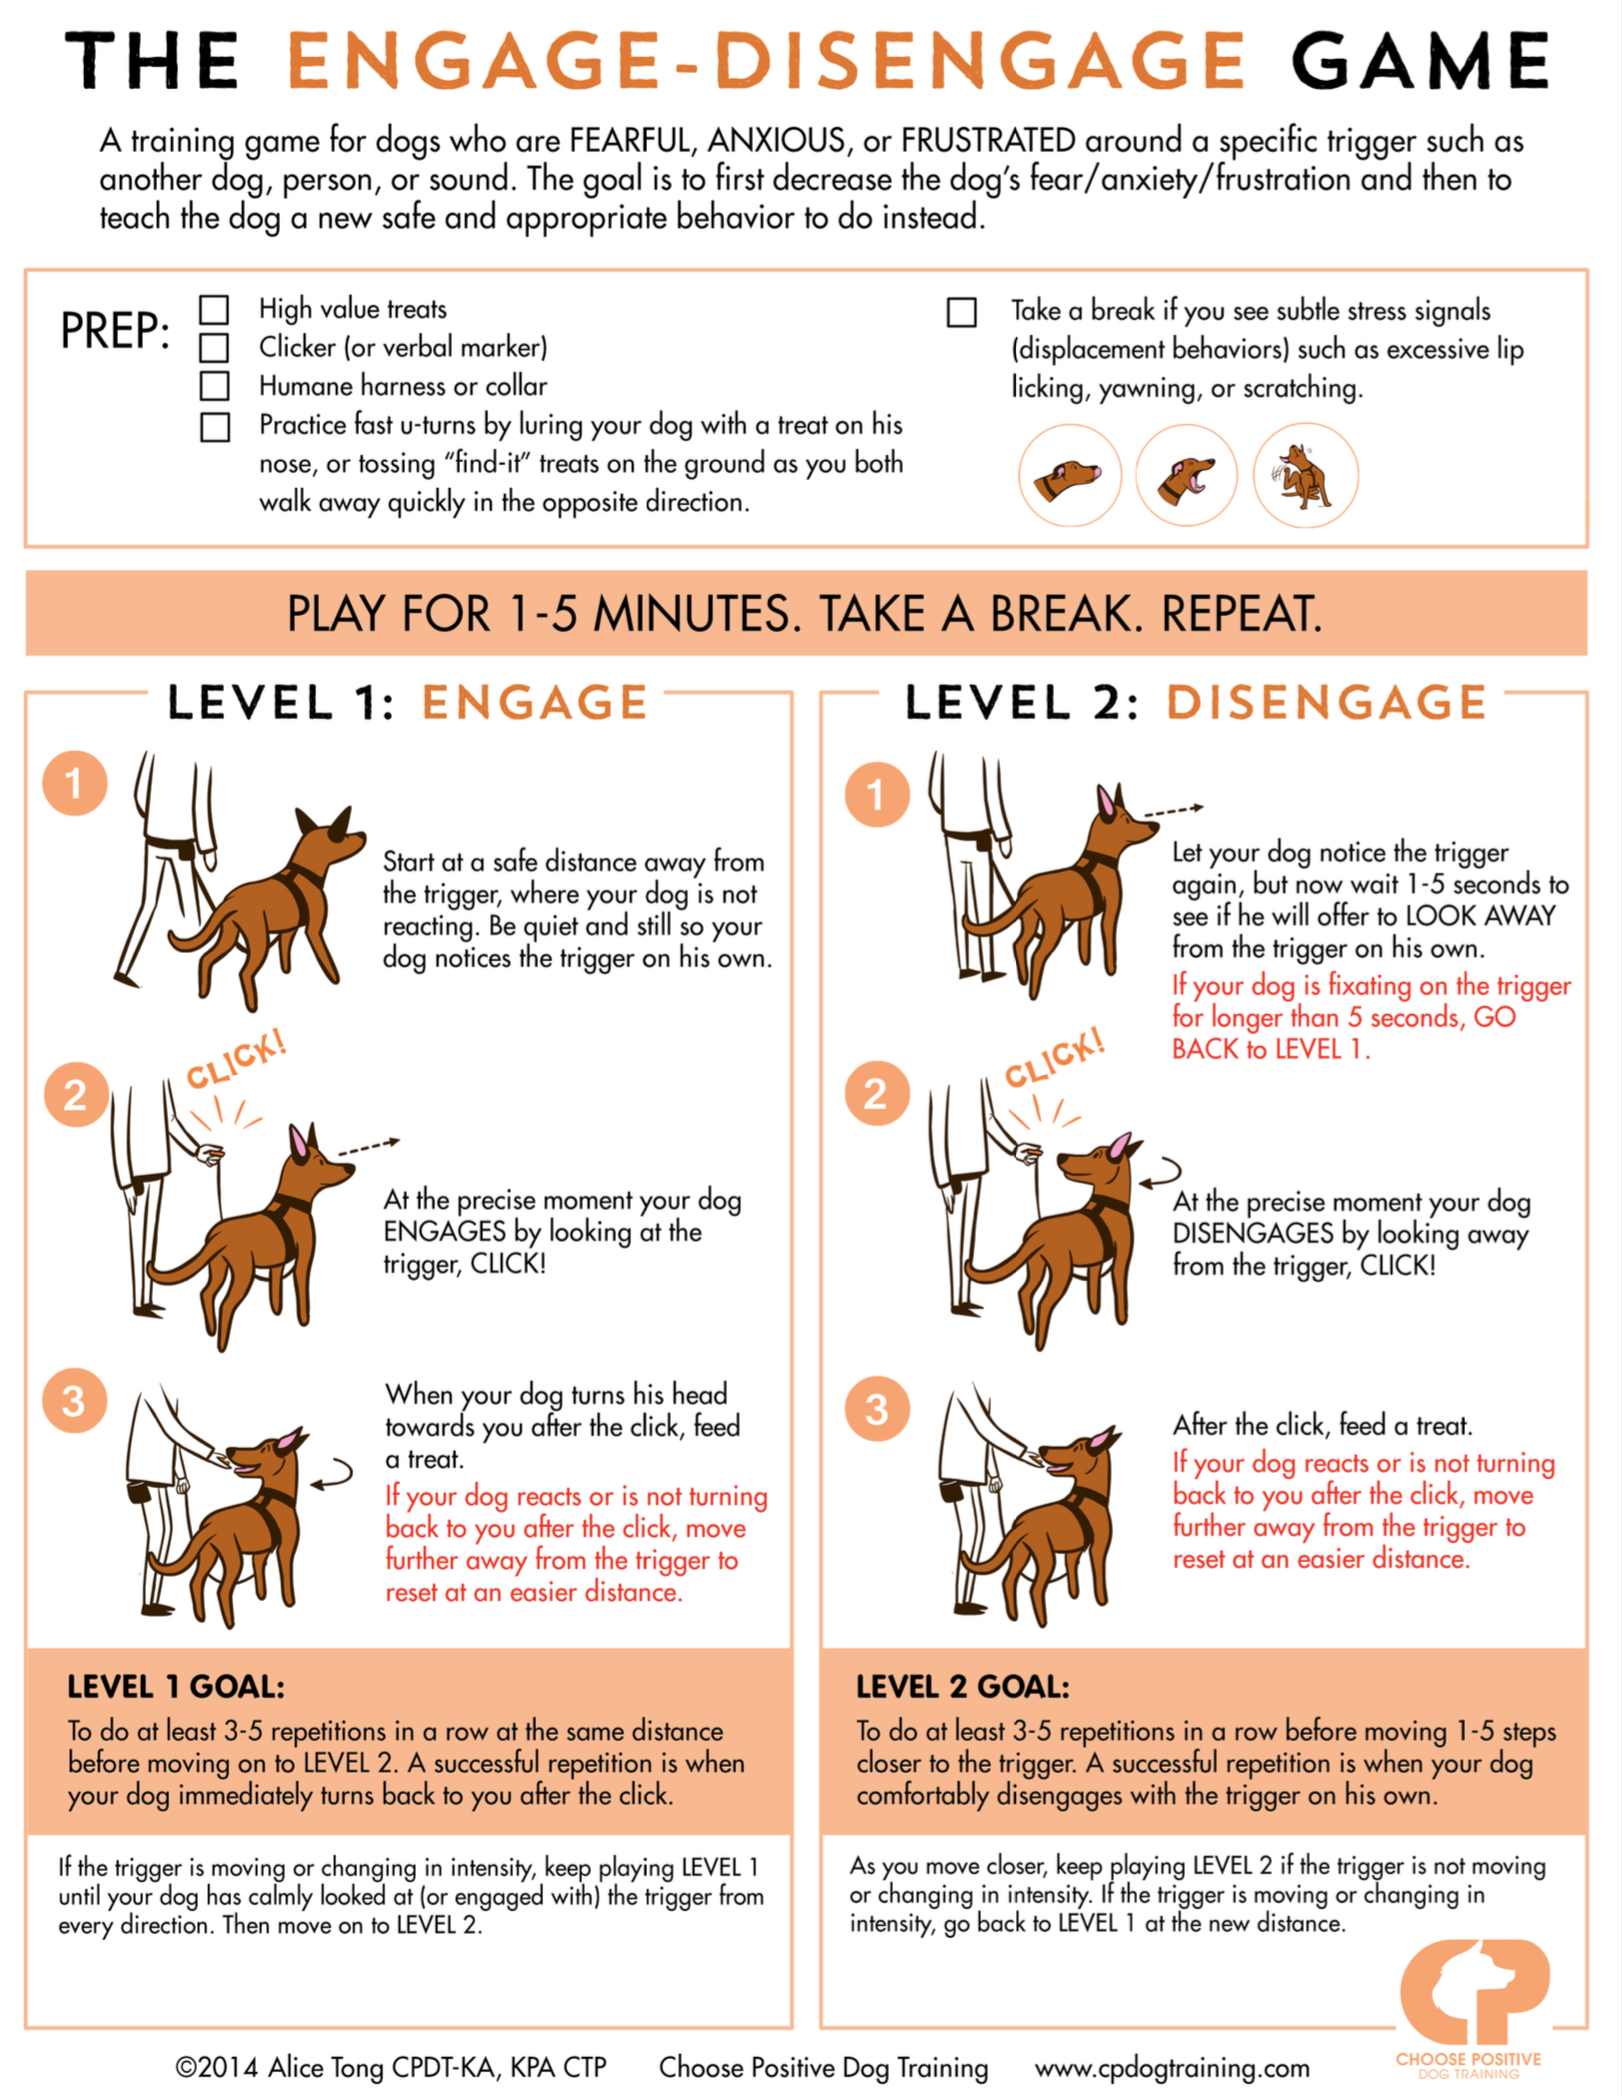
Engage/Disengage is a simple game that you can use in training sessions and in everyday life that will help change your dog’s emotional response to seeing other dogs. It will also teach your dog how to automatically look to you when they see a dog.
What: The game has two levels. In Level One, you mark the moment your dog notices/engages with the other dog. In Level Two, you wait for your dog to look away from the other dog and then mark and reward. Check out the infographic below for details.
Why: This “game” is simple and crazy powerful! This game will help your dog learn how to self-interrupt when they notice other dogs (or whatever stimuli you do this with) and will reduce the stressful feelings that come up. Engage/disengage will help make your dog’s new default response around other dogs be to disengage and look at you.
How to Practice U-Turns Away from Dogs Outside of the Dog Park
Sometimes you just need to be able to walk the other direction when you see a dog -- here is your chance to practice that!
What: Walk toward the dogs (aka toward the dog park). Say whatever cue you use to ask your dog to flip around and follow you (e.g. “let’s go”) and then turn around 180 degrees (avoid yanking your dog -- you want your dog to be responding to your cue and body language). Mark and reward your dog as soon as they flip around to face you. (Note: Practice this in a low distraction setting before you try it outside a dog park.)
Why: This builds a history of reinforcement for your dog for turning away from dogs and makes it more likely that they will be able to do this in everyday life settings.
Try the Cookie Toss Game Outside of the Dog Park
TOC co-founder, Christie Catan, plays the cookie toss game with Hana, the American Staffordshire Terrier Puppy, during a session for how to use the dog park to train your dog.
This may look simple, but the cookie toss game is powerful and can helps your dog choose to engage with you instead of with other dogs (or more broadly, the environment).
What: This engagement pattern game may look easy, but it can have a lot of impact! To play, say “get it” and then toss a treat to the side for your dog to chase. After they eat it, they are likely going to look back to you wondering if there are more treats. The moment the orient to you (aka as soon as they turn back toward you), say “get it” (which is your marker in this game) and toss a treat to the other side for your dog to chase. Keep repeating this pattern. Remember: This is not a recall game, so try not to say your dog’s name or use their recall cue. You want them to choose to turn back to you. If they need some help, try making a kissy noise. (Note: Teach your dog this game in a low distraction setting first.)
Why: This game helps your dog choose you! After they eat the cookie that you toss, they have to make the choice to turn away from whatever is “out there” (in this case, that’s the dogs in the dog park) and turn back to you. You reward that choice by tossing a treat for them to chase, and most dogs find chasing quite fun! This game gives your dog a lot of practice in looking away from dogs and toward you! The simple pattern also helps your dog make the choice to engage with you because it is familiar.
Play With Your Dog Outside of the Dog Park
If you want your dog to engage with you around other dogs, it certainly doesn’t hurt for them to think you are fun!
What: Have some fun with your dog! We are big fans of personal play for its ability to give you information about your dog’s threshold, but feel free to bring food and toys into the mix.
Why: Good play is super engaged! Fun play can help your dog see that you can actually be more fun than those dogs inside of the park (or at least a decent substitute - LOL!). Play can also help you gauge where your dog’s threshold is. If your dog is too concerned about the other dogs to play with you, create more distance. You can even combine play with some engage/disengage by waiting for your dog to look away from the dogs and orient to you and rewarding that choice with play!
Recall Away from Dogs Outside of the Dog Park
Just because your dog knows the word “come” doesn’t mean they can always respond to it; here is a chance to work through a distraction (other dogs) in a controlled setting!
What: Say “get it” and toss a cookie away from you toward the dog park. After they eat the cookie and right before they turn around, say “come” (or whatever recall cue you use). Mark and reward them the moment they turn back to you and give them a treat. Repeat.
Why: This builds a history of reinforcement for turning away from dogs in response to their recall cue. Practice makes progress!
Engaged Walking Just Outside of the Dog Park
City sidewalks can be tough if you have a dog with big feelings about other dogs. Walking outside of a dog park allows you to build up that walking behavior around dogs, without feeling afraid that your dog is getting too close.
What: Take your leash walking show on the road! Try some of the leash walking exercises you have been working on at home outside of the dog park. The goal is for your dog to choose to walk near you rather than you having to bribe or nag your dog. You can use your body language and voice to keep them engaged and then reinforce the behavior you like with treats or play. If they get distracted, just wait them out and come to life when they choose to re-engage with you (unless you think they are going to react -- in which chase, create distance ASAP).
Why: The dog park gives you an opportunity to reinforce your dog for walking near you around other dogs while controlling your distance between them to keep your dog successful. Practicing here should help set your dog up for success for walks in everyday life.
Please be cognizant of your dog’s individual needs before you pull up to a crowded dog park. That may be too much for your dog. When in doubt, find dog parks where you know you can start really far away (aka not one where there is almost no surrounding area for you to work in).
Have you tried training your dog outside of the dog park? If you try this (even if it’s around other dogs in a different setting), let us know how it goes! Don’t forget to tag @tailsofconnection on Facebook or Instagram and use the hashtag #tailsofconnection.
PS: Pin this post for later!
How Do I Stop My Dog From Eating Dirt or Mud
Does your dog really enjoy snacking on a nice mud pit? Or maybe rolling in it? It can be so easy to focus on what you don’t want your dog to do in this situation (roll in or eat the mud), but what would happen if you focused on what you DO want your dog to do around the mud instead? Our co-founder, Christie Catan, thought it would be fun to show you some real-time problem solving using her dog, Otis, who happens to have a real taste for mud from the big old wet pits 😋. (Note: If your dog is obsessively eating mud or dirt, you may want to ask your vet about it.)
What to Think About Before You Can Start Training
Whether your dog enjoys eating or rolling in dirt (or even going toward something else tempting in their environment), the same training principals will apply here. For the purposes of this training session, I worked with Otis around mud because he finds particularly stinky patches of it extra tasty after a good rain. You can try the same steps below for any environmental distraction your dog wants to go toward when you would prefer for them not to!
But before you even start training, it’s important to do some observing. What’s happening when your dog is around their distraction (mud, dirt, sticks, etc.)? When Otis notices a nice mud pit (the antecedent), he eats the mud (his behavior) and seems to find it yummy since it leads to him eating more of it (the consequence).
Once you’ve got this worked out, decide what you want your dog to do instead of succumbing to their current behavior around the distraction. I asked, “What do I want Otis to do when he spots a stinky mud pit?” My answer: I want him to come to me, and I will give him something yummy.
Step By Step: How Do I Stop My Dog From Eating Dirt or Mud
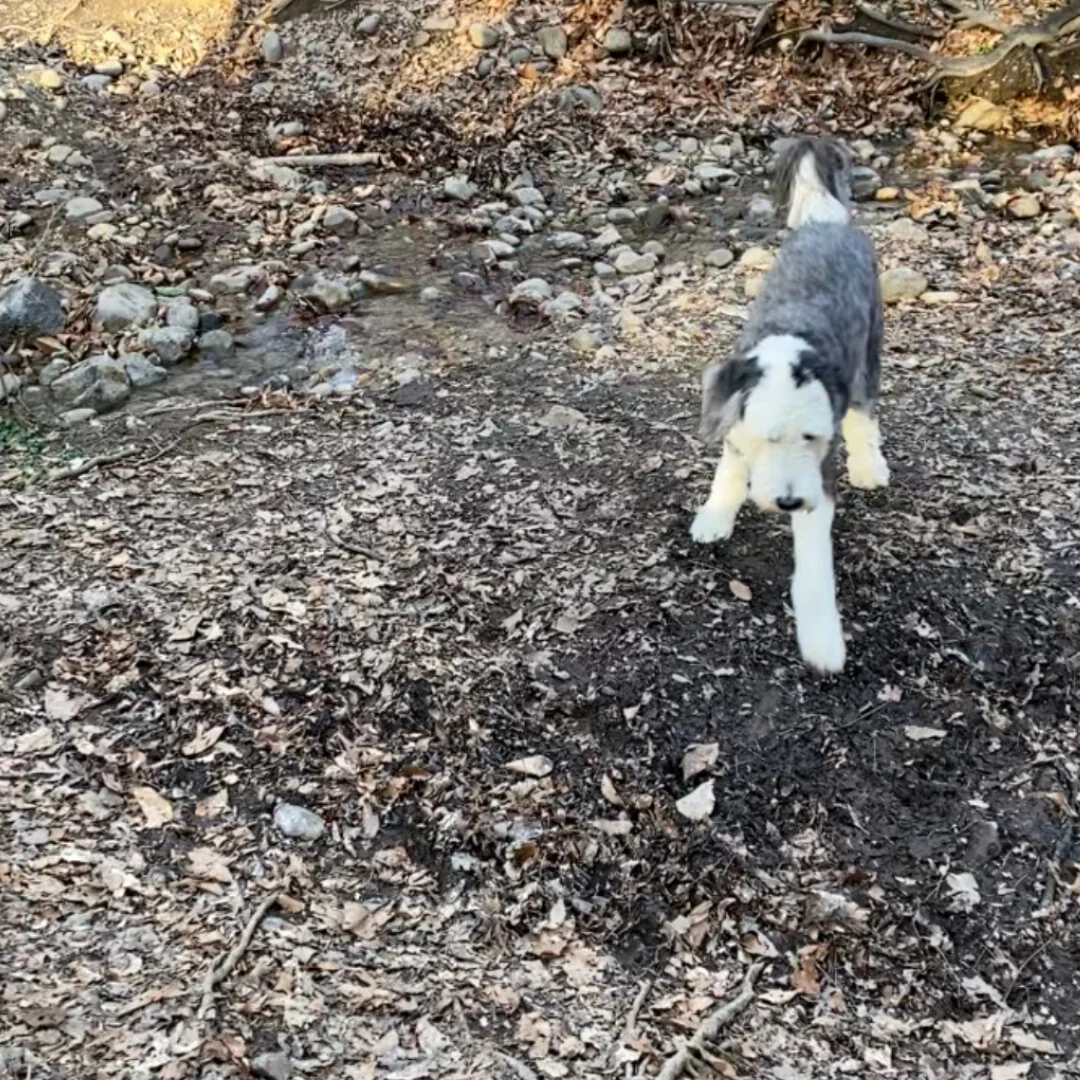
TOC Co-Founder, Christie Catan’s dog, Otis, stand in front of a mud pit in the woods in Washington, DC during their training session for how do I stop my dog from eating dirt or mud.
That all sounds great but you’re probably wondering how is this ever going to be possible? The answer is simple: CAPTURE BEHAVIOR!! Believe it or not, even when Otis goes to eat mud, he is offering behavior I can use (it happens the exact moment he notices the mud but before he eats it), so I need to pay attention and be ready to mark the moment he notices mud but before he actually eats it (say ‘yes,’ use a click etc.). Keep reading for the basic gist.
STEP ONE: Mark the moment your dog notices mud (before they eat it!) and then give them a treat. Repeat (the number of reps will vary by dog and situation). You are creating an association that mud pits (or whatever distraction you are working with) predict a treat from you!
STEP TWO: When your dog notices mud (or whatever distraction you are working with), wait to see what they do (they have been getting treats from you every time they notice mud, so you are high on the list of places they will look when they don’t hear a marker). Mark and reward the moment they look toward you. Now you are reinforcing the desired behavior around mud: orienting away from the mud and toward you.
The Subtle Shift That Happens When You Train Your Dog to Stop Eating Mud
In the video, can you spot the shift between step one and step two? Did you notice it isn’t a linear progression? That means that even though your dog was able to look away from the mud (or whatever distraction) last time, it doesn’t necessarily mean they can this time. You have to make a judgment call based on a lot of factors (e.g. the value of the distraction, the distance from you, the value of your reinforcer, the environment, your dog’s state of mind, their training history, etc.).
Some behaviors almost beg us to focus on what we don’t want our dogs to do, but see if you can ask yourself what behavior you want instead. In the video, you can see just how quickly Otis starts CHOOSING to look to me instead of eating the mud. The shift in behavior was accomplished with a well-timed marker cue and some treats. That’s it!
(Note: Otis has discerning taste when it comes to mud. In other words, he doesn’t eat all mud and dirt. He is drawn to very specific mud pits, and having observed his choices and behavior, it is much easier for me to sort out when he is likely to want to eat it versus just the usual sniffing dogs do.)
Have you tried training your dog to stop eating mud or dirt? If you try this (even if it’s around a totally different distraction), let us know how it goes! Don’t forget to tag @tailsofconnection on Facebook or Instagram and use the hashtag #tailsofconnection.
PS: Pin this post for later!
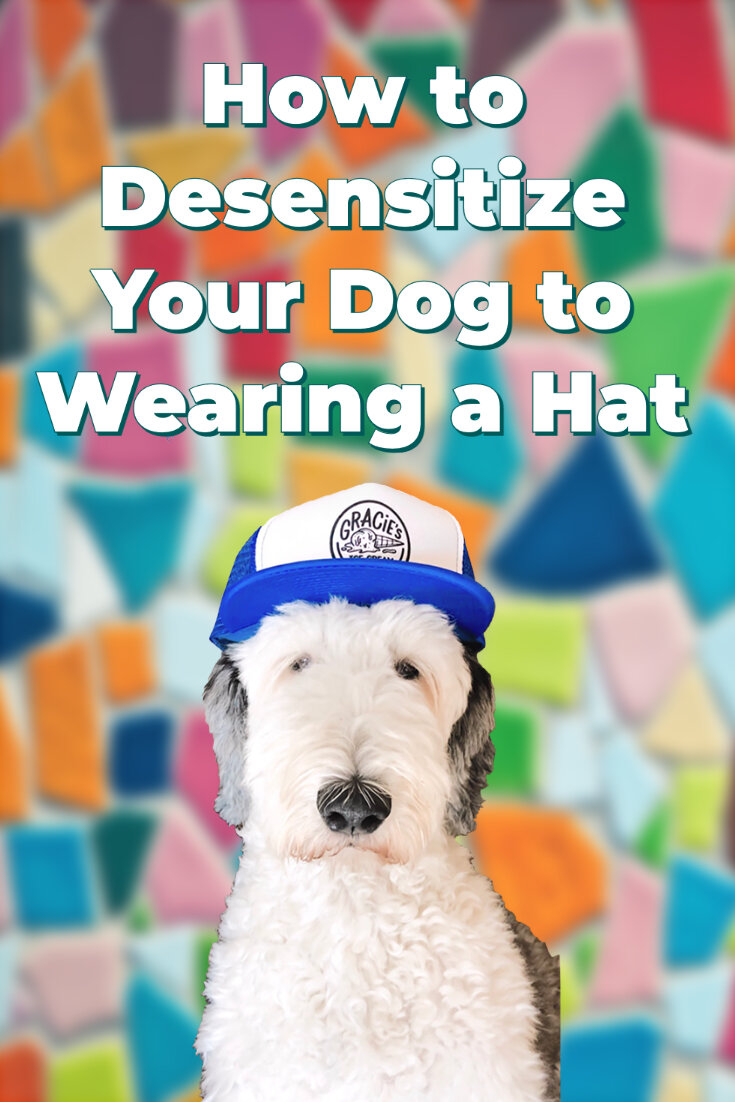
Cooperative Care: How to Desensitize a Dog to Wearing a Hat
‘Tis the season for putting a Santa hat on your dog! Before you force that hat on their head, have you considered getting your dog to opt into wearing a hat? Did you know it’s possible to desensitize them to wearing a hat through cooperative care? Actually in the Camp TOC scavenger hunt, we have a bingo square as a little mock cooperative care activity: desensitize your dog to a hat or sunglasses! While it’s just a silly hat, the basic idea of this exercise sets you up for things that matter a lot more (cooperative care for grooming, eye drops, ear cleaning etc. 🙌)! Our co-founder, Christie Catan, filmed this tutorial for someone in our #TOCFam who wanted help, and she figured, “why not just share it with everyone!?” While this is NOT a fancy video (in fact, in her words “it’s poorly lit and framed” 😂), we hope that it will give you some ideas that will be useful! Keep reading to see the written steps she followed to get her dog, Otis, to consent to wearing a hat.
Step by Step: How to Desensitize a Dog to Wearing a Hat
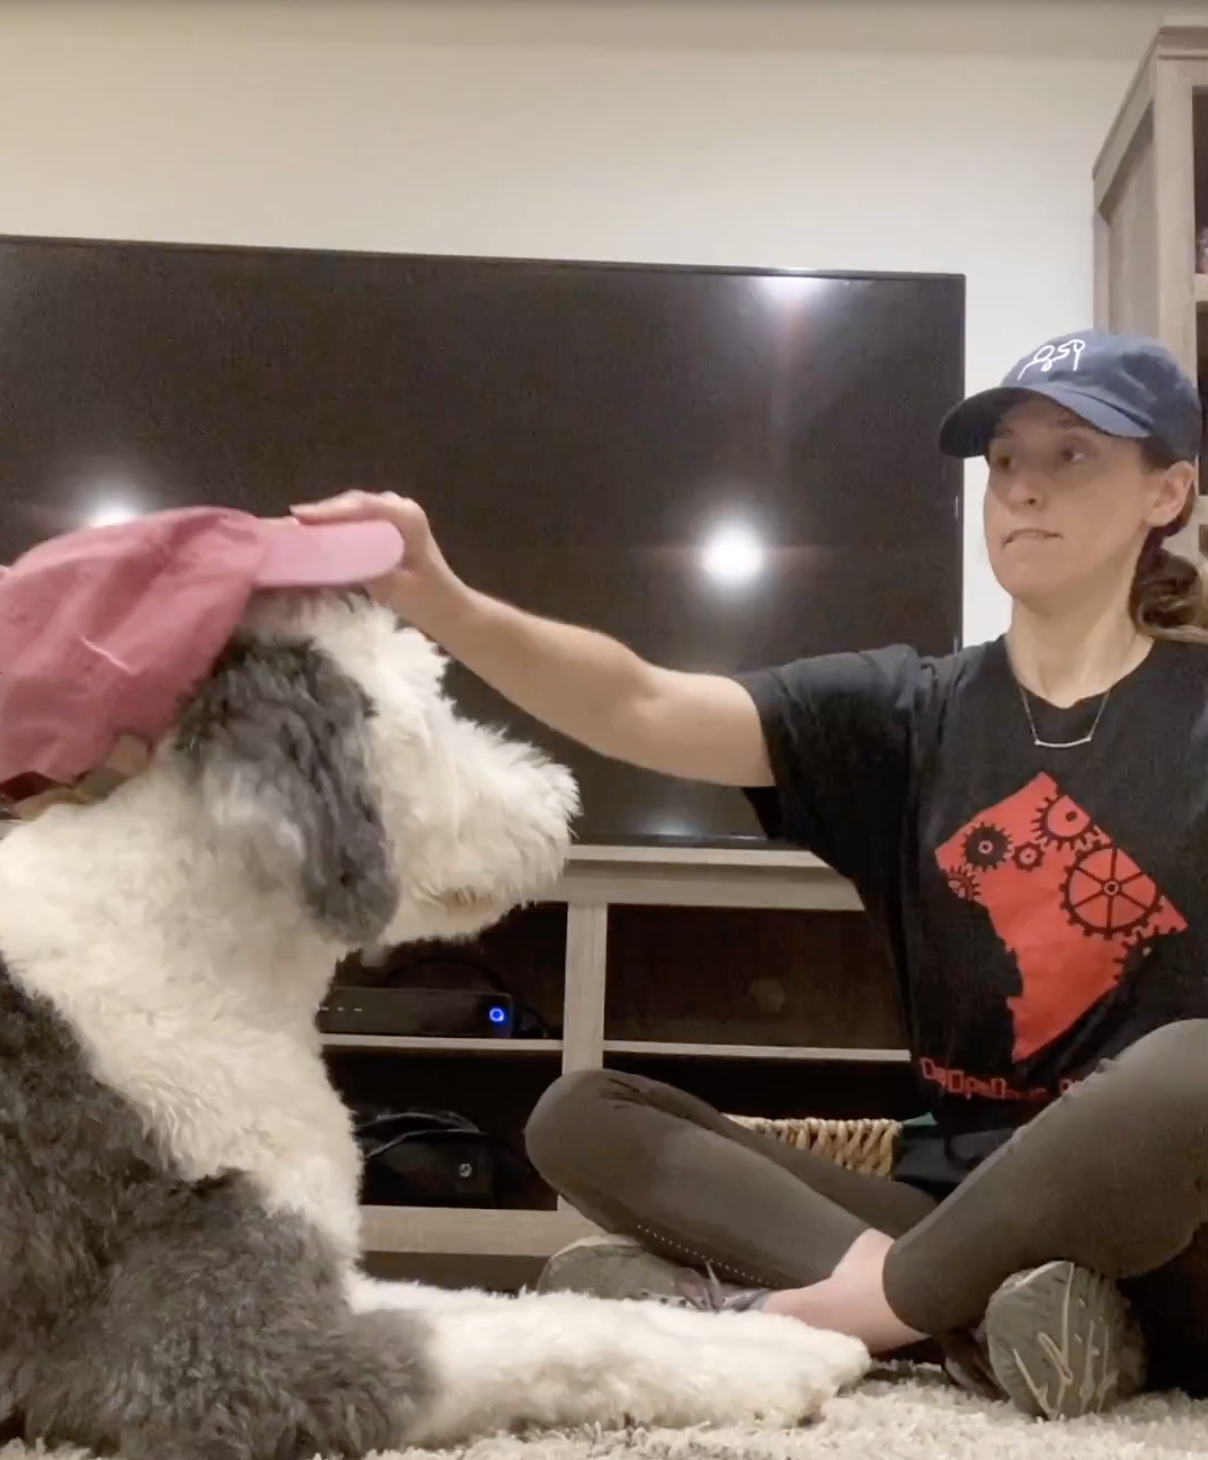
Christie Catan puts a hat on her dog, Otis's, head as part of the training session for how to desensitize your dog to wearing a hat.
Step One: Shape a behavior that will become your start button. I am going to use eye contact as Otis’s start button behavior, so I simply sit in front of him and mark and reward him (by saying yes and giving him a treat) when he looks at me. I do this a few times to make eye contact a behavior he wants to offer.
Step Two: Introduce the hat. You’ll notice that first I flash the hat in front of Otis and mark and reward each time that happens. This is so he starts to understand that the hat predicts a treat, and he feels good about the hat showing up. Now technically, what is happening here is that Otis looks at me and then I flash the hat and give him a treat (eye contact is already becoming a start button). It is not the end of the world if you just do some basic desensitization of the hat without thinking about start buttons for a few reps as long as you don’t reach the hat too close to your dog.
Step Three: Be intentional about eye contact as a start button for moving the hat toward your dog. Since we already shaped eye contact, that is a behavior Otis is likely to offer. I will only move the hat when he is looking at me. If Otis looks away from me and stops making eye contact, I stop moving the hat towards him and don’t move it any closer (you can still give a treat for this; just don’t mark). Make sure to go slowly! You will notice that I mark a lot even though I have only moved the hat a few inches. The trick here is not to push your dog too hard and to get them to consent to having the hat near them by continuing to look at you (or by doing another consent behavior that you select).
Step Four: Put the Hat on Your Dog. Since Otis continues to look at me the whole time, I can finally put the hat on him. If your dog continues to give consent through eye contact (or whatever start button behavior you chose), go ahead and try it! Remember if your dog looks away, pull that hat back (and give them a treat). They are allowed to say no. By letting them say no, they will say yes far more often (yay science!).
The Power of Choice Based Dog Training
One of the coolest parts about this is what happens when you give your dog the power of choice and control in dog training. By giving Otis the ability to opt in or out, I actually increase the frequency with which he opts in (COOL, right!?). Anyway, take this video or leave it (but know the actual camp videos are much much better than this 😂).
By the way, please don’t fret if you didn’t put a hat on your dog in this cooperative way in the past. Feel free to loop back if you’re interested. Also, your session may look different than mine. I chose a very simple behavior as my consent behavior (eye contact), but do what works for you (some other ideas include chin rest or when your dog looks at food in a bowl). The idea is to give your dog control over their environment, so they aren’t freaked out by a strange object coming toward them. The fun part of trying cooperative care with a hat is that it is low pressure. You don’t have to stress if your dog opts out or it takes many sessions to get the hat on since getting the hat on is not critical. Often times we think about cooperative care in moments when we don’t actually have the ability to give our dogs choice, and that isn’t the moment to try to work through this since “no” may not be something you can actually honor if it is medically necessary.
Have you tried putting a hat on your dog through cooperative care? If you try this, let us know how it goes! Don’t forget to tag @tailsofconnection on Facebook or Instagram and use the hashtag #tailsofconnection.
PS: Pin this article for later!
Cooperative Care: How Choice Based Dog Training Can Help With Grooming
Editor’s Note: If your dog had two ways to get treats and only one of them involved enduring something that they don’t like (aka getting their hair brushed), why would they ever choose the option that involved something they didn’t particularly enjoy? Because giving your dog the gift of choice AND control is magical (it is actually a primary reinforcer)! We are big fans of start buttons when it comes to working with our dogs. Recently, we were having a conversation with one of our friends, Logan Buie, and she talked about adding a second behavior option (in addition to the standard start button) that doesn’t result in us doing anything to the dog to help ensure that your dog actually has full choice and control (R+ can be coercive if the only way for the dog to access reinforcement is by doing something they really don’t feel comfortable with). Our co-founder, Christie Catan, was very intrigued and thought she would try this out with her dog, Otis. Watch the video above to see their real life cooperative care/start button training session, and keep reading for all the steps she followed to see how choice based dog training can help with grooming your dog.
A Little Background On Cooperative Care and A “No” Behavior
Cooperative care is rooted in empowering animals to be willing participants in their own care. In practice, this means we give them a way to "say” yes or no. We give them a way to say yes by turning a behavior into a start button. Practically speaking, this means we only take our action after the dog offers the specific start button behavior. The dog learns that if they don’t give that behavior, the the thing we are doing to do to them doesn’t happen. Therefore, they are in control! As you may have guessed, cooperative care hinges on the ability for your dog to “say” no. As with human relationships, anything other than a clear yes is a no (and no’s get rewarded too!). Let’s say your start button behavior for brushing your dog is your dog lying down on a mat. When they lie down, you brush them. If they don’t go lie down on the mat, it is a no, and it is important that we honor and reward that no. Sometimes our hopes for a training session can lead us to push for yes even though our dog is saying no, so the experiment I tried was to give a definitive “no” behavior to compliment the “yes” (start button) behavior. You can find information about how I set this up below.
My Experiment to See How Choice Based Dog Training Can Help With Grooming
Step One (Pick Your Activity): I picked an activity that Otis isn’t super fond of: Combing. Prior to this session, Otis did not have a start button for combing.
Christie Catan combs her dog, Otis's, hair during a training session for how choice based dog training can help with grooming.
Step Two (Present Your Dog With Two Options for Reinforcement): We presented Otis with two options for accessing reinforcement (treats): A) Touching a target; and B) Lying down on a mat. (Note: This is a mat Otis has never seen before, so he doesn’t have a big history with it.)
Step Three (Shape and Reward Your Dog for Interaction With Both Objects): We shaped and rewarded him to interact with both the mat and the target right before we started filming to create a little history of reinforcement.
Step Four (Add the Start Button Element): Then we added the start button element: If he laid down on the mat, we combed him and then gave him a treat. If he touched the target, he just got a treat tossed away (did not get combed). We never once cued him to lie on the mat. We did cue him a couple of times to touch the target to ensure that he knew that he could access reinforcement without having to be combed. (You may also have spotted some reset tosses done to get him off the mat or if he hesitated.) We know the science, but watching it play out is still so thrilling. He picked the mat time and time again. This is also the best body language I have seen from him around a comb.
More Reflections on the Importance of Choice in Cooperative Care
Pretty cool, huh!? Control is a primary reinforcer, and sometimes we forget that. Give your dog a choice and reward them for saying no...and watch how much more they will say yes!
By the way, I tried very hard not to bias Otis toward one behavior with my own body language, but I very well could have shown more excitement over the mat knowing where I was going with this. It wouldn’t have been intentional but that doesn’t rule it out 😂. Otis definitely gets MORE treats on the mat since it’s a duration behavior (though I toss treats off a lot to make it clear that I’ll reward him even if he leaves), and that is intentional. This is a dog who really doesn’t like being combed, so to see this much more excitement for the mat given all the other ways I am reinforcing him off the mat is a big, big win!
I had fun adding this second behavior option and can see how it would be helpful. I think if you have good communication with your dog and established trust, you likely won’t need it, but if I am honest, I think I made more progress by adding the target as an option. You can play around and see what you think!
Have you tried adding a second behavior option to cooperative care? If you try this, let us know how it goes! Don’t forget to tag @tailsofconnection on Facebook or Instagram and use the hashtag #tailsofconnection.
PS: Pin this post for later!
Make It Fun for Your Dog To Look Back at You Outside
The outdoors come with all sorts of sights, smells, and sounds, so it is helpful to teach your dog how to enjoy the world without totally forgetting that you exist. In this video above (and the written steps outlined below), we’ll show you some simple ways to build an automatic check in behavior (and even how to turn that into some recall practice). Your dog will learn that coming into you actually gets them access to fun things “out there,” and if you are able to move a bit, you can make yourself a really fun part of this game too (chasing YOU is fun!). Keep scrolling for those steps to work on this with your dog at home.
Step by Step: How to Make It Fun for Your Dog to Look Back at You Outside
Christie Catan looks at Hana, the American Staffordshire Terrier puppy, during a TOC training session for making it fun for your dog to look back at you outside.
Step One: To start to make it fun for your dog to look back at you outside. Begin by tossing some treats in the grass away from your dog and then back away from your dog. Simply wait while your dog sniffs to find the treats (try not to say "come" or use their name). You want them to make a choice to come to you
Step Two: When your dog comes to you (likely wondering if you have more treats), mark and reward (toss treats away from you).
Step Three: You can start to actually run away from your dog when they head toward you to build more speed and enthusiasm (chasing you is fun!).
Step Four: Once your dog has this down, you can add in a recall cue right before your dog turns if you want some recall practice.
How This Game Can Also Help Your Dog Make Good Choices
Turn distractions into cues for your dog to check in with you: This game relies on a simple out and back pattern where your dog is always returning to you. If your dog notices something before they turn to you (a person, another dog, etc.), it can become an environmental cue to check in with you as you repeatedly reinforce them for noticing that distraction and coming back to you. Want to know how this works?! Just look at what trainers call the ABC’s (antecedent, behavior, and consequence). The behavior is what the dog actually does (in this case, turn around and run to you). The consequence is what gets added or removed after the behavior (in this case, you are tossing a treat). The antecedent is everything that happens right before the behavior that leads to the behavior. If your dog finishes eating a treat and looks up and sees a person before they decide to turn around and run to you, seeing that person is part of the antecedent and can become a cue that actually will tell your dog to check in with you in the future without you having to ask for this behavior. So if your dog is off leash somewhere and spots someone and you have practiced this game a fair bit with people as distractions, your dog may very well see that person and choose to check in with you rather than darting over to the person. Cool, right? If this is a behavior you really want, know that there are ways you can be super intentional about teaching this within the context of this game and many other ways (maybe that’s an article for another time!).
Plus, it would be hard for us to oversell how valuable it is to reinforce your dog for turning back to you. If you make looking back at you and choosing to come to you behaviors that pay, you will see more and more of them without having to nag your dog. So if you are out on a walk and find yourself thinking, “Why does my dog look back at me on walks,” you can remind yourself it is from all the little times you reinforced them for flipping around to you!
How Focus Games for Dogs Can Help With Attention Outside
It is pretty hard to get your dog to do anything if you don’t actually have their attention. In the Tails of Connection Challenge we have a whole day devoted to attention games, where you teach your dog that it is awesome to focus on you and remind them that they should look at you when you call their name (plus it’s always good to show them that their name is a positive thing). We play these games inside to start and also include a bonus video on how to start to capture your dog’s attention on walks outside. To sign up for the Tails of Connection Challenge, click here.
PS: Pin this post for later!
How to Teach Your Dog Recall With Distractions
Have you ever recalled your dog to come to you outside and never felt so ignored? Good news: That "failure" or slow recall simply tells you where your gaps are, and lucky for you, recall training is a lot of fun! We thought it would be fun to show you a session TOC Co-Founder, Christie Catan, did with her dog, Otis, to work through a gap she recently found in their recall training. Keep reading for some behind the scenes context from Christie and Otis’s training session and all of the steps written out for how to teach your dog recall with distractions.
Are there any gaps in your dog’s recall that you are currently working through? If you did the TOC Challenge or Camp TOC, you probably know by now that Otis is one of those dogs who could convince a stranger that I never feed him. He LOVES to eat. Recently, I saw him going for something on the ground and tried recalling him when he was almost to the food. Instead of flipping around to me, he moved even faster to get to the thing he wanted to eat 😜. While I wasn't thrilled, I also wasn't mad. It is my responsibility to teach Otis how to recall, and by not giving me the behavior when I cued it there, Otis simply showed me an area where he wasn't able to do what I was asking. Then comes the fun part: How do I create some training sessions that mimic my real life "failed" recall, so I can start showing Otis how to recall in that situation?
Step by Step: How to Teach Your Dog Recall With Distractions
Above, Christie and Otis train in front of an x-pen that has a bowl of chicken inside of it as part of a training session for how to teach your dog to recall distractions.
Step One (Figure Out Your Gap): I knew my gap was in recalling Otis away from something he wanted to eat when he was close to it (let’s say less than eight feet away from it for now) and off leash.
Step Two (Select Your Distraction): For our training session, I decided to use chicken as the distraction (it is high value but not the highest value possible) and chose to work in a relatively small and clear space (I wanted to be close enough to him to make this recall feasible to start). I also used chicken I had on me as my reinforcer.
Step Three (Make the Distraction Easier For Your Dog to Recall From): I put some chicken into a bowl and then put that bowl inside of an x-pen (Otis knew the chicken was there but had no way to get it). This allowed me to build up a bit of a reinforcement history with Otis for recalling away from that chicken while off leash without having to worry about him failing a recall (management for the win!).
Step Four (Start to Take Off the Training Wheels): This started to look too easy in a hurry, so I removed the x-pen. Now, I could have put a leash on Otis at this point, but I chose not to (mostly because I knew it would force me to really think through my training and how to progress without lumping criteria - aka asking for too much from Otis before he is ready). I knew this would be hard, so I focused on recalling him early in his approach to the chicken (aka not waiting for him to be two inches away from it), marking behavior quickly (I was marking him the moment he turned instead of waiting for him to get all the way to me), and using some of my own body movement after the recall cue to help him out. At some point, I want him to recall off chicken when he is about to eat it, but I know that day is not today. So I am starting where we are and will work up to that.
Step Five (Release to that Reward): At the very end of the clip, you will notice that I release him to go eat the distraction chicken as his reward. I ran out of chicken, but if I were a betting gal, I would bet that that release as a reward will be an even greater reinforcer of recall here, so I may try that more in the next session we do (remember, the dog's behavior tells us what is reinforcing). You can play around with your rewards to see what is most reinforcing! For example, a treat tossed away that your dog gets to chase may be much more motivating than simply handing your dog a treat.
How to Improve Your Dog’s Recall (It Takes More Than This!)
Recall has to be fun! Think about it for a second. There are emotions tied to everything your dog does. What type of emotion will work in your favor with a recall behavior? In our experience, it tends to be enthusiastic, happy, and optimistic. So if you are viewing recall training as a chore, ask yourself what kind of emotions you might be bringing.
Recall involves relationship. It just does. There is more to it than that, but it is so important not to forget or downplay this piece. Simply doing fun things with your dog will improve your recall — especially playing with them! I can do a lot to strengthen a recall using food, but I have found that I actually need toys and play to really really build that crazy speed with recall (it makes sense when you think about prey drive).
There is a lot that goes into recall and building it up looks different for different dogs. The video and steps in this article are certainly not a recall protocol. This is just an example of how I started working through a gap I found. Hopefully this can give you some ideas on how to work through areas where your dog is not able to recall.
That is all for now! We would love to know if you’re working on how to improve your dog’s recall and what distractions you are working through or want to work through. Tag us on Instagram or Facebook (@Tailsofconnection) and use the hashtag #tailsofconnection.
PS: Pin this article for later!
How to Train Your Dog to Enjoy a Collar Grab
It is so important that your dog enjoys or tolerates a collar grab as a safety measure. At some point in your puppy or dog's life, they might need to be caught while they are loose, and we want them to feel comfortable with this. Grabbing a collar can arouse some dogs who may start nipping at your hand and intimidate other dogs who may back away to try to prevent you from being able to grab their collar. You can teach them to enjoy having their collar grabbed by making the collar grab predict something they like (food). In this video above, Gwen Podulka, CPDT-ka and founder of Dog Trained, is working on collar grabs with elkhound puppy, Nova. Keep scrolling for the written steps to help train your dog to enjoy a collar grab.
Step by Step: Collar Grab Dog Training
Gwen kneels with Nova, the Elkhound puppy, during a training session for collar grabs.
Step One: If you can't grab the collar without your dog getting mouthy or frightened, you can show them what you are going to do first (the physical gesture of reaching toward them) but then give them a treat WHILE you reach for that collar (you will see Gwen do this in the first rep in the video above).
Step Two: Once your dog is comfortable, you can move to reaching and grabbing your dog’s collar FIRST and THEN giving them a treat (this is what Gwen does in the later reps in the video). That is ultimately the order we want: one reach and grab collar THEN two deliver a treat (we need that collar grab to be the predictor of good things in order for your dog to build up good feelings about it).
Step Three: You can then practice these grabs from various positions: to the side of your dog, in front of your dog, behind your dog, sitting down, standing up, etc. (As a note, you could add a step and present your hand without fully grabbing the collar followed by a treat to start making the act of reaching more pleasant for your dog before you ever work up to grabbing the collar.).
Behind the Scenes: A Special Filming Note from Gwen
I had someone ask a really great question about the mask. They said “Why wear one since the likelihood that dogs transmit Covid is extremely low?” It gave me the great excuse to mention that we train in masks in my studio in Washington, DC a) because there is still another person in studio and we can’t always maintain distance but more importantly we REALLY want puppies to learn that masks = fun and they don’t need to worry about someone wearing one around them.
To learn more about Gwen and her training business, click here. For more TOC training tutorials, keep learning and training here.
Pin this article for later!
Training Tutorial: How to Train Your Dog to Focus on You
Wouldn’t it be awesome if you could make the things that really distract your dog become the cues that tell them to look at you?! Good news! You can begin to train your dog to focus on you by simply capturing behavior - aka rewarding your dog for what they’re already offering! This can make walks (among so many other activities) much more enjoyable! In the video above, Juliana Willems, CPDT-KA, and owner and head trainer at JW Dog Training & Behavior, explains how to find the smallest possible behavior to reward your dog for at first. Then she says to build on that until you have a dog who will happily and easily give you attention. Be sure to watch the whole video for a more thorough explanation and a great demo, and keep scrolling for the written steps for how to train your dog to focus on you.
Step by Step: How to Train Your Dog to Focus on You
✏️Pre-Reqs:
- A conditioned marker (aka yes, good, or clicker). If you’re interested in all things markers, check out the Tails of Connection Challenge.
📍 Setup:
- Line up some distractions on the ground, put your dog’s leash on, and have your treats ready. Start far enough away from distractions to keep your dog successful.
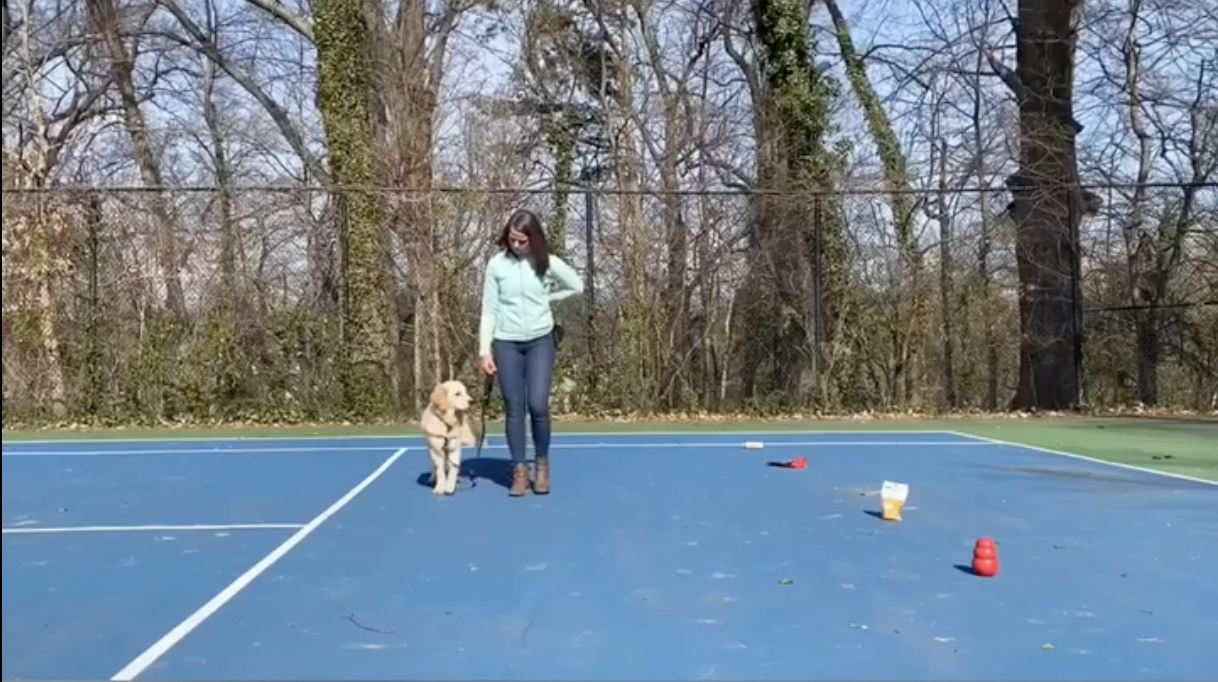
Trainer Juliana Wilems walks Austin the dog past cones as part of a training session for “how to train your dog to focus on you.”
✅Basic Steps:
Step One: Begin walking parallel to the distractions. The moment your dog looks at the distraction, mark and give them a treat. (Yes, you read that right! You want your dog to actually look at the distraction to start because you are going to teach them how to cope in real life when they notice things.)
Step Two: Slowly move closer to distractions (may take multiple sessions). Continue to mark and reward when your dog first notices the distraction.
Step Three: In time, you will be able to increase your criteria around distractions by asking for a behavior like eye contact. This means instead of marking the distraction, you will let your dog notice the distraction and wait for your dog to look back at you. You will then mark and reward that eye contact. (You may pick a different behavior for certain distractions). At this point, you are marking and rewarding your dog for noticing the distraction and disengaging from it on their own.
Why This Is a Great Strategy for How To Teach a Dog To Focus
Editor’s Note from TOC co-founder, Christie Catan: This is one of my absolute favorite things to do with puppies and dogs. It might feel counterintuitive to you at first to mark your dog for looking away from you, but remember, your dog hasn’t left to go engage with that distraction yet if they have only just noticed it. Simply marking the distractions starts to create beautiful behavior and takes so little effort on your part -- you just have to pay attention to your environment and your dog and have some treats on you.
Pin this article for later!
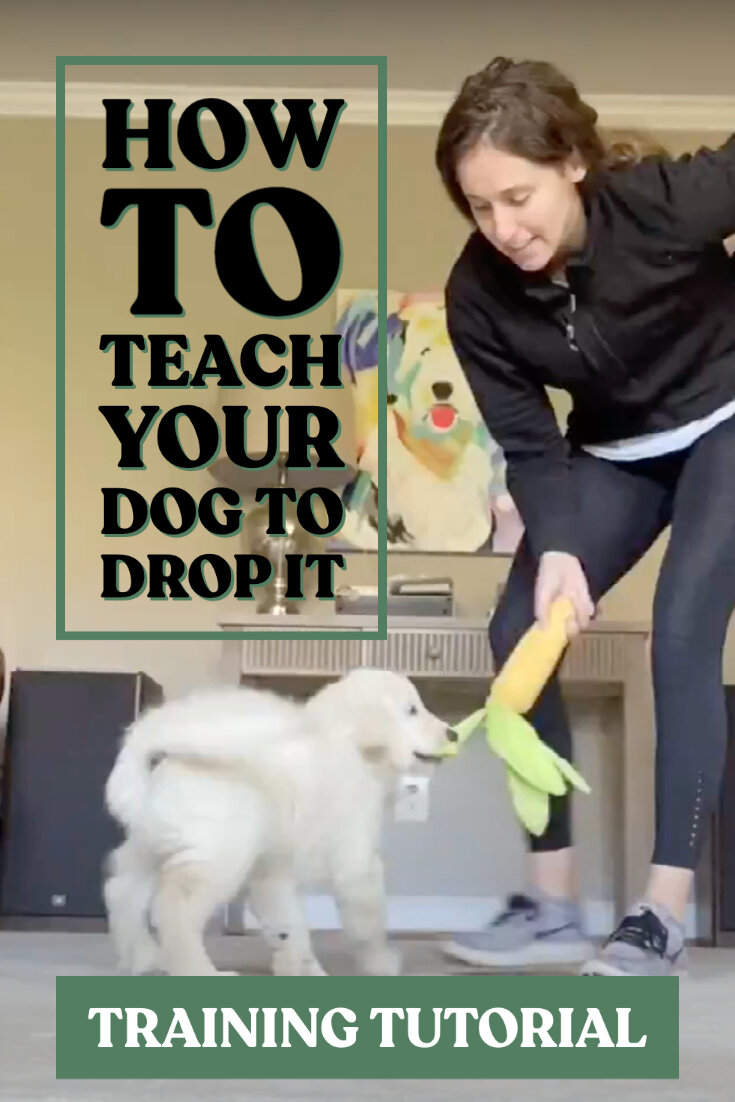
Training Tutorial: How to Teach Your Dog to Drop It
When you visualize "drop it,” do you picture your dog letting go of something? What would happen if we started teaching drop it so that our dogs (at first) think it means something awesome is going to be given to them!? We learned this method from Chirag Patel, and it is our absolute favorite (for puppies and dogs). Keep scrolling for our step by step breakdown of how to teach your dog to drop it (which leads to a great enthusiastic drop behavior):
Step by Step: How to Teach Your Dog to Drop It
Step One: "Condition your drop cue" by saying your cue and then scattering treats on the ground (wave your hand in the treats for a second when you do this to draw their attention there and continue to make your hands near food a good thing). This may feel silly because your dog won't have anything in their mouth to drop! But remember, we just want them to think that "something awesome is coming" when they hear "drop," so we are making it predict food. Think about it - what do they have to do in order to eat food? OPEN THEIR MOUTH! Ta-da -- that is the foundation for drop! (Tip: Make sure you say “drop” before you show or reach for the treats. “Drop” must predict incoming treats, so they need to be two separate events.)
Step Two: Once you are seeing anticipation in your dog's body after saying the drop cue, start adding in some objects for them to actually bite onto. Start with more neutral objects and work up to higher value objects. At first, you may still have to almost immediately scatter those treats on the ground after saying your drop cue.
Step Three: Start to build a pause in after you say your drop cue to see if they drop the object on their own (because if they think great food is coming, they have to open their mouth to eat it ... so you will get an out if the cue is conditioned enough). If they do drop the object on their own after they hear the cue, mark the behavior (say "yes" or click) and then scatter treats on the ground! If they don't drop it right away, no problem - just scatter the treats without marking.
Step Four: Keep working through various objects (building in that pause) until you very consistently get an out behavior as soon as you cue it and are then able to mark and reinforce it with treat scatters (or whatever you choose). When you are ready, practice in new settings (try outdoors if you have been working on this indoors the whole time).
Why Reinforcing Drop It Pays Off Over Time
I also reinforce this drop behavior almost every single time. Because of how we teach it, dogs will drop things FAST even without a reward, but I want to keep "money in the bank" on this behavior since the city has a strange supply of chicken wings on the sidewalks. However, my reinforcement certainly changes over time as my dog gets good at this (aka I am not doing treat scatters forever, but hey, you totally could!). Here are some of the things I now use to reinforce a drop: my dog drops a chicken wing and I reward by finding a stick from the ground to toss or play tug with; my dog drops another dog's ball at the field and I reinforce that by tossing my ball to them; my dog drops a stick they carried outside before we go inside and I reward by running away and letting him chase me (and with lots of praise and scratches when they arrive). To be honest, I have even rewarded some harder "real life" drops indoors with "let's go get a treat" and I walk over to the cabinet with my dog to give them one (sometimes I am just not feeling inspired and this is easy). I still use treats plenty because they are fast and efficient! But I am offering the other examples because some people get hung up on not wanting to use treats for some reason. I can get away with just using praise and pets because I have built those up as good rewards over time, but I try to find some way to make the reward even higher value if I can since this behavior can be life-saving.
Pro Tip: Your Voice Matters When Training a Dog to Drop
Fun fact: I try to keep "drop" incredibly positive and happy. I actually teach it to dogs in a higher pitch because I can't angrily say "drop" in that tone (setting myself up for success!). If you are someone who is likely going to panic and scream this at your dog, you can actually condition your dog to that tone, so it is positive instead of scary. We don't want our dogs to think this is a scary or threatening cue. Because if dogs feel threatened or scared, you are more likely to get a dog who does the exact opposite thing you want and actually runs away with the object (and since this is a behavior that can save their life - we definitely don't want to accidentally teach that).
PS: Pin this article for later!
Training Tutorial: How to Teach Your Dog to Leave It
Isn’t “Leave It” one of those phrases that seems to just fly out of your mouth as soon as a new puppy or dog comes home? That’s often before your dog has learned what those words actually mean. We thought it would be fun to quickly show you our favorite way to teach “leave it!” Keep scrolling for our step by step process on how to teach your dog to leave it, which we also breakdown in the video above. We’ll show you how you can teach either an implied leave it (that means you teach your dog you want them to ignore that thing by default) and a cued leave it (where your dog understands how to respond when you say “leave it”).
What is “Leave It” in Dog Training?
The way we teach “leave it” will initially tell your dog to look at you immediately. Teaching them what to do provides way more clarity up front than trying to teach them what NOT to do. Leave it is a cue you would use before your dog actually puts something in their mouth whereas the “drop it” cue is something you would use if your dog already has something in their mouth. There are other moments you can use “leave it,” but we will keep it simple for now (fun fact: there are also a million other awesome cues you can use instead of leave it -- like your recall cue!).
✅ Step by Step: How to Teach Your Dog to Leave It
1️⃣ STEP ONE: Reward your dog for Eye Contact
TOC co-founder, Christie Catan, rewards Colby, the golden retriever puppy, for eye contact during their training session for how to teach your dog to leave it.
In this step, you are simply telling your dog up front how they will win this entire “Leave It” game: Eye Contact. To start, sit in front of your dog and wait. The moment your dog looks at you, mark and give them a treat. Keep repeating this until your dog is constantly looking at you (aka they know how to win the game). Eye contact is going to be what “leave it” means for your dog when you teach it initially to make it super clear for them.
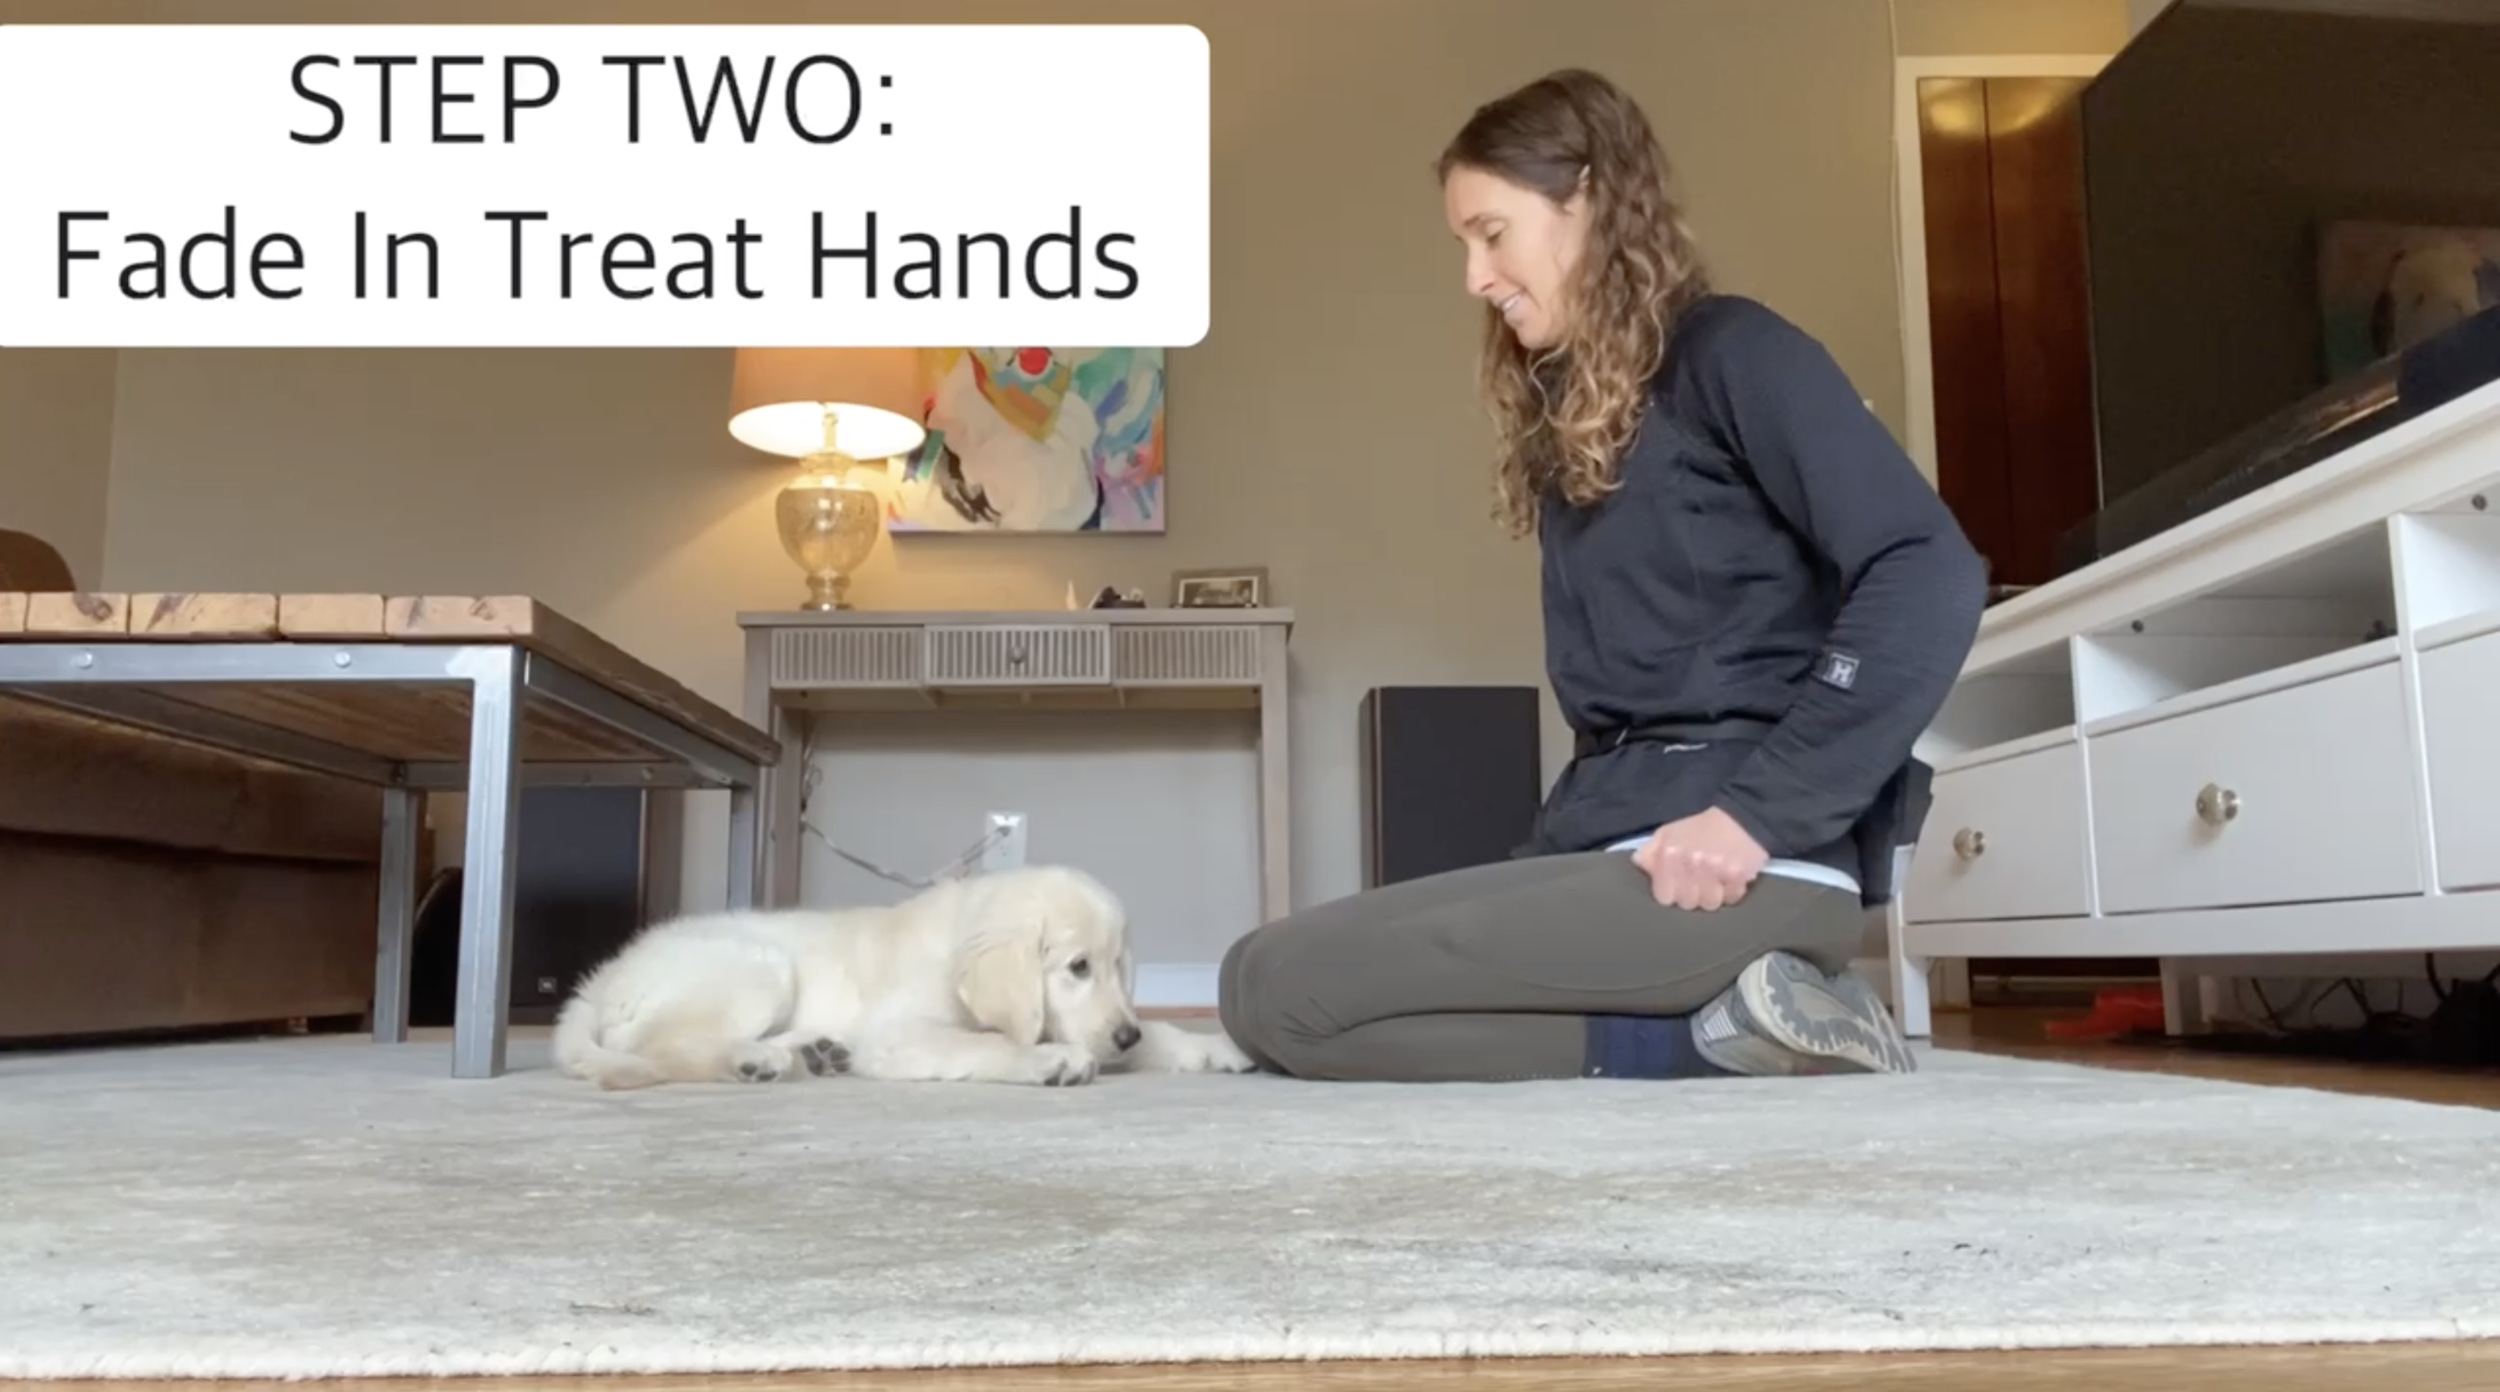
2️⃣ STEP TWO: Fade In your Treat Hands
With food in your hands, make closed fists behind your back. Slowly creep them around your hips and down your legs toward your knees through various repetitions. Still mark and reward your dog everytime they make eye contact (the way to win the game is still the same). If your dog is stuck staring at the treats, you may need to back your hands up a bit and work up the “line” more slowly. Do not say “leave it” yet (we want the behavior consistent first). You want your dog to win -- so move at the pace that makes that possible. Keep doing this until your closed fist treat hands are in your lap right in front of your dog. You are actually building a calm default behavior for your dog when you have food in your hands (and it isn’t one where your dog mugs your hands trying to get the food).
3️⃣ STEP THREE: Open your Palms
With some food in both of your hands behind your back, flash one hand out (with food in it) with your palm open (if you need to start with it closed, that is fine too). Your dog will likely look at your open hand, and if you wait a second, your dog is likely going to look at you since that is how they have won every other variation of this game! When they look at you, mark and reward. (Looking away from the food in that outstretched hand to look at you looks a whole lot like a leave it, doesn’t it?!)
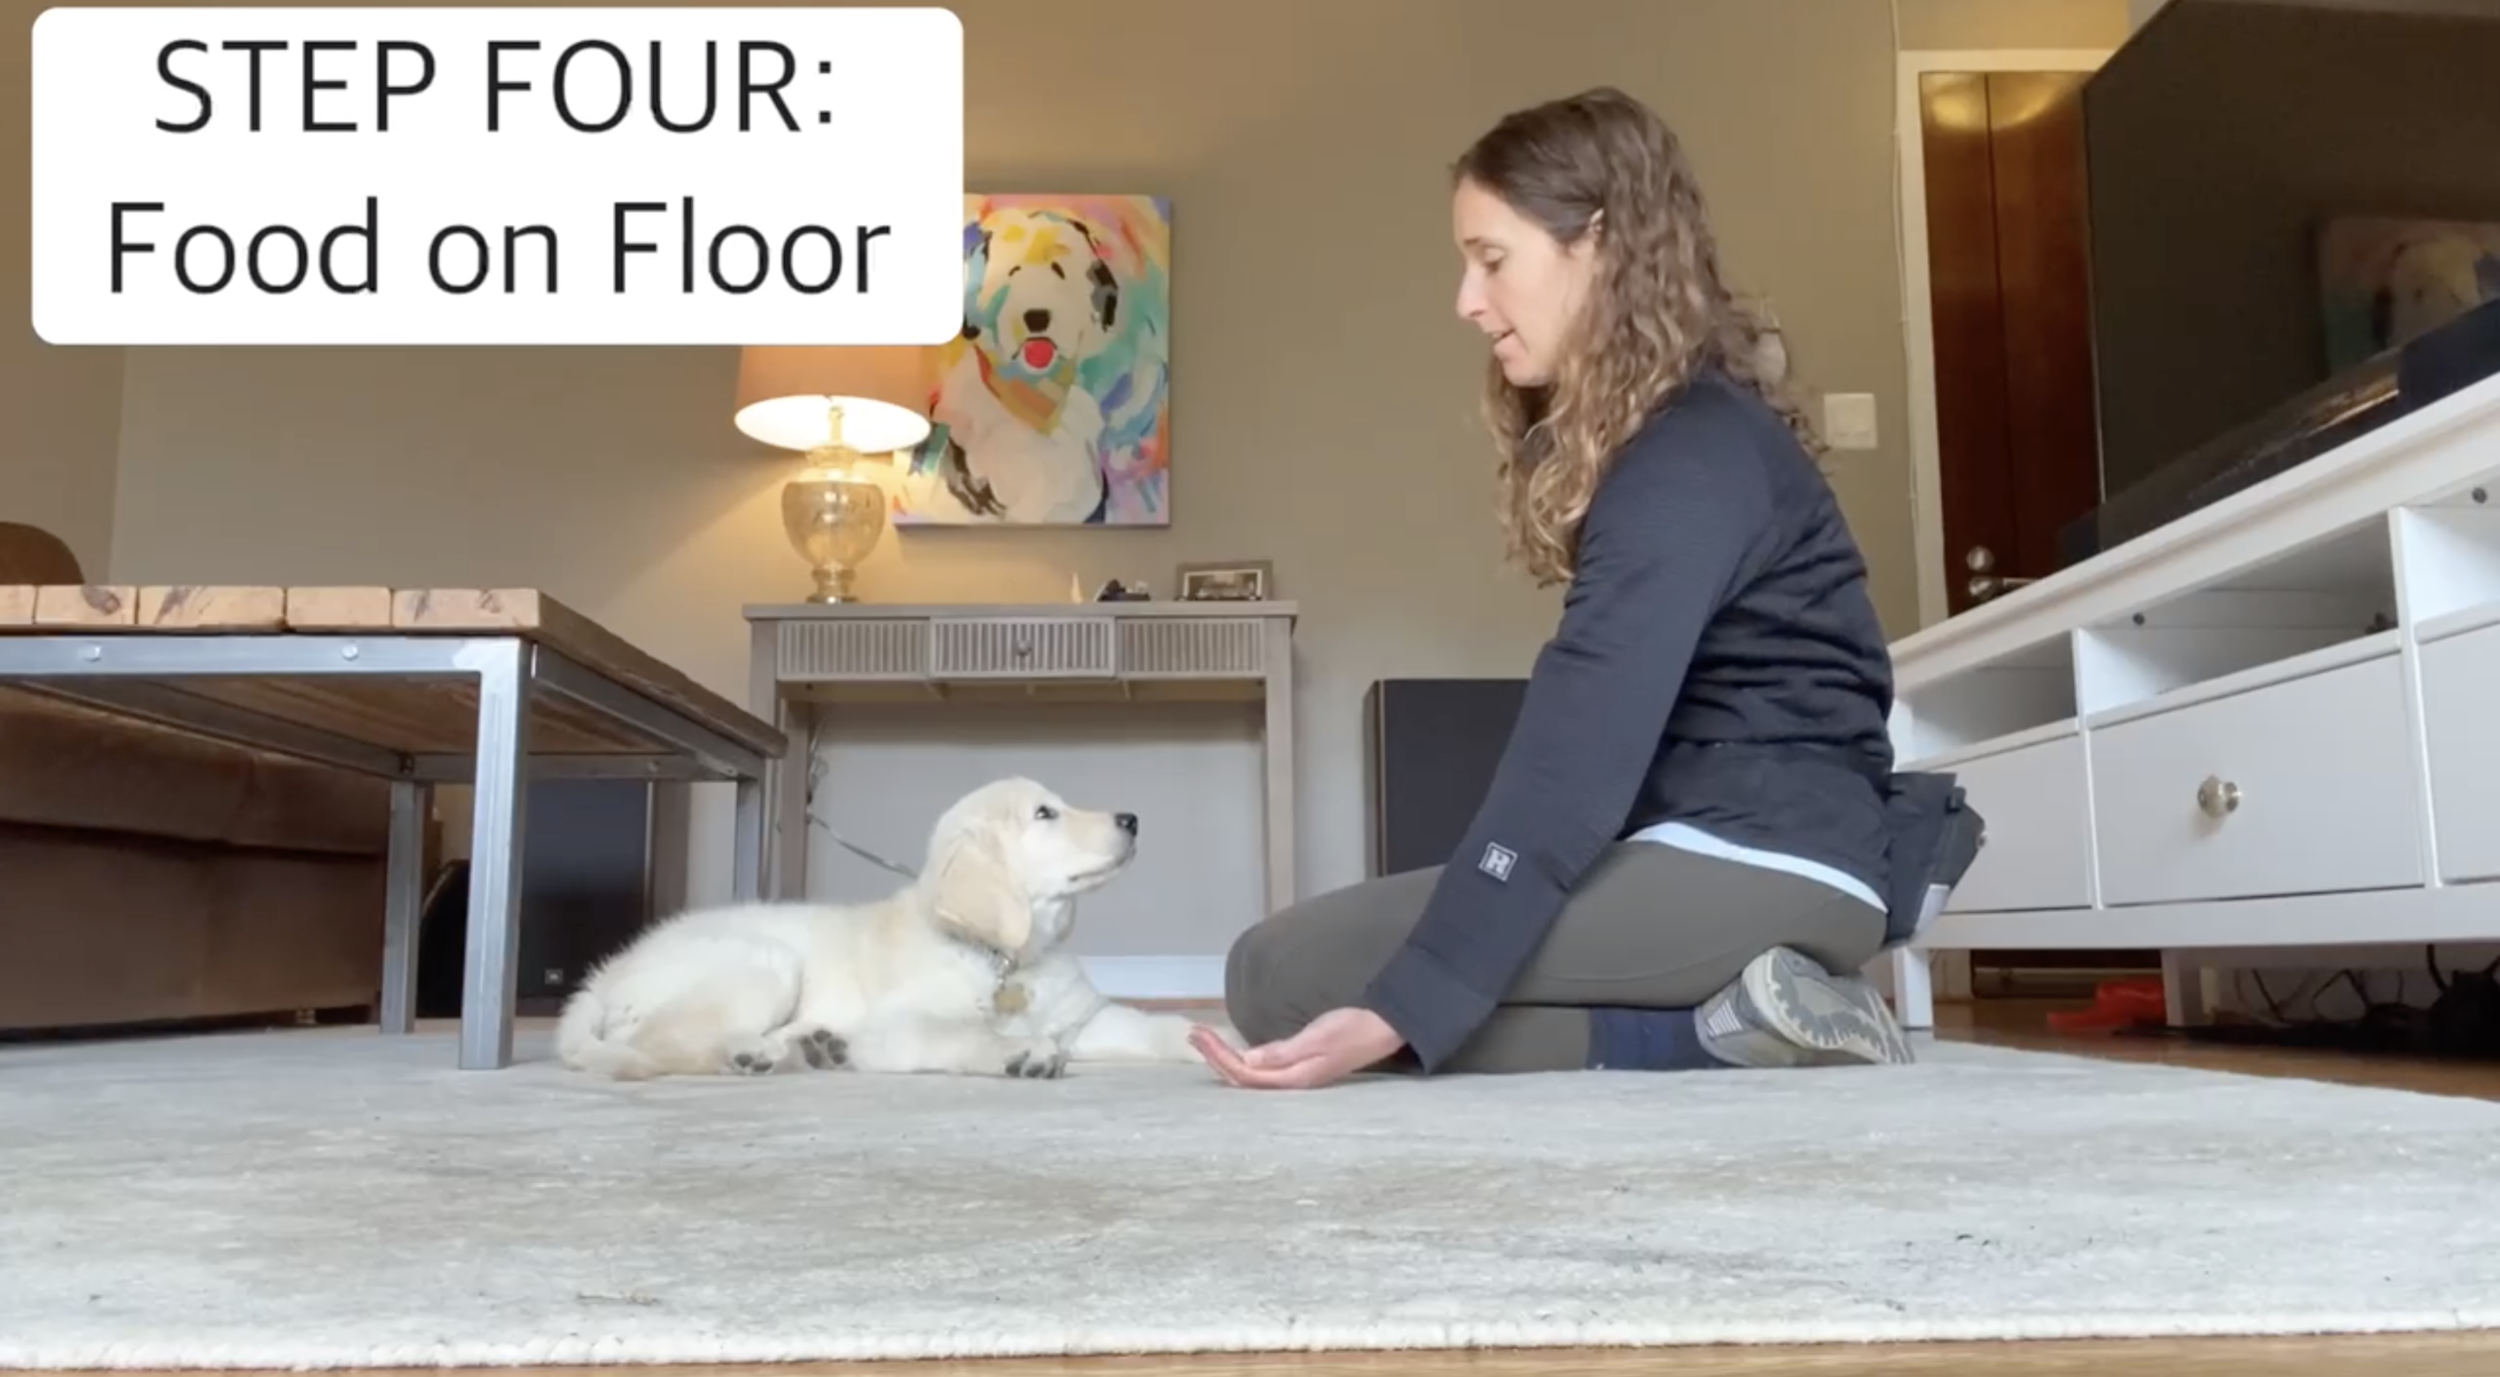
4️⃣ STEP FOUR: put Food on Floor
Slowly progress to putting the food on the floor. Perhaps start by flashing your food hand out and resting your other hand on the floor. Take baby steps with lots of reinforcement along the way to help your dog understand that eye contact is still the way to win this game. You are still not saying “leave it.”
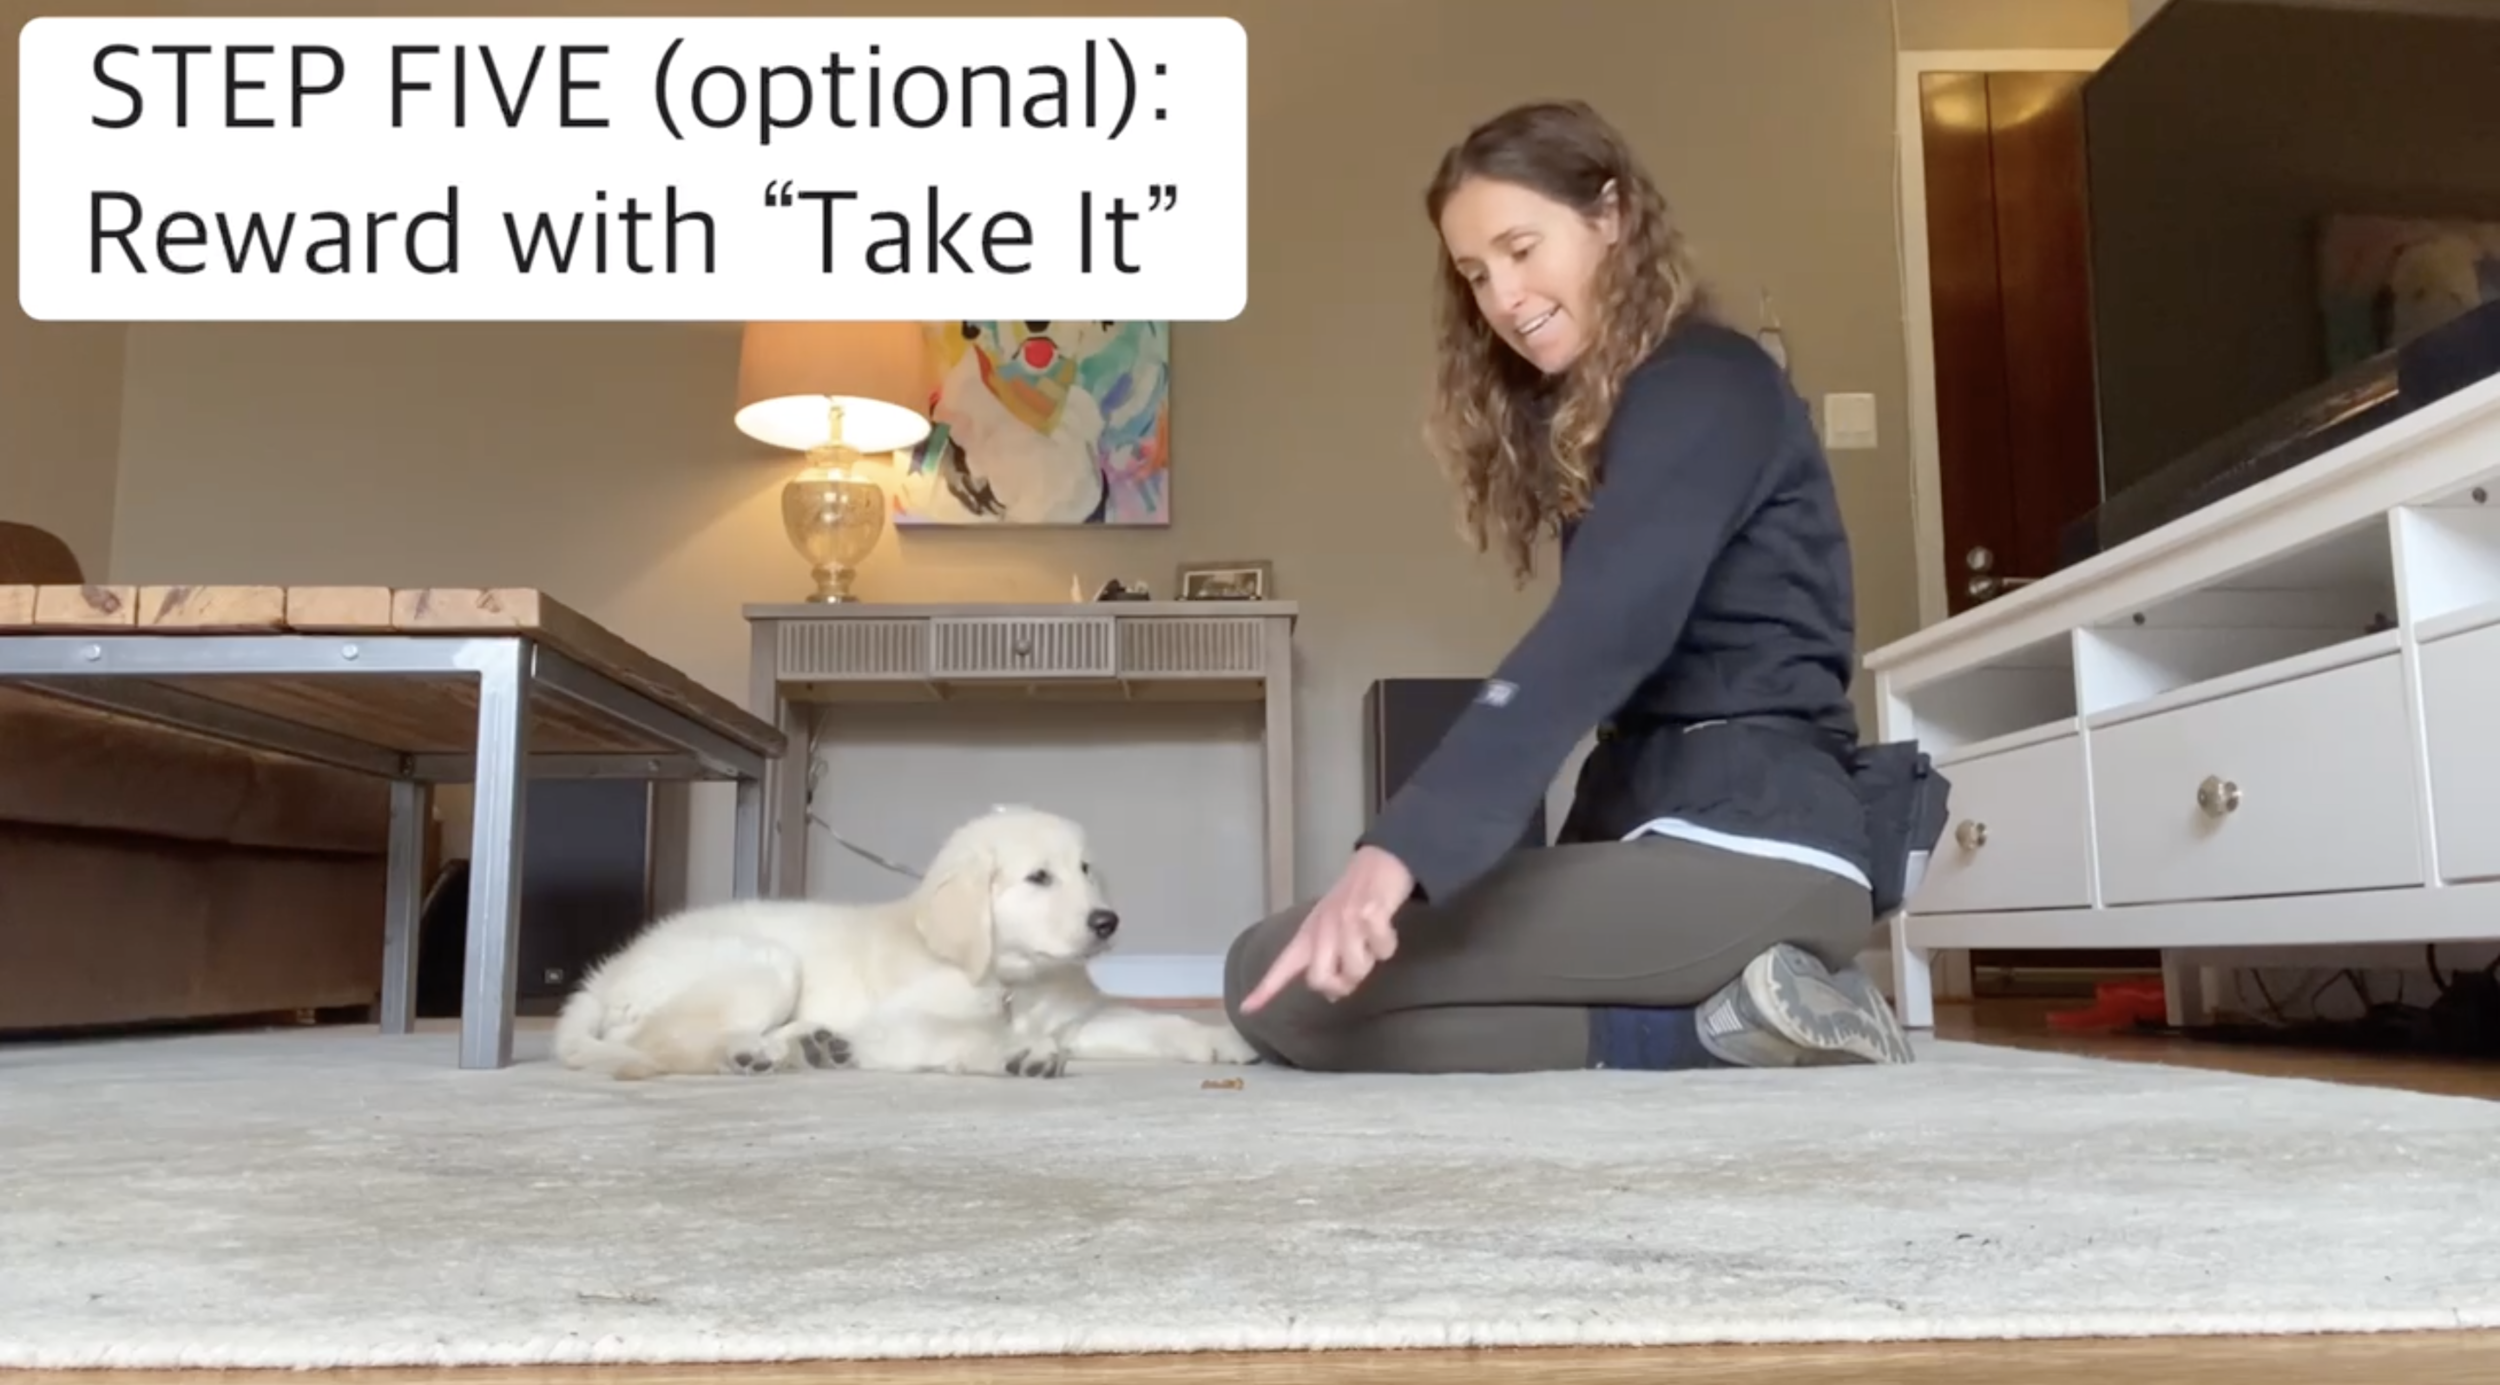
5️⃣ STEP FIVE: Reward with “Take IT”(Optional)
Once your dog is consistently looking at you in the presence of food on the ground, you can mark and reward with “take it” (say “take it” and then point to the food to let your dog know they can have it).
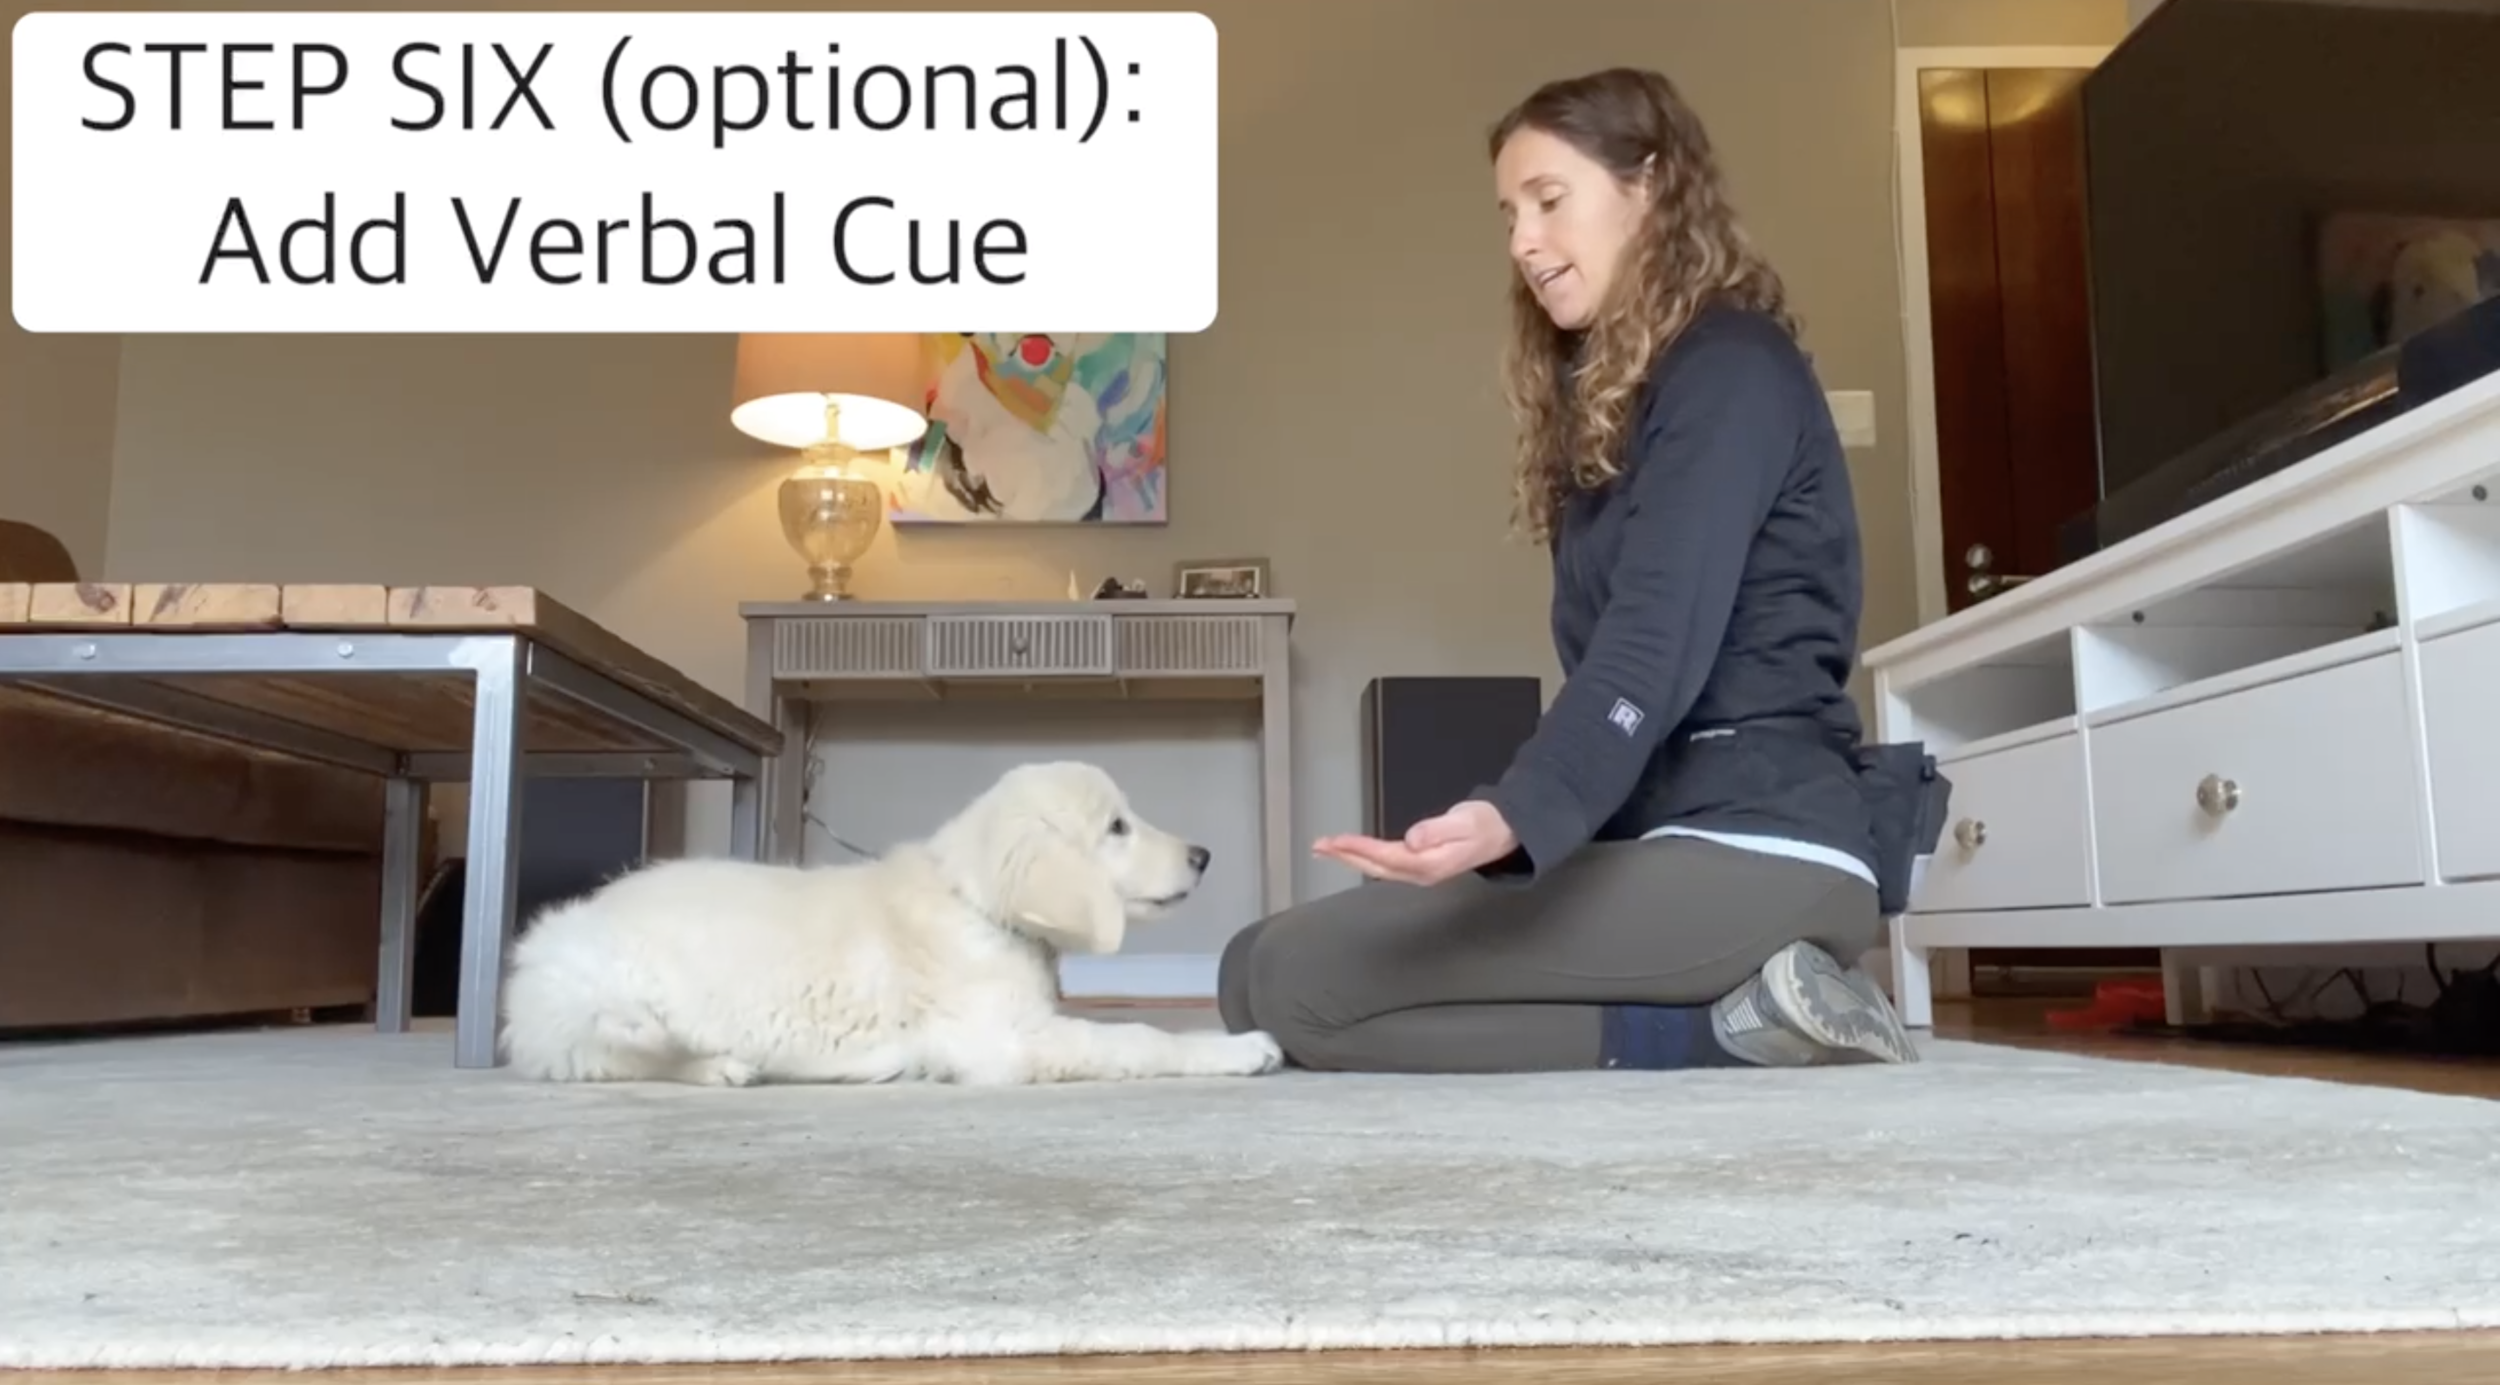
6️⃣ STEP SIX: Add the Verbal Cue Leave It (Optional)
Once your dog consistently looks away from your food hand when you flash it out, you can add a verbal cue (aka say “leave it” when you flash your hand). Since your dog already knows how to win this game without that cue, you just need to mark and reward when they look at you when you do say the cue to associate the behavior they are already giving you with the verbal cue you choose.
📝 Additional Notes on How to Train Leave It
This is such an effective way to start to teach “leave it” because you are showing your dog the behavior you want (“look at me”) rather than trying to teach the more abstract behavior of “don’t do what you are doing.” Having clear criteria (aka rules for how to win) creates a super strong foundation for this behavior! You can then start to practice this with more and more objects and in more and more settings (aka start to proof and generalize the behavior).
Note, if you want your dog to always leave something as their default, we recommend teaching an “implied leave it” (this means you practice the behavior of leaving it but never use the verbal cue). I tend to teach an implied leave it for things I just always want my dog to leave as a general rule, so I don’t have to constantly say “leave it” (for example, I never really want my pup to eat rocks, so if they tend to want to eat those, I teach an implied leave it). You can bring in nature from outside and practice this exact game using a pinecone! And as far as verbal cues go, you may find some of your other cues work just as well (for example, I use my dog’s name, a quick kissy noise, or my recall cue in situations where people might say “leave it” since those cues have super strong responses and very clear criteria).
Follow @Tailsofconnection on Instagram for more training tutorials.
PS: Pin this post for later.
Christie sits on the ground with Colby the golden retriever during a leave it training session.
Training Tutorial: Learn a More Painless Way to Give Your Dog Eye Drops
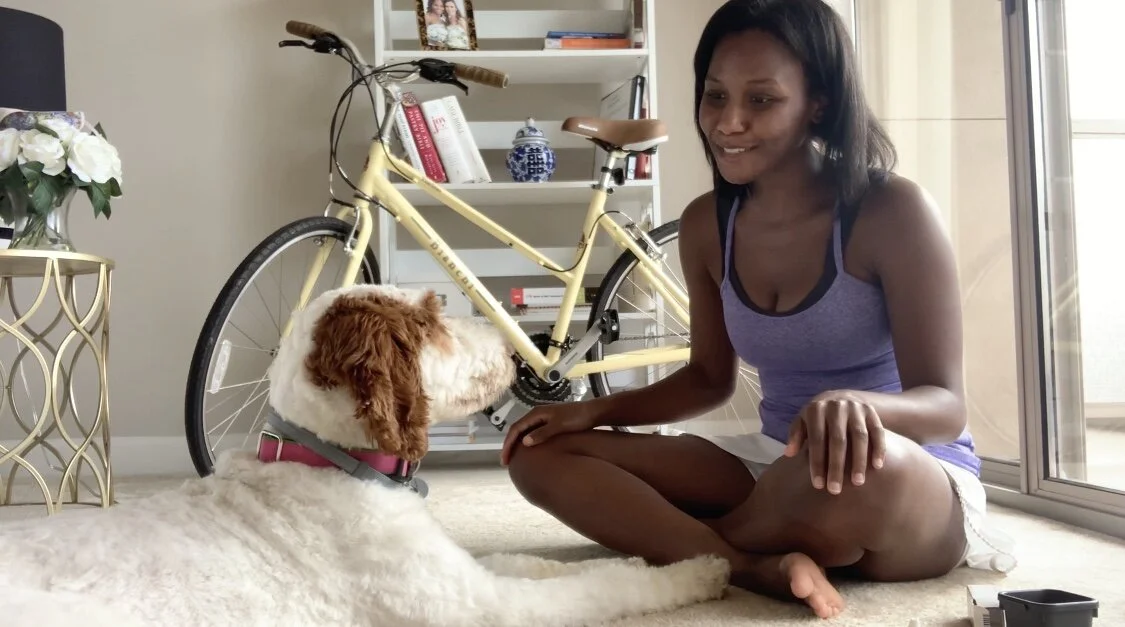
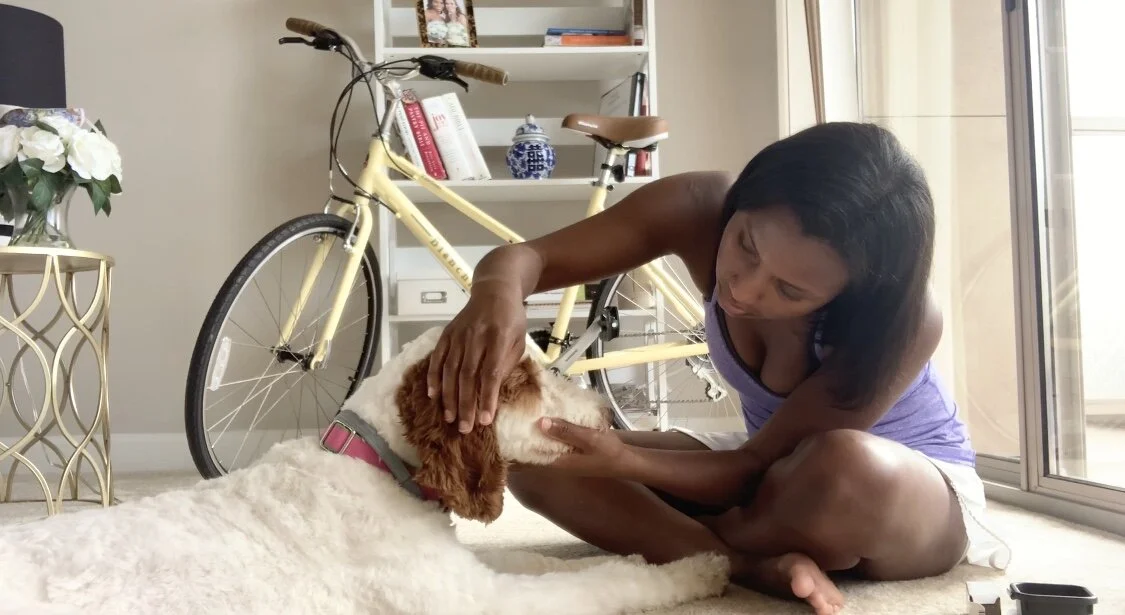
Editor’s Note: Not long after I adopted my dog Sully, I had to give her eye drops, and I was nearly in tears. She was so afraid that she was snarling and snapping, and I wished I’d had the time to make the experience more pleasant for her before actually needing to give her eye drops. This week we’re so excited to bring you a special training tutorial focused on desensitizing your dog to eye drops from our friend Lisette Rossman, who lives with her eight month old red and white parti goldendoodle, Lucy, in Washington, DC (she is currently an apprentice trainer under our friend and owner of DogTrained, Gwen Podulka, CPDT-KA). We hope that after watching and reading Lisette’s work, you can partner with your dog to make the whole eye drop process more painless well before they would ever actually need the drops.
✅Step by Step: How to Desensitize Your Dog to Eye Drops
When people get a new dog, have you noticed that cooperative care is rarely at the top of the list of things they are excited to do? It tends to be something they save for later, but there are so many reasons why it is something worth prioritizing! Spending time working on cooperative care can save you and your dog so much heartache and stress if and when your dog needs a medical procedure in the future.
Step One: Work on Consent Behavior With Your Dog
Lucy, Lisette’s Goldendoodle, offers her eye contact at their apartment in Washington, DC.
When Lucy was a puppy, the first thing that we worked on was consent behavior. For Lucy, that meant giving me eye contact, so I knew that she was ready to engage with me. You can go with whatever consent behavior makes sense for you and your dog, but if you want to use eye contact too, simply wait until your dog gives your eye contact and then mark and reward them with a treat. We will turn this behavior into a “start button” in the next step.
Step Two: Introduce Your Hand Coming Toward Their Face Using a Start Button
This first step is simply getting them used to your hand coming toward their face. Wait for your dog to look at you (this is the “start button” your dog will use to tell you they are ready) and then start moving your hand in your dog’s directions and mark and reward them (go nice and slowly here if you need to). If at any time your dog looks away or gets up and leaves, let them do that because that means that they 1) aren’t ready to engage; 2) it is too much for them; or 3) they just want a break. (Pssst...You can toss a treat when they opt out too!). Here is the order: Your dog looks at you → you present your hand (possibly move it toward their face) → mark and treat. You should also give them some treats for not looking at you to make sure they know they have a choice.
In step two, after Lucy looks at Lisette, Lisette shows her hands and then gives Lucy a treat.
Step Three: Work On Getting Your dog Comfortable with General Face Handling
In step three, Lucy rests her head on Lisette’s hand as a way to tell her that she is ready for more face handling. Then Lisette begins touching her face and rewarding her.
As soon as they are comfortable with your hand coming toward their face, move onto actually touching their face. For Lucy, the main areas that I worked on were her muzzle, her eyes and then the top of her head. You can still use eye contact as a start button behavior. If your dog has a chin rest, that can be an awesome constant behavior or start button for face handling. Either way, wait for consent and then touch your dog’s face gently, mark, and feed. Note: Lucy is used to this but your dog might not immediately put their head in your hand. This takes time.
Step Four: Select and Present the Eyedropper Tool to Your Dog
Next, find the object that you are going to work with. When Lucy was a puppy, I used a close-capped pen because that is what I had around, but you could also use a cotton ball or any object that you think would be helpful for this exercise. Because Lucy did get conjunctivitis, I do have an empty eye-dropper bottle here, which I will use, but again choose whatever object you want to for this exercise. You want to do some basic classical conditioning to create a positive association with the object, so present the object and then give them a treat. Ultimately, your dog should have a positive or neutral response to the presented object as it is part of their normal routine (we don’t want this bottle to turn into something crazy exciting).
In step four, Lisette shows Lucy the eye dropper and then gives her a treat to create a positive and calm association with the object.
💡Tip: One thing to note is that when I was working with Lucy as a puppy, we worked really hard to capture calmness. Whenever you are doing a medical procedure, calmness is really important. For example, if Lucy was super excited to see this eye-dropper bottle and was moving everywhere, that would ultimately make it really hard for me to put in her eye drops. So calmness, in conjunction with having a positive association with whatever object you are using, is crucial.
Step Five: Work on Moving the Eyedropper Object Toward Your Dog’s Face
Once your dog is comfortable with seeing the object, work on moving it towards their face. Move it a couple of inches and give them a treat. Again, Lucy is used to this, but look for your dog to give you eye contact to let you know that they are still comfortable with what you are doing (you could also use a chin rest as you consent behavior, which will give you a very clear indication of how your dog is doing). The order you want here is: your dog offers you consent/start button behavior → you move the object toward your dog’s face → mark and give your dog a treat. Remember, if they pick their head up or look away, stop (and still give a treat because opting out is a fine choice and actually makes it more likely for them to opt in).
Step Six: Simulate Using the Eyedropper Object on Your Dog
In step six, Lisette’s hard work with Lucy culminates with her simulating administering an eye drop to prepare Lucy for the future.
Once they are comfortable with the object coming toward them, work on simulating putting in the eye drops. In the beginning, when Lucy was a puppy, her consent behavior was giving me eye contact. As she got older, we transitioned that consent behavior to a chin rest. If your dog doesn’t have that behavior yet, it is fine (you can stick with eye contact/looking at you). Simply wait for the start button, begin your simulation, and then give your dog a treat. When you are simulating eye drops, it is really important that you work on both eyes. You don’t want your dog to just get comfortable with doing their left eye for example, and then be funky about their right. I made sure when Lucy was little that we did both sides to prepare her for what I would need to do in the future.
To follow Lucy’s adventures with Lisette, click here.
PS: Pin this article for later!


