

Getting Started With How To Train Your Dog To Wear a Harness
For a lot of dogs, harnesses can be crucial to their success outside while walking on a leash. It’s not uncommon for dogs to be sensitive to things touching their body, so we put together this mini guide (it’s not intended to have all of the answers - but we’ll keep adding to it!) on how to get your dog to wear a harness. We’ve included a link (keep scrolling to the bottom of the piece) to the harnesses we love as well. [Disclosure: The page may contain affiliate links, meaning TOC may get a commission if you decide to make a purchase through our links, at no cost to you.]
How to Desensitize Your Dog to a New Harness Before It’s Needed
In the post above, Beth, a member of our TOC Fam, has been working on desensitizing her dog, Dug (he was six months old in these videos) to his new harness. (Good news: These videos are from several months ago, so he is happy in his harness now!) Dug is sensitive to things touching his body, but having a harness is important since he spends a lot of time on a long line.
If you swipe through the post above, you’ll see some home videos from Beth and Dug! Here is what Beth shared with TOC:
“It’s taken a long time for Dug to feel comfortable with his current harness so when it looked like he was going to grow out of it soon I bought a new one in advance so we could spend time helping Dug to really love wearing it. We’ve been working on this for about four weeks now.
Video One: Here we are playing a nose targeting game with the harness. Dug runs to the harness, puts his nose in the hole and then is marked and rewarded with a treat toss. The purpose of this game is to build confidence around the harness and for Dug to move towards the harness (his default is to run away from it).
Video Two: Here we’re using a behavior Dug already knows well - a chin rest on the sofa (PS: you can learn how train your dog to do a chin rest in the TOC Challenge) - to encourage him to put his head further through the hole in the harness. I’m not luring with a treat - Dug volunteers this behavior and then is marked and rewarded.
Video Three: This was a huge breakthrough moment for us. Dug got to the point where he was happy to put his nose in the harness but not happy for it to go past his ears. I saw a trainer on Instagram ( @noblewoof ) use different novel objects to help teach her dog this behavior. By using something that Dug was already completely comfortable with – his collar - we were finally able to make the association that head through equaled a jackpot. This quickly translated to the harness and other novel objects, like the T-shirt shown.”
How To Turn a Scary Harness Into Something Fun for Your Dog
Listen, there’s nothing fancy about this video above. Everyday of the week that I filmed it, I pulled out my dog Otis’s car safety harness and simply played fetch with it. And then I put it away! WHY?! Well, because I made an oops. I got this harness right before a road trip and didn’t ever desensitize him to it before tossing it on him. It’s heavy and has metal buckles (road safety!). He didn’t seem super uncomfortable in it, but when I decided to loop back to it and do the consent-based work I should have done initially, he BOLTED as soon as I pulled it out. I tried a few times and each time he spotted or heard it, he was gone. He didn’t even want to stick around to see if there were treats. WOAH NELLY! Now I could have done a million different things here, but I think we both were in need of something fun and low pressure.
So one day, I pulled it out, set it down on the ground, and gave his retrieve cue. Otis knows his cues are all invitations (aka he won’t be forced into anything), so I was just curious what he would do. Something about the “fun game” premise made his body language shift COMPLETELY. He softened and started wagging as he realized we were playing a game instead of trying to do something that felt like a lot of pressure to him. Sure enough, he picked the harness right up and handed it to me. After just a day, I could make pretty big tossing motions with the harness in my hand without seeing any concern from Otis. He was naturally desensitizing to the sound of the metal clasps through this game too! And the only time that harness touches him is when he grabs it, so he has full control over the interaction. Pulling the harness out no longer predicts having to work with something scary. It predicts a game he loves! Now that he is not panicked at the sight of it, I feel a bit more free to start the real work of using consent to put it on him 🤣!
So the moral of this story is twofold: 1) Desensitize AHEAD of using a new harness (I know better 😳); 2) It is okay to not always be super serious! Sometimes silly games can actually be incredibly helpful! (Pssst...There isn’t just one right way to do something. You can do what works for YOUR dog!)
What if Your Dog Already Hates Their Harness?
Have you ever worked on something and just felt stuck? That was me with the new harness I got for Otis. He rarely wears harnesses anymore, and when I tried to put this new one on, I was pretty surprised to see him sprint to the other room. Like all of you, I genuinely care about how my dog feels, and I prioritize giving him choice. For a couple of months, I tried all sorts of things: basic classical conditioning (pairing harness with treats), teaching him to put his head through it (first through other objects), and all sorts of start button behaviors. No matter what I did, he never chose to put more than his nose into the actual harness and would run away if I moved it even a little bit. Looking back, I see A BAJILLION ways I could improve on what I was doing (and some of them likely would have worked!). I think I was so incredibly focused on how Otis felt about the harness that I never stopped to actually define my goal behavior and break it down into a training plan (pssst...we can do both).
So when my training didn’t work, I felt genuinely stuck. As luck would have it, I had an unrelated conversation with Kiki Yablon, who asked me a question that stuck with me long after our conversation: “How do you know if your dog actually likes something?” The only thing I have to go off of here is his observable and measurable behavior. Then I watched an awesome presentation from Lindsay Wood Brown with a demo from Scotti Harvey where she socialized a six month old puppy to kids. Scotti absolutely cared about how the pup felt, and she also knew that there is no way to separate operant and respondent conditioning. She was really intentional about how she set the sessions up, so she could get and reinforce the behavior she wanted around kids (rather than only thinking about giving treats around kids). The combo of all these things made a lightbulb go off in my head.
I started to think more operantly (knowing full well that classical conditioning was coming along for the ride). Thinking like this unstuck me. This video above shows a highlight of the initial steps! Here’s my TLDR play-by play:
I tried to simplify the whole thing when I thought about the goal. Here’s what I decided on: I wanted Otis to remain still with loose body language (aka “comfortable”) while I put the harness on him. Then I went and really defined what that meant (perhaps even thinking about what does “liking” the harness look like?). I wanted a soft, still body. I wanted a relaxed face, neutral ears, and his head to remain still and eventually for it to move forward. I knew specifically that I did NOT want any backwards movement (even a subtle weight shift), but it is easier to focus on what I want. Because of how I train, putting these things into the criteria actually helped prevent me from moving too fast. Then I thought about how I could break this down into an actual training plan. I knew I wanted to start with us both on the ground (that’s where we’re even in height, and he is most likely to “be calm” when lying down in a training context). I started by simply sitting down on the ground and capturing the basic position I wanted (calm body language in a down and oriented to me.
Then I actually skipped a step that I had to come back to (but thanks to thinking about this operantly, it was really clear how to troubleshoot). (NOTE: The video shows the adjusted order after I corrected my mistake.) I moved from the base position to introducing a leash that I could create a HUGE circle with and put over his head. I started by simply raising my looped leash up (but not moving it towards him) and marking and reinforcing for the criteria I had already defined. Because I knew my criteria, I was crazy careful to set up conditions that I thought would set him up for success (aka I didn’t push for speed). I worked in baby steps. Before I even tried moving the looped leash over his head, I tried holding the leash flat and just moving it slightly over his head. That was when I saw his head move back just a little and his ears pin back. I tried one more time and the same thing happened. That’s when I realized I hadn’t actually broken it down enough.💡
The step where Otis wasn’t able to meet criteria came when my hands (with a leash) were coming over or around his head. Funnily enough, this is the same step where our start button work broke down (he was always willing to put his nose in, but then darted if I moved the harness even a smidge) - coincidence???...I think not! But this time, I was thinking operantly, and this helped me get into a problem solving mindset. I realized I was actually lumping criteria by introducing my hands coming over his head at the same time as introducing a leash coming over his head. So I nixed the leash. I went back to the base behavior, and I worked on fading my hands into the equation. Pretty soon, I was able to move my hands over and around his head while he had calm body language.
Then when I went back to the leash, suddenly I saw different behavior from Otis. I was able to move the large looped leash towards him, and he kept a loose body and face, neutral ears, and his head still or even forward slightly. That is what I wanted to see from Otis in order to move forward. I said “putting it on” out loud before I made any move to put the looped leash over his head (predictability removes a lot of stress) and “taking it off” before I took the leash off.
I gradually made the leash loop smaller to mimic the size of the harness opening. When that was easy, I switched to the harness. Using a harness changes the conditions, so I lowered some of my criteria. I started by simply presenting it (without moving it towards him) and marking and reinforcing that same behavior and body language. My job was to set up conditions so that Otis was successful. This meant I had to be super observant about all the little behaviors and to go at his pace. It didn’t take long for me to be able to put the harness over his head. Just like with the leash, I said “putting it on” before moving it over his head and “taking it off” before pulling it off of him. What happened over time was pretty interesting. Dr. Friedman talks about selecting behaviors in the flow. Well Otis naturally started to offer putting his nose into the loop, so I started to select for that.
We got to the point you see in the video in two 4-minute sessions. I laugh a little bit because of how much time I spent working on this in previous months. I have tried to think about what I did differently this time. I actually think the biggest difference is that I just did a better job training - LOL! I absolutely could have been this thoughtful in my previous attempts using start button behaviors, but I got so hung up on Otis’s feelings that I forgot to think through behavior like I know how to. Respondent and operant conditioning always happen together. I will ALWAYS care about how my dog feels. ALWAYS. And I am a better problem solver when I think operantly because it forces me to be intentional. Could I have caught the same gap (pressure of hands over head) when I was using start buttons? YES! But I was using them without having a real plan for building a behavior. I was just assuming that the end behavior I wanted would magically evolve if Otis had a choice. Sometimes I get away with that. I didn’t here.
In terms of next steps, I think I want to clarify the sequence of events. I hadn’t planned on a start button behavior, but one is naturally evolving (Otis sticking his nose through the harness). I naturally started waiting to move the harness until he put his nose to the opening, so it started to operate as a start button behavior anyway. I think I like having that built into the sequence, so I want to get more intentional about it. Then I will need to change the conditions and bring this to a stand (I doubt in real life I will have him lie down...though I could). I am pretty sure I will start from a kneel while he stands though (less physical pressure and more of a baby step). I will likely go back and move through hands, leash loop, and harness with him standing and me kneeling and then with both of us standing.
What’s funny is that this experience actually taught me a lot about how I can be more intentional with start buttons. I LOVE start buttons. But I was not thinking much about my criteria (I was jumping straight to the harness as the consequence for the start button behavior when I could have actually gone through a similar progression that mirrored what I did here). It’s also funny that a start button behavior of sorts (nose to harness opening) naturally evolved anyway. I had gotten to the point of Otis putting his nose through the harness before when I was focused just on start button behaviors, but I never was able to actually move the harness fully over him. By thinking operantly and being super duper clear about my criteria and taking ownership of setting up conditions where Otis would be successful, it forced me to break the behavior down much more. Now, when he puts his nose in the harness, I can move it over his head, and he doesn’t sprint away from me. In fact, I see so much softness in his body.
I’m definitely not an expert on dog emotions. I share this story simply to relay a moment where I got stuck and had to unstuck myself. We can’t ever separate respondent and operant conditioning. Because of that, I should always care about the associations I think my dog may make and about the behavior that is operantly being selected (because some behavior always is). In my case, thinking operantly empowered me in a way and got me into a much better problem-solving mindset than when I left that out of the equation in my effort to get my dog to like the harness. I can make arguments in either direction, but I am hopeful this approach accomplished both selecting the behavior I want while building a better association with the harness.
BTW, here are some of our favorite harnesses, collars, and leashes.*

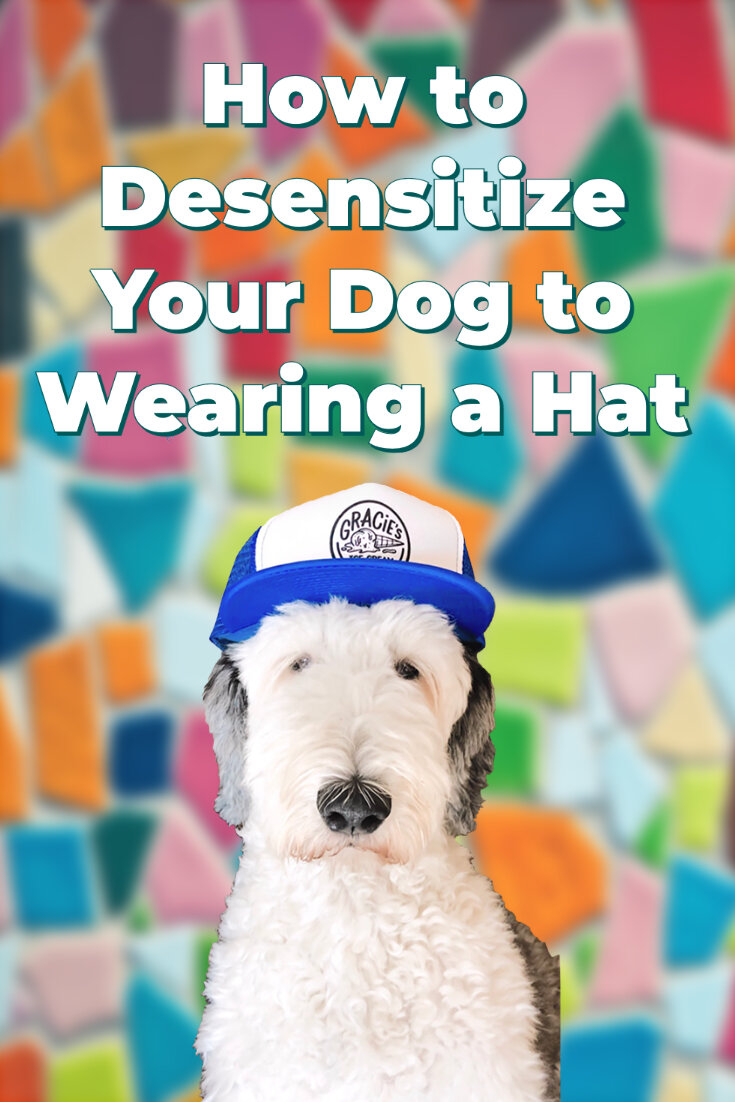
Cooperative Care: How to Desensitize a Dog to Wearing a Hat
‘Tis the season for putting a Santa hat on your dog! Before you force that hat on their head, have you considered getting your dog to opt into wearing a hat? Did you know it’s possible to desensitize them to wearing a hat through cooperative care? Actually in the Camp TOC scavenger hunt, we have a bingo square as a little mock cooperative care activity: desensitize your dog to a hat or sunglasses! While it’s just a silly hat, the basic idea of this exercise sets you up for things that matter a lot more (cooperative care for grooming, eye drops, ear cleaning etc. 🙌)! Our co-founder, Christie Catan, filmed this tutorial for someone in our #TOCFam who wanted help, and she figured, “why not just share it with everyone!?” While this is NOT a fancy video (in fact, in her words “it’s poorly lit and framed” 😂), we hope that it will give you some ideas that will be useful! Keep reading to see the written steps she followed to get her dog, Otis, to consent to wearing a hat.
Step by Step: How to Desensitize a Dog to Wearing a Hat
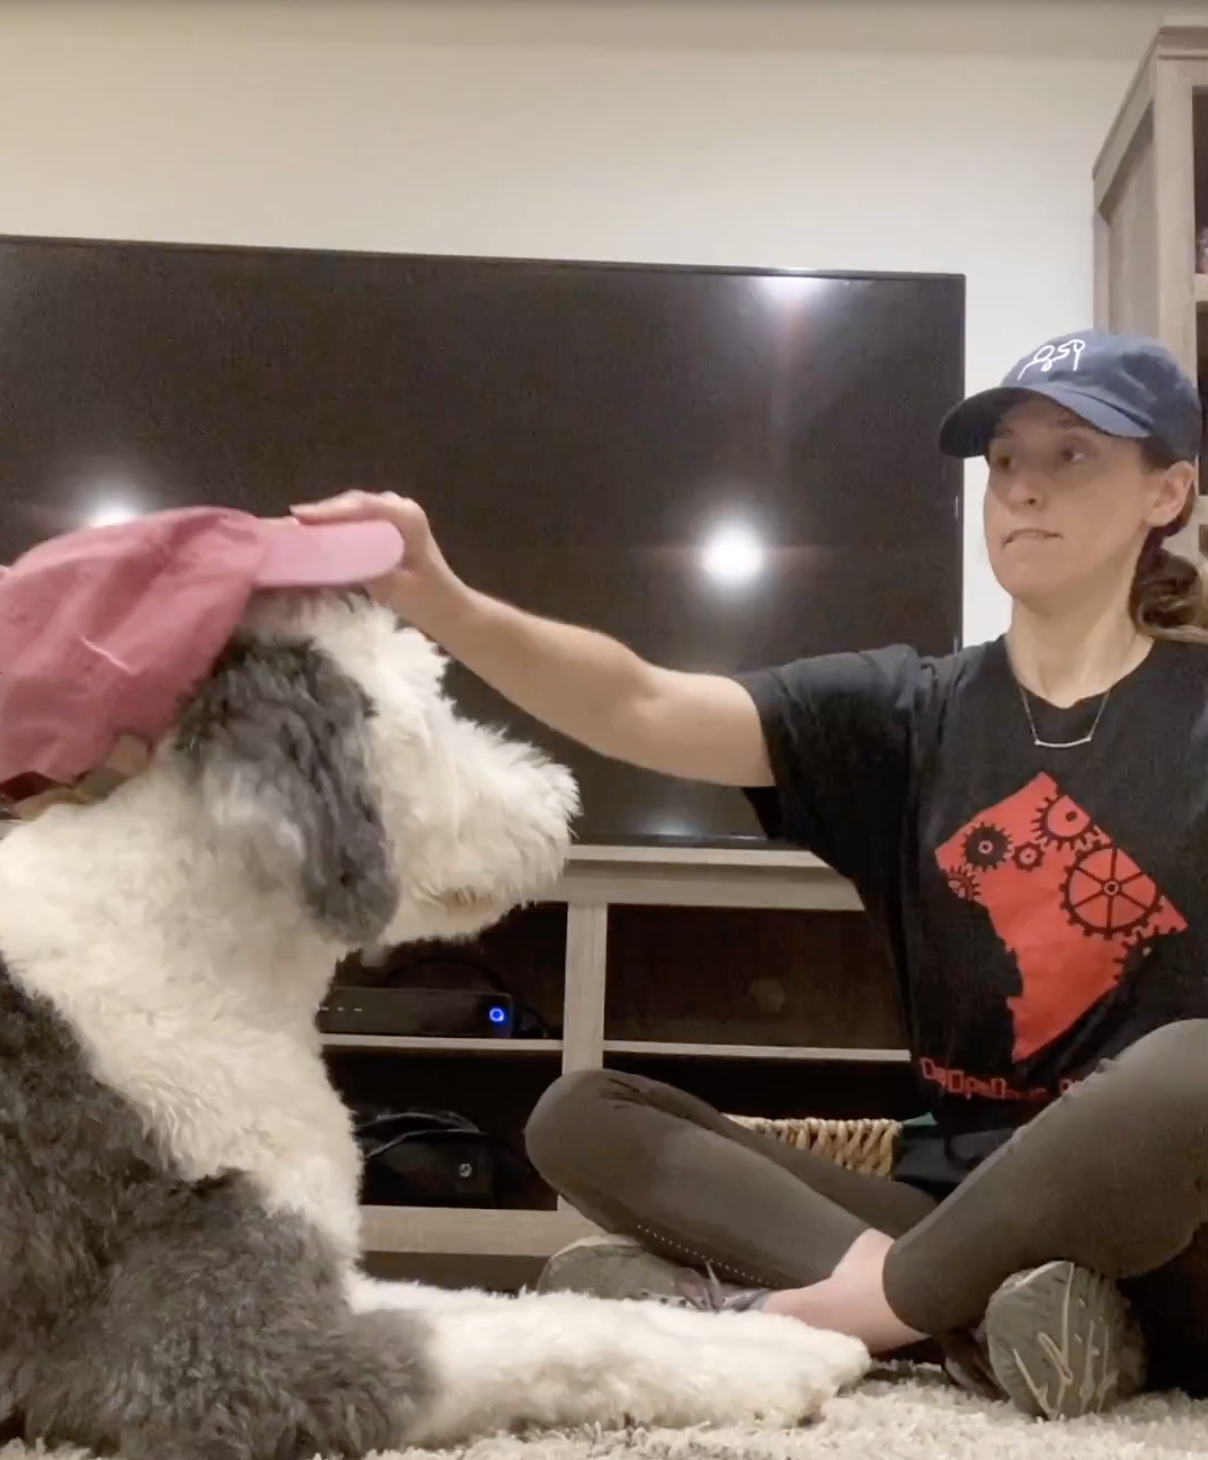
Christie Catan puts a hat on her dog, Otis's, head as part of the training session for how to desensitize your dog to wearing a hat.
Step One: Shape a behavior that will become your start button. I am going to use eye contact as Otis’s start button behavior, so I simply sit in front of him and mark and reward him (by saying yes and giving him a treat) when he looks at me. I do this a few times to make eye contact a behavior he wants to offer.
Step Two: Introduce the hat. You’ll notice that first I flash the hat in front of Otis and mark and reward each time that happens. This is so he starts to understand that the hat predicts a treat, and he feels good about the hat showing up. Now technically, what is happening here is that Otis looks at me and then I flash the hat and give him a treat (eye contact is already becoming a start button). It is not the end of the world if you just do some basic desensitization of the hat without thinking about start buttons for a few reps as long as you don’t reach the hat too close to your dog.
Step Three: Be intentional about eye contact as a start button for moving the hat toward your dog. Since we already shaped eye contact, that is a behavior Otis is likely to offer. I will only move the hat when he is looking at me. If Otis looks away from me and stops making eye contact, I stop moving the hat towards him and don’t move it any closer (you can still give a treat for this; just don’t mark). Make sure to go slowly! You will notice that I mark a lot even though I have only moved the hat a few inches. The trick here is not to push your dog too hard and to get them to consent to having the hat near them by continuing to look at you (or by doing another consent behavior that you select).
Step Four: Put the Hat on Your Dog. Since Otis continues to look at me the whole time, I can finally put the hat on him. If your dog continues to give consent through eye contact (or whatever start button behavior you chose), go ahead and try it! Remember if your dog looks away, pull that hat back (and give them a treat). They are allowed to say no. By letting them say no, they will say yes far more often (yay science!).
The Power of Choice Based Dog Training
One of the coolest parts about this is what happens when you give your dog the power of choice and control in dog training. By giving Otis the ability to opt in or out, I actually increase the frequency with which he opts in (COOL, right!?). Anyway, take this video or leave it (but know the actual camp videos are much much better than this 😂).
By the way, please don’t fret if you didn’t put a hat on your dog in this cooperative way in the past. Feel free to loop back if you’re interested. Also, your session may look different than mine. I chose a very simple behavior as my consent behavior (eye contact), but do what works for you (some other ideas include chin rest or when your dog looks at food in a bowl). The idea is to give your dog control over their environment, so they aren’t freaked out by a strange object coming toward them. The fun part of trying cooperative care with a hat is that it is low pressure. You don’t have to stress if your dog opts out or it takes many sessions to get the hat on since getting the hat on is not critical. Often times we think about cooperative care in moments when we don’t actually have the ability to give our dogs choice, and that isn’t the moment to try to work through this since “no” may not be something you can actually honor if it is medically necessary.
Have you tried putting a hat on your dog through cooperative care? If you try this, let us know how it goes! Don’t forget to tag @tailsofconnection on Facebook or Instagram and use the hashtag #tailsofconnection.
PS: Pin this article for later!

Cooperative Care: How Choice Based Dog Training Can Help With Grooming
Editor’s Note: If your dog had two ways to get treats and only one of them involved enduring something that they don’t like (aka getting their hair brushed), why would they ever choose the option that involved something they didn’t particularly enjoy? Because giving your dog the gift of choice AND control is magical (it is actually a primary reinforcer)! We are big fans of start buttons when it comes to working with our dogs. Recently, we were having a conversation with one of our friends, Logan Buie, and she talked about adding a second behavior option (in addition to the standard start button) that doesn’t result in us doing anything to the dog to help ensure that your dog actually has full choice and control (R+ can be coercive if the only way for the dog to access reinforcement is by doing something they really don’t feel comfortable with). Our co-founder, Christie Catan, was very intrigued and thought she would try this out with her dog, Otis. Watch the video above to see their real life cooperative care/start button training session, and keep reading for all the steps she followed to see how choice based dog training can help with grooming your dog.
A Little Background On Cooperative Care and A “No” Behavior
Cooperative care is rooted in empowering animals to be willing participants in their own care. In practice, this means we give them a way to "say” yes or no. We give them a way to say yes by turning a behavior into a start button. Practically speaking, this means we only take our action after the dog offers the specific start button behavior. The dog learns that if they don’t give that behavior, the the thing we are doing to do to them doesn’t happen. Therefore, they are in control! As you may have guessed, cooperative care hinges on the ability for your dog to “say” no. As with human relationships, anything other than a clear yes is a no (and no’s get rewarded too!). Let’s say your start button behavior for brushing your dog is your dog lying down on a mat. When they lie down, you brush them. If they don’t go lie down on the mat, it is a no, and it is important that we honor and reward that no. Sometimes our hopes for a training session can lead us to push for yes even though our dog is saying no, so the experiment I tried was to give a definitive “no” behavior to compliment the “yes” (start button) behavior. You can find information about how I set this up below.
My Experiment to See How Choice Based Dog Training Can Help With Grooming
Step One (Pick Your Activity): I picked an activity that Otis isn’t super fond of: Combing. Prior to this session, Otis did not have a start button for combing.

Christie Catan combs her dog, Otis's, hair during a training session for how choice based dog training can help with grooming.
Step Two (Present Your Dog With Two Options for Reinforcement): We presented Otis with two options for accessing reinforcement (treats): A) Touching a target; and B) Lying down on a mat. (Note: This is a mat Otis has never seen before, so he doesn’t have a big history with it.)
Step Three (Shape and Reward Your Dog for Interaction With Both Objects): We shaped and rewarded him to interact with both the mat and the target right before we started filming to create a little history of reinforcement.
Step Four (Add the Start Button Element): Then we added the start button element: If he laid down on the mat, we combed him and then gave him a treat. If he touched the target, he just got a treat tossed away (did not get combed). We never once cued him to lie on the mat. We did cue him a couple of times to touch the target to ensure that he knew that he could access reinforcement without having to be combed. (You may also have spotted some reset tosses done to get him off the mat or if he hesitated.) We know the science, but watching it play out is still so thrilling. He picked the mat time and time again. This is also the best body language I have seen from him around a comb.
More Reflections on the Importance of Choice in Cooperative Care
Pretty cool, huh!? Control is a primary reinforcer, and sometimes we forget that. Give your dog a choice and reward them for saying no...and watch how much more they will say yes!
By the way, I tried very hard not to bias Otis toward one behavior with my own body language, but I very well could have shown more excitement over the mat knowing where I was going with this. It wouldn’t have been intentional but that doesn’t rule it out 😂. Otis definitely gets MORE treats on the mat since it’s a duration behavior (though I toss treats off a lot to make it clear that I’ll reward him even if he leaves), and that is intentional. This is a dog who really doesn’t like being combed, so to see this much more excitement for the mat given all the other ways I am reinforcing him off the mat is a big, big win!
I had fun adding this second behavior option and can see how it would be helpful. I think if you have good communication with your dog and established trust, you likely won’t need it, but if I am honest, I think I made more progress by adding the target as an option. You can play around and see what you think!
Have you tried adding a second behavior option to cooperative care? If you try this, let us know how it goes! Don’t forget to tag @tailsofconnection on Facebook or Instagram and use the hashtag #tailsofconnection.
PS: Pin this post for later!
