

Keep reading for tips for selecting a properly fitting harness and cooperatively putting it on your dog (plus, our favorite harnesses!).
A harness is a great way to keep your dog safely and comfortably tethered to you with a leash. An ergonomic harness can help prevent injuries and should be comfortable for your dog when they have it on. A well-fitting harness will allow for free shoulder movement and minimize breathing constraint.
This guide is focused on general use dog harnesses rather than harnesses for specific sports like bikejoring. [Disclosure: This article may contain affiliate links, meaning TOC may get a commission if you decide to make a purchase through our links, at no cost to you.]
How To Find a Good Harness for Your Dog
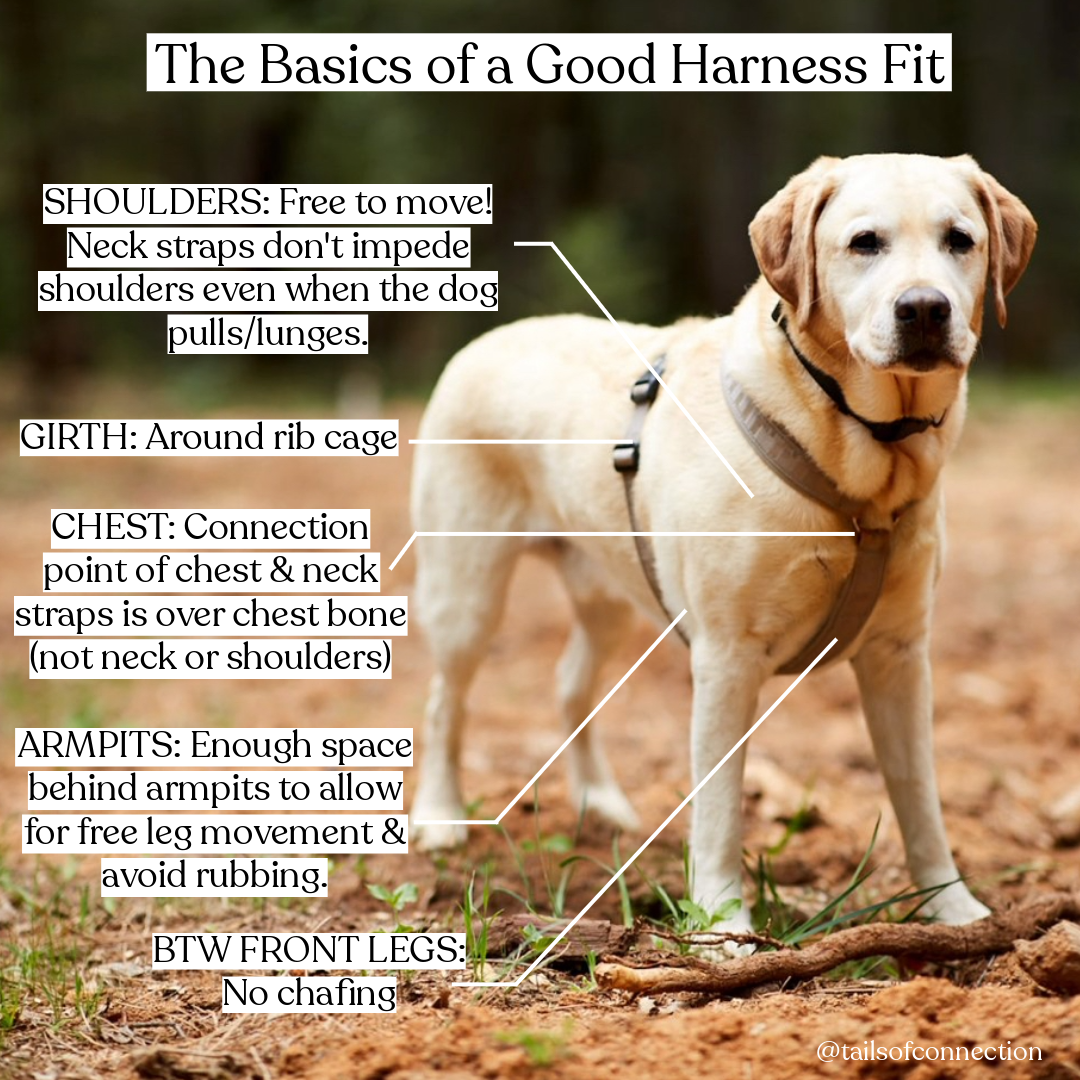
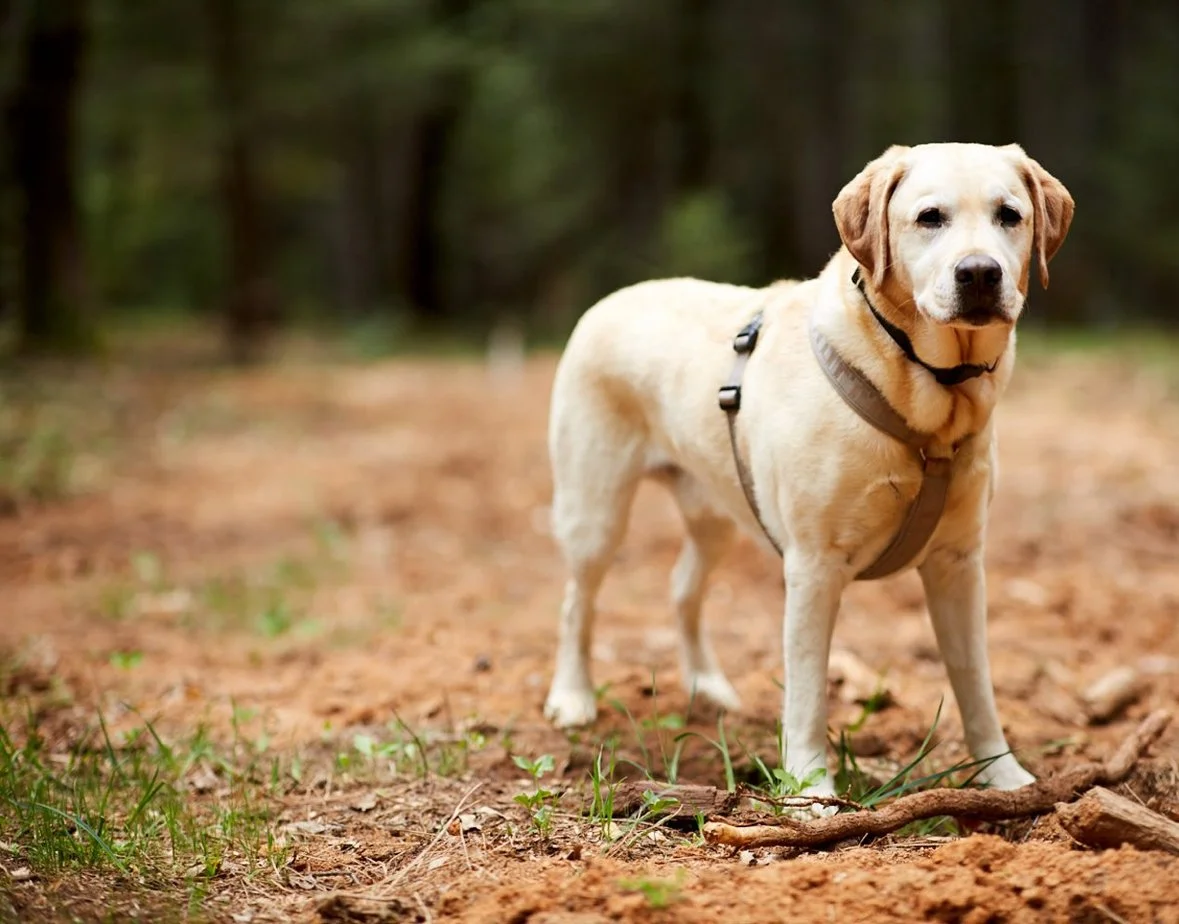
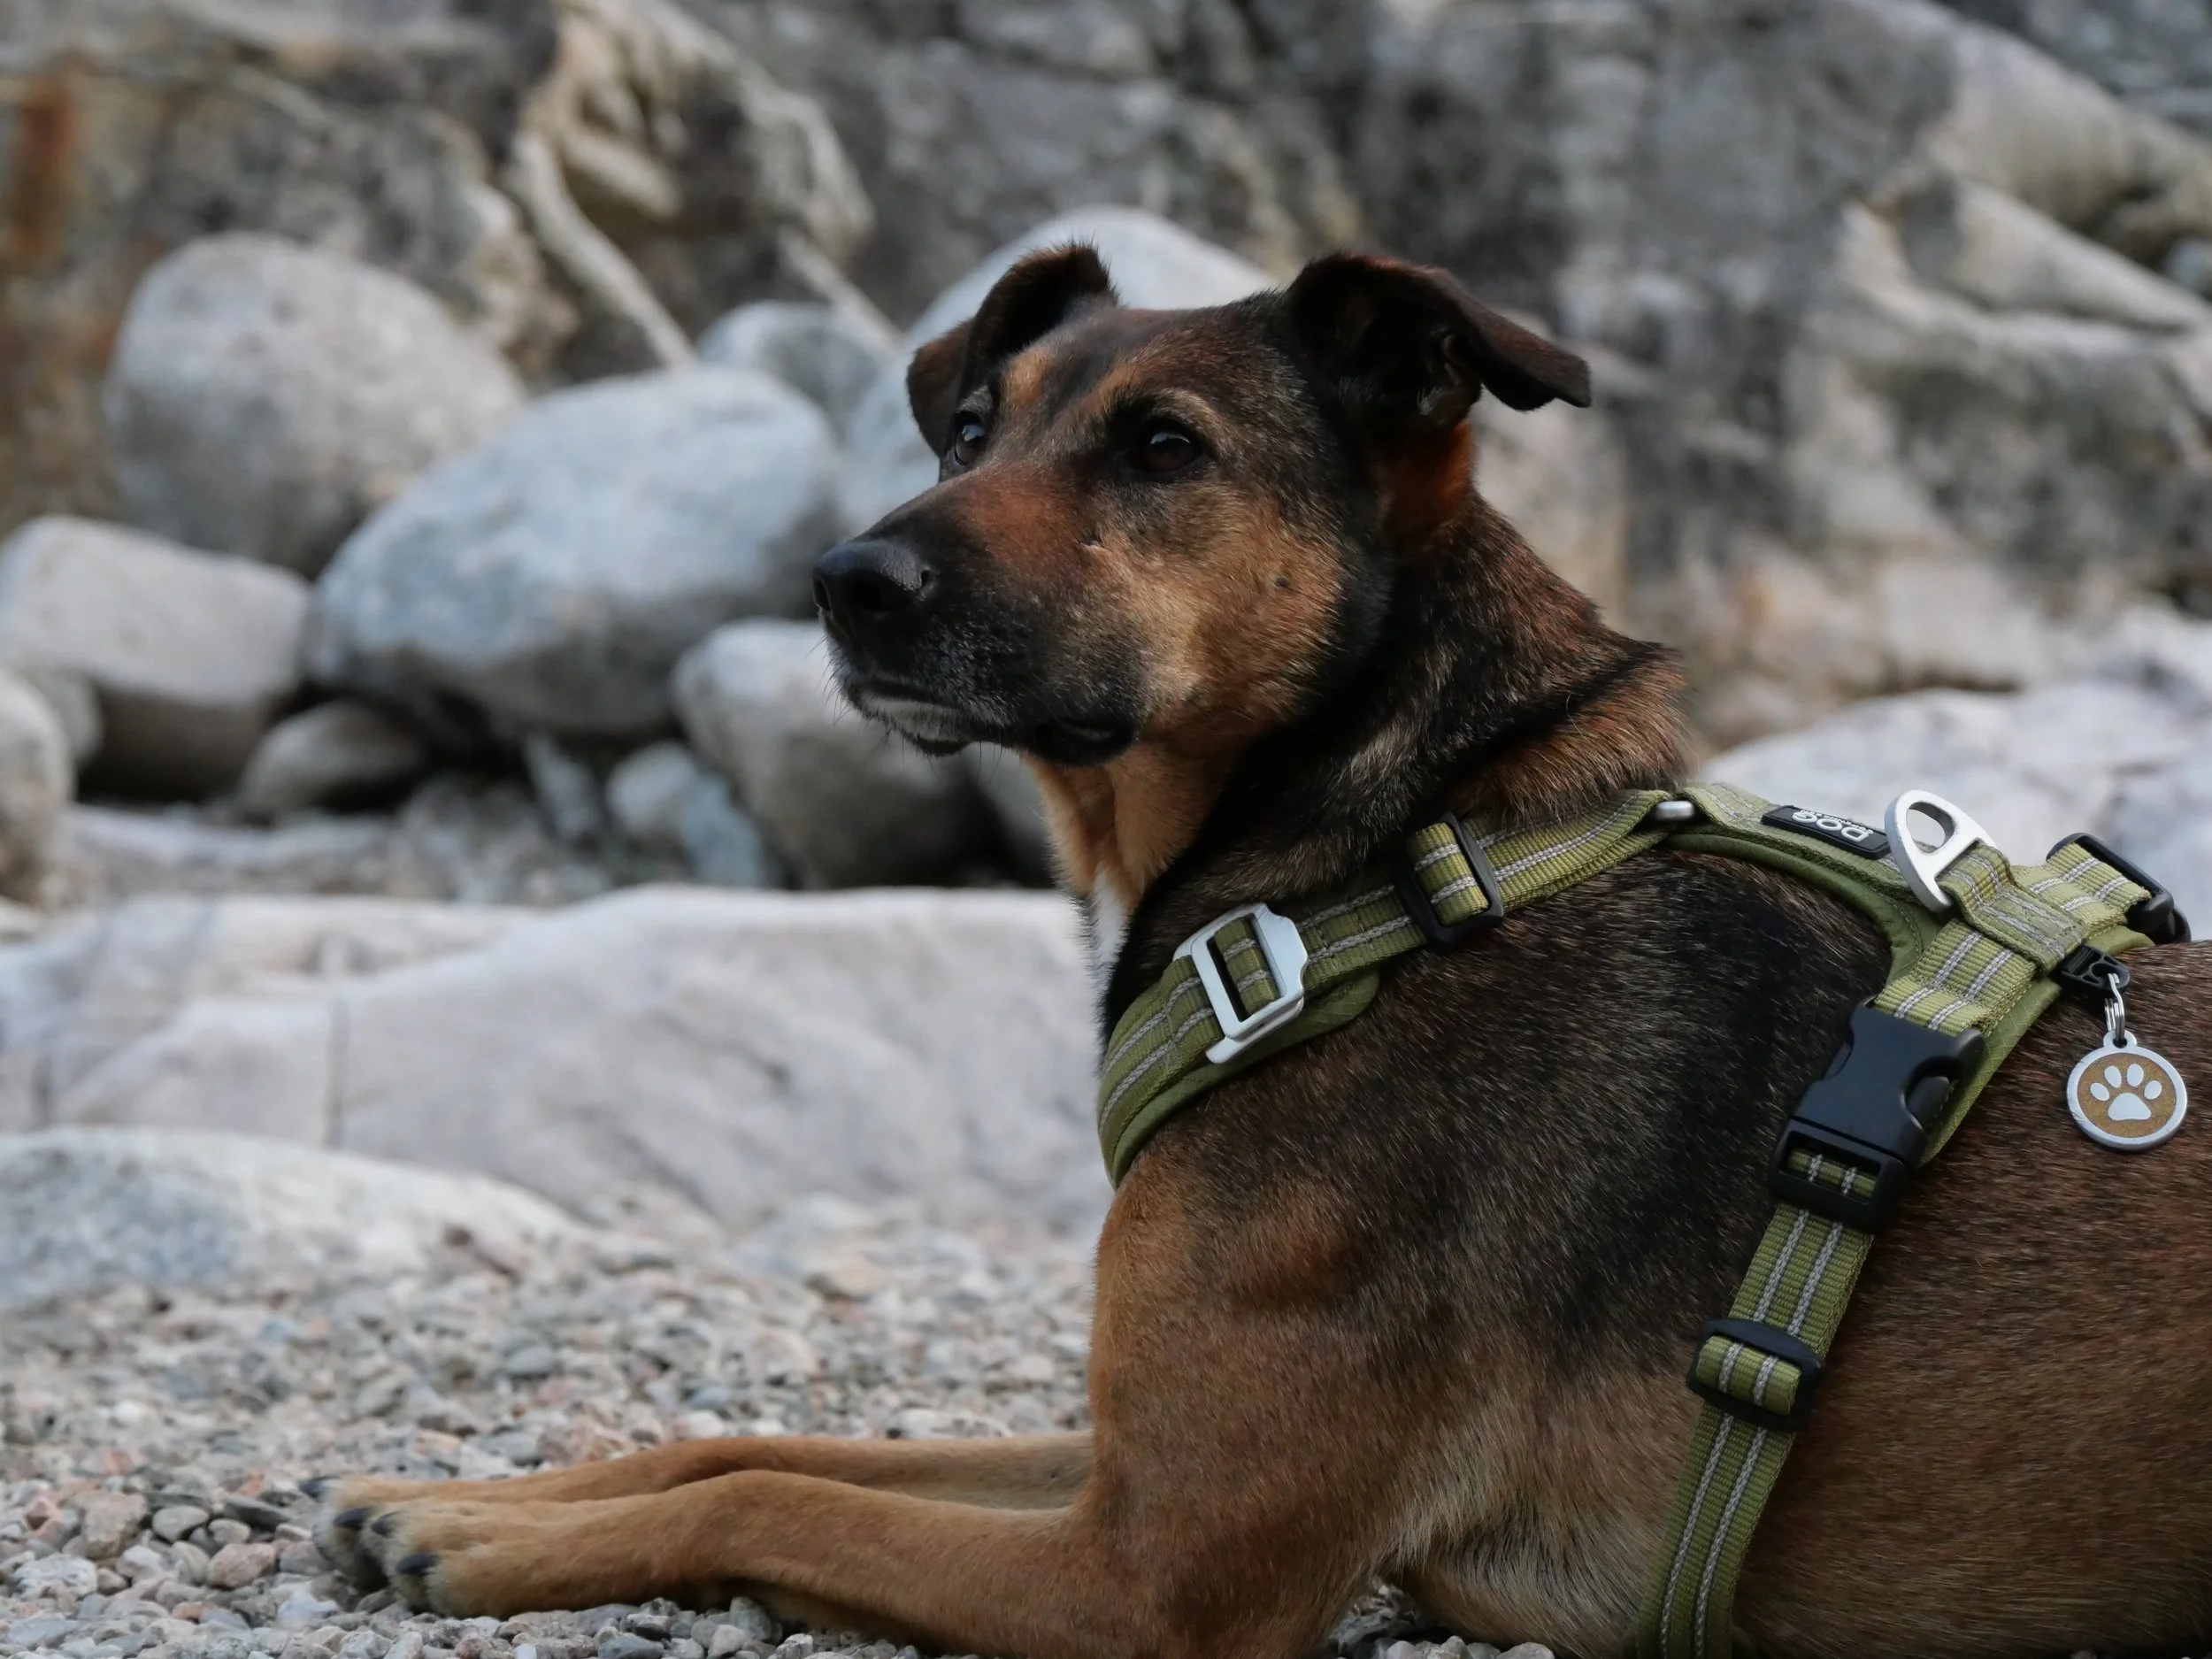
When looking for the correct fit of your Y-shaped harness on your dog, look for the meeting point of the chest & neck straps to land on your dog’s chest bone to keep the trachea safe and the shoulders unimpeded, the armpits to have enough space, the girth strap to be around their rib cage, and the chest strap to be narrow enough to avoid rubbing their front legs.
Look for a Y-shaped harness
We call them Y-shaped harnesses because if your dog is standing and facing you, the harness strap coming up from their belly, over their chest bone, and around their neck should look like a Y rather than a T. When well fitted, the Y shape gives your dog’s shoulder blades free range of motion - that’s really what we’re after here.
Look for the “Meeting Point” of the chest and neck straps to be on the chest bone
Where the chest strap (the one that comes from under the belly and up the chest) meets the neck strap (the one that goes around their neck area) should land on the chest bone (this is the prominent bone you can feel on their chest), not the soft tissue. This helps protect the trachea and ensures good pressure distribution of the dog pulls into the the harness.
Make sure the shoulder blades are unimpeded
Harnesses come up from your dog’s belly to their chest bone and then go around below their neck. Check to make sure the harness isn’t going over their shoulder blades.
If your dog is a big puller, you’ll want to ensure that you have a snug enough fit (without being too tight) in the neck strap to keep it from sliding down and restricting their shoulders when they pull. Generally look to be able to fit two of your fingers stacked vertically under the neck strap.
If your dog isn’t pulling much in the harness, it’s likely okay to have a bit more room here.
TIP: Take a video of your dog walking without a harness on and then with the harness on. Their gait should look the same!
Look for space in the armpit
Rubbing under the armpit can be really uncomfortable and also restrict movement, so when you try a harness on your dog, make sure it isn’t resting right in their armpit. Alternatively, if there is too much space here, the harness slides around a lot more when the dog stops before the front legs stop it. You are looking for your dog’s arms to be able to move backwards freely and to avoid chafing in their armpit.
As a general guide: look for two to three finger width’s distance from the armpit crease and from the chest strap for medium dogs and three to four for larger dogs. It’s tough to give a general rule here because dogs and human fingers are shaped so differently, so looking at where the straps are actually hitting is key.
Check the fit around their abdomen
The girth strap should lie over your dog’s ribs, not behind them on their soft belly tissue.*
While the harness should be secure enough not to slide around a ton, you want to at least be able to comfortably slide your hand (or two fingers stacked vertically) under the harness once it’s all buckled up.
*Note: If you’re getting a harness with a third belt (often called a waist or safety belt), some of the third straps still sit on the ribcage while others sit right beyond the last rib on the waist (which can be useful if you’re really worried about your dog slipping out of the harness since that is the narrowest part of their abdomen). If the third strap sits beyond the ribs, check that the leash attachment point is on the main girth strap that goes over their rips (and make sure that third strap isn’t too tight).
Consider chest strap width
Some harnesses have thicker chest straps. If your dog is a bit narrower between the front legs and you have a wide chest strap, the harness may rub when your dog moves, creating discomfort and potentially changing how they walk to avoid the feeling (which can lead to abnormal pressure on their joints). This is another example of where video is your friend!
Consider adjustability
This can be a great option if your dog’s proportions don’t fit a lot of standard harnesses.
Plus, just because a harness fits right now doesn’t mean it’s going to fit in a month for any number of reasons. It’s important to continue to check that a harness is still a good fit for your dog - especially if you notice their body has changed.
If you have a fast growing puppy, a harness that has more adjustable straps may give you a bit more wear than one that does not.
But … just because a harness doesn’t have adjustable straps everywhere doesn’t mean it couldn’t be a great fit for your dog.
Check for “twisting” when you add a leash
This is a big reason why I like some harnesses more than others. There are plenty of harnesses that fit great when you don’t have the leash attached but then start to twist to the side when the weight of the leash is added. This can fundamentally change where the straps are landing on your dog. In general, I recommend testing most harness with a leash on (and perhaps even with a little tension) to make sure the general fit is still good.
The type of leash you use may play a factor here too. For example, I like biothane leashes (typically longer ones), and I sometimes let them drag, which can add some weight. I’ve used harness before that always wound up lopsided towards whichever side the leash was on. Some of this is a fit thing, but I’ve also found that some harnesses are just better at staying in the center on dogs’ backs than others. You can read reviews to see if people mention this and can try the harness on with a leash before you tear off the sales tags.
Consider material & general design
This one comes down to you and your dog’s preferences and needs. Here are some things to consider:
Wide vs. Thin Straps
Padded vs. Not Padded
Heavy/Hefty vs. Light/Minimal
Straps can be made from all sorts of materials too. Some materials may make more sense if your dog, for example, often gets wet on walks.
You may also want to consider whether or not you need bright colors or reflective design components. This can be helpful if you hike in the woods where hunting is allowed or if you walk at night.
Consider safety / security
Escape Artists: If your dog is at risk for slipping out of their harness, consider a harness that has a third strap around the belly that makes it much more secure.
Pullers and Lungers: If you’ve got a big strong dog who has a tendency to lunge or pull, look for harnesses with multiple attachment points. While we don’t recommend using a front clip to teach loose leash walking, having both a front and back clip option may be helpful for some people. You can attach to the front clip if you feel like you need a bit more leverage when they pull or lunge in order to feel safe walking them. In addition, having a front and back clip allows you to attach a double clip leash or emergency handle. Having a handle on top to hold onto may also give you an extra sense of security.
Mobility Support: Harnesses with handles on top can also be helpful if your dog has mobility issues or if you sometimes want to hold onto the handle for more security in certain situations.
Overhead vs. Buckle Neck straps
Some dogs really don’t like harnesses coming over their heads. If your dog falls in this category, know that there are some harnesses out there that allow you to buckle the straps around their necks instead of pulling them over their head.
Introducing a Harness to Your Dog
When introducing a harness, the key is to take baby steps and allow your dog to opt in and discover all the good things that happen when they approach a harness.

Try to avoid harnesses like the one above that look like a T shape in the front. The straps on this harness go over the dog’s shoulder blades and restrict the dog’s range of motion, which can be uncomfortable and create physical health problems down the line.
Perhaps begin by simply having the harness out on the floor and allowing your dog to investigate. Give them some treats or a fun toy after they’ve come over to check the harness out.
If they seem comfortable with the harness on the floor, you can pick it up. This is where I like to use a bit of a cooperative care framework to allow them to control the harness coming towards them.
You can use something like Chirag Patel’s Bucket Game or do something as simple as using orientation to you as a start button behavior. When your dog approaches you and looks at you/generally orients to you, lift the harness and give them a treat. When they look at you again, lift the harness and move it an inch towards them. Take baby steps. When you first make contact, try just touching their shoulders with the harness rather than going over their head with it.
If you’ve got a head shy dog, consider separating out the motion of moving your hands towards their head from holding the harness.
You might even consider first practicing bringing a large t-shirt or a big belt or looped leash over their head before you move into the harness.
Pay attention to your dog’s body language. If they tense up, tuck their tail, pull their ears back, or look away, pause and give them some space. If they leave, let them walk away - heck, perhaps even give them a treat for calmly walking away (that’s a great skill in life!). Having the ability to easily say no can actually make it more likely for them to say yes.
When they do come back, take a step back from whatever you were working on to make it easier! And keep those reinforcers flowing.
If you go nice and slow, you’ll likely be able to fade the treats from the picture (if you want), and approaching the harness and having it put on will be reinforced by access to the good things that come with a walk.
Troubleshooting When Your Dog Seems to Hate Their Harness
If your dog runs away when you pull the harness out, you aren’t alone. While harnesses often predict lots of awesome things (outdoors), it’s clear that they can also predict some things the dogs don’t seem to love - hence those escape behaviors.
One of the first things to check is the fit and design of your harness - see above. If it’s not a well-fitted Y-shaped harness, it may be uncomfortable for your dog. (Note: your dog may have some preferences in terms of materials and general design, so you could also experiment with this even if your current harness fits well.)
Another thing to investigate upfront is underlying pain. Sometimes dogs have something going on with their ears or teeth that can make putting the strap over the head really uncomfortable. There could be underlying pain elsewhere too. If you’re seeing other signs of potential pain, it’s worth checking with your vet.
If you’ve got a well fit Y-shaped harness and have ruled out pain, we can move onto training. Here are some ideas to consider when thinking about how to get started:
Change the context
If your current “put the harness on routine” is cueing your dog’s escape behaviors, it will be much harder if you try to train approach behaviors with the exact same environmental conditions.
You can change things like the location you work in, how you stand/sit, what object you hold, what’s out in the room you’ve been in (for example, sometimes having drawers open might be enough of a difference), etc.
This post highlights how hard it can be if we work in an environment that is already cueing some other behavior (we end up fighting extinction).
The good news is that you can eventually bring the new approach behavior into the old problematic conditions (just go slowly).
This post talks about how “ … what is selected is always an environment-behavior relation, never a response alone.” Donahoe & Palmer (1994). LCB, p.68 (via Dr. Jesus Rosales-Ruiz’s talk “Learning in Context: Expedited Learning Through Environmental Design”)
Break it way down (split criteria)
Think about all of the actions you perform when putting a harness on your dog and work on them one at a time. For example, if you’re standing up when you put your dog’s harness on, you’ll have to bend over them. You could work on that without holding a harness first. Another example could be touching their shoulder with the harness before you work on getting it over their head.
This post shows how I split criteria to ultimately get a cone on my dog, Otis. The same basic principles can apply to putting a harness on. I had to go to this extreme due to how aversive the cone was, so you may not need to do all of this for a harness - just depends. Hopefully this helps you think about how to approach splitting criteria though.
Work with an object other than their harness
Use a looped leash or a belt and make a BIG loop to start. Gradually make the loop smaller. You can throw on some reps where the loop is bigger too to take some pressure off.
Here is an example of training using a looped leash leading to a dog eventually voluntarily sticking their head through a harness loop.
Have clear ways for your dog to opt in or out
Regardless of your approach and how you break it down, having ways for your dog to control what you do can increase the likelihood that they opt in. Yep, your dog being able to say no matters for a lot of reasons!
To do this, you want clear contingencies. Check out this post for some general information about how to create an opt in behavior and fade IN the object or action.
This post highlights how big of a difference subtle shifts can make on behavior and emphasizes the importance of giving your dog control (avoid chasing them if possible).
Here is another post on getting started with start button behaviors. I like having people play around with the concept in a low stakes setting (let your dog control when you move your hand or when you hold up a coffee cup) before trying to use it in real life.
Protect your training
While you’re working on building those new, wonderful approach behaviors with the harness, what do you do for walks?! It depends.
If a collar is a safe, comfortable option, you can walk your dog on a collar while you work on the harness.
If you absolutely need a harness on your dog, make sure your routine walk-prep context looks quite distinct from your training context. This might mean using two different harnesses (one for those no-choice moments and one for the choice-filled training moments) or it could mean making sure the environment looks different (i.e. where you put harness on for walks vs training location or that you have glasses on in one situation and not the other). Over time, the goal will be to bring the behaviors from the training context into the routine walk-prep context, but that should be done intentionally. In the meantime, having the two situations look different will help protect the progress you are making in your training.
Note: Trainers can be a big help here! Don’t be afraid to reach out if you need some extra help. So many wonderful people providing excellent support out there.
Our Harness Product Recommendations
The harness that’s best for your dog is the one that works best for THEM. What works for one dog may not be the best for another. Leveraging the list above can help you determine what harness might be best for your dog. The good news is that there are a lot of really wonderful harnesses out there. Here are some of the ones that we love or the dogs and people in our TOC Family love.

“One of the best fitting harnesses I've found for Boobert. Most harnesses tend to twist or rub or just don't quite fit right in one area, the flagline is very adjustable and fits great everywhere, especially lots of room around the armpits. Also has lots of great features like multiple leash attachment points, built in handle, loop to clip light to, and the straps behind the ribs make it extra secure.” - @boobert_the_bully
[Boobert is a bully breed mix wearing a size medium]

“It leaves the shoulder very open. Adjustable around the neck and chest, and the under belly piece as well. Well made (though has plastic clips, not metal). Doesn't have extra adjustment straps hanging all over. Cleans easily.” - Alex O.
[Ruby is a pit mix wearing a size small long. Ruby is 50 pounds, 26" chest, 16" neck, 21" at the withers, muscled with some looser skin on the neck.]
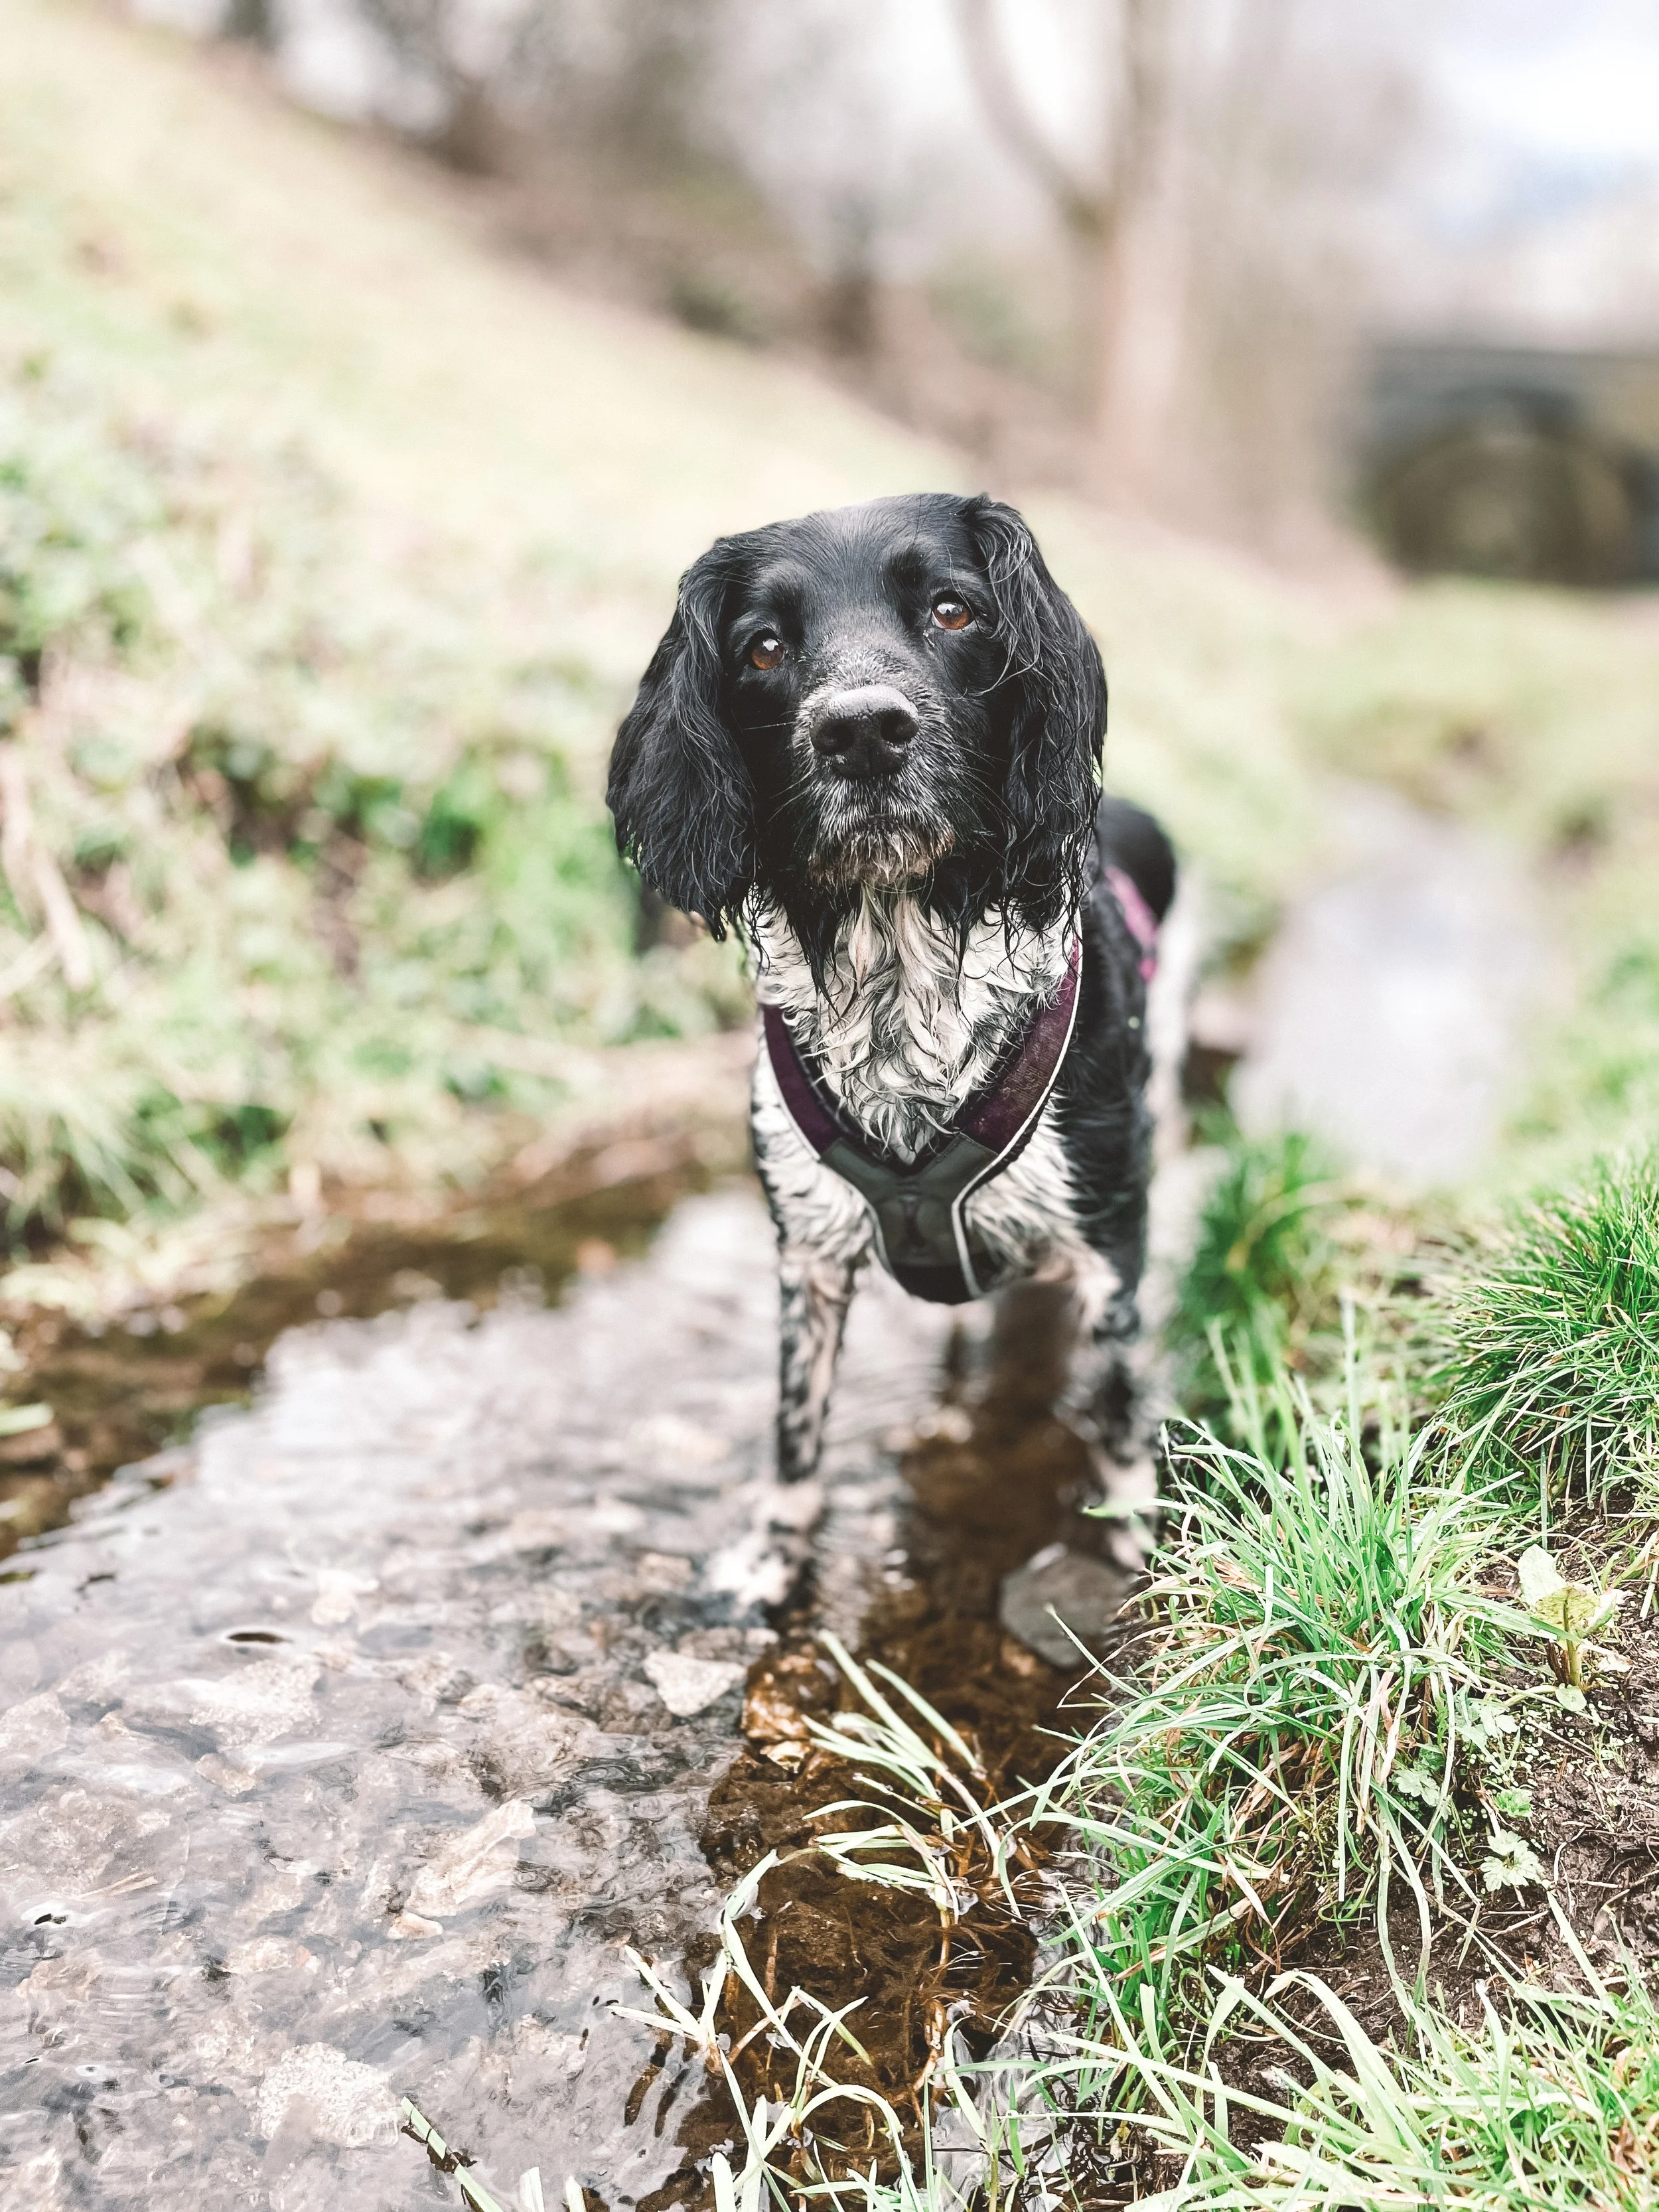
“It is lightweight (so lightweight!!), durable, brilliant for dogs that get muddy, super padded, and has 3 options for leash attachments. Plus the colours are cute. For us it was one of the only harnesses in 10 years that we found fit her chest right/didn’t ride in front legs.”
[Lexi is a Springer Spaniel wearing a purple line harness in size 5.] USE CODE TOCFAMILY for 20% off from the 17th - 24th of April 2024.
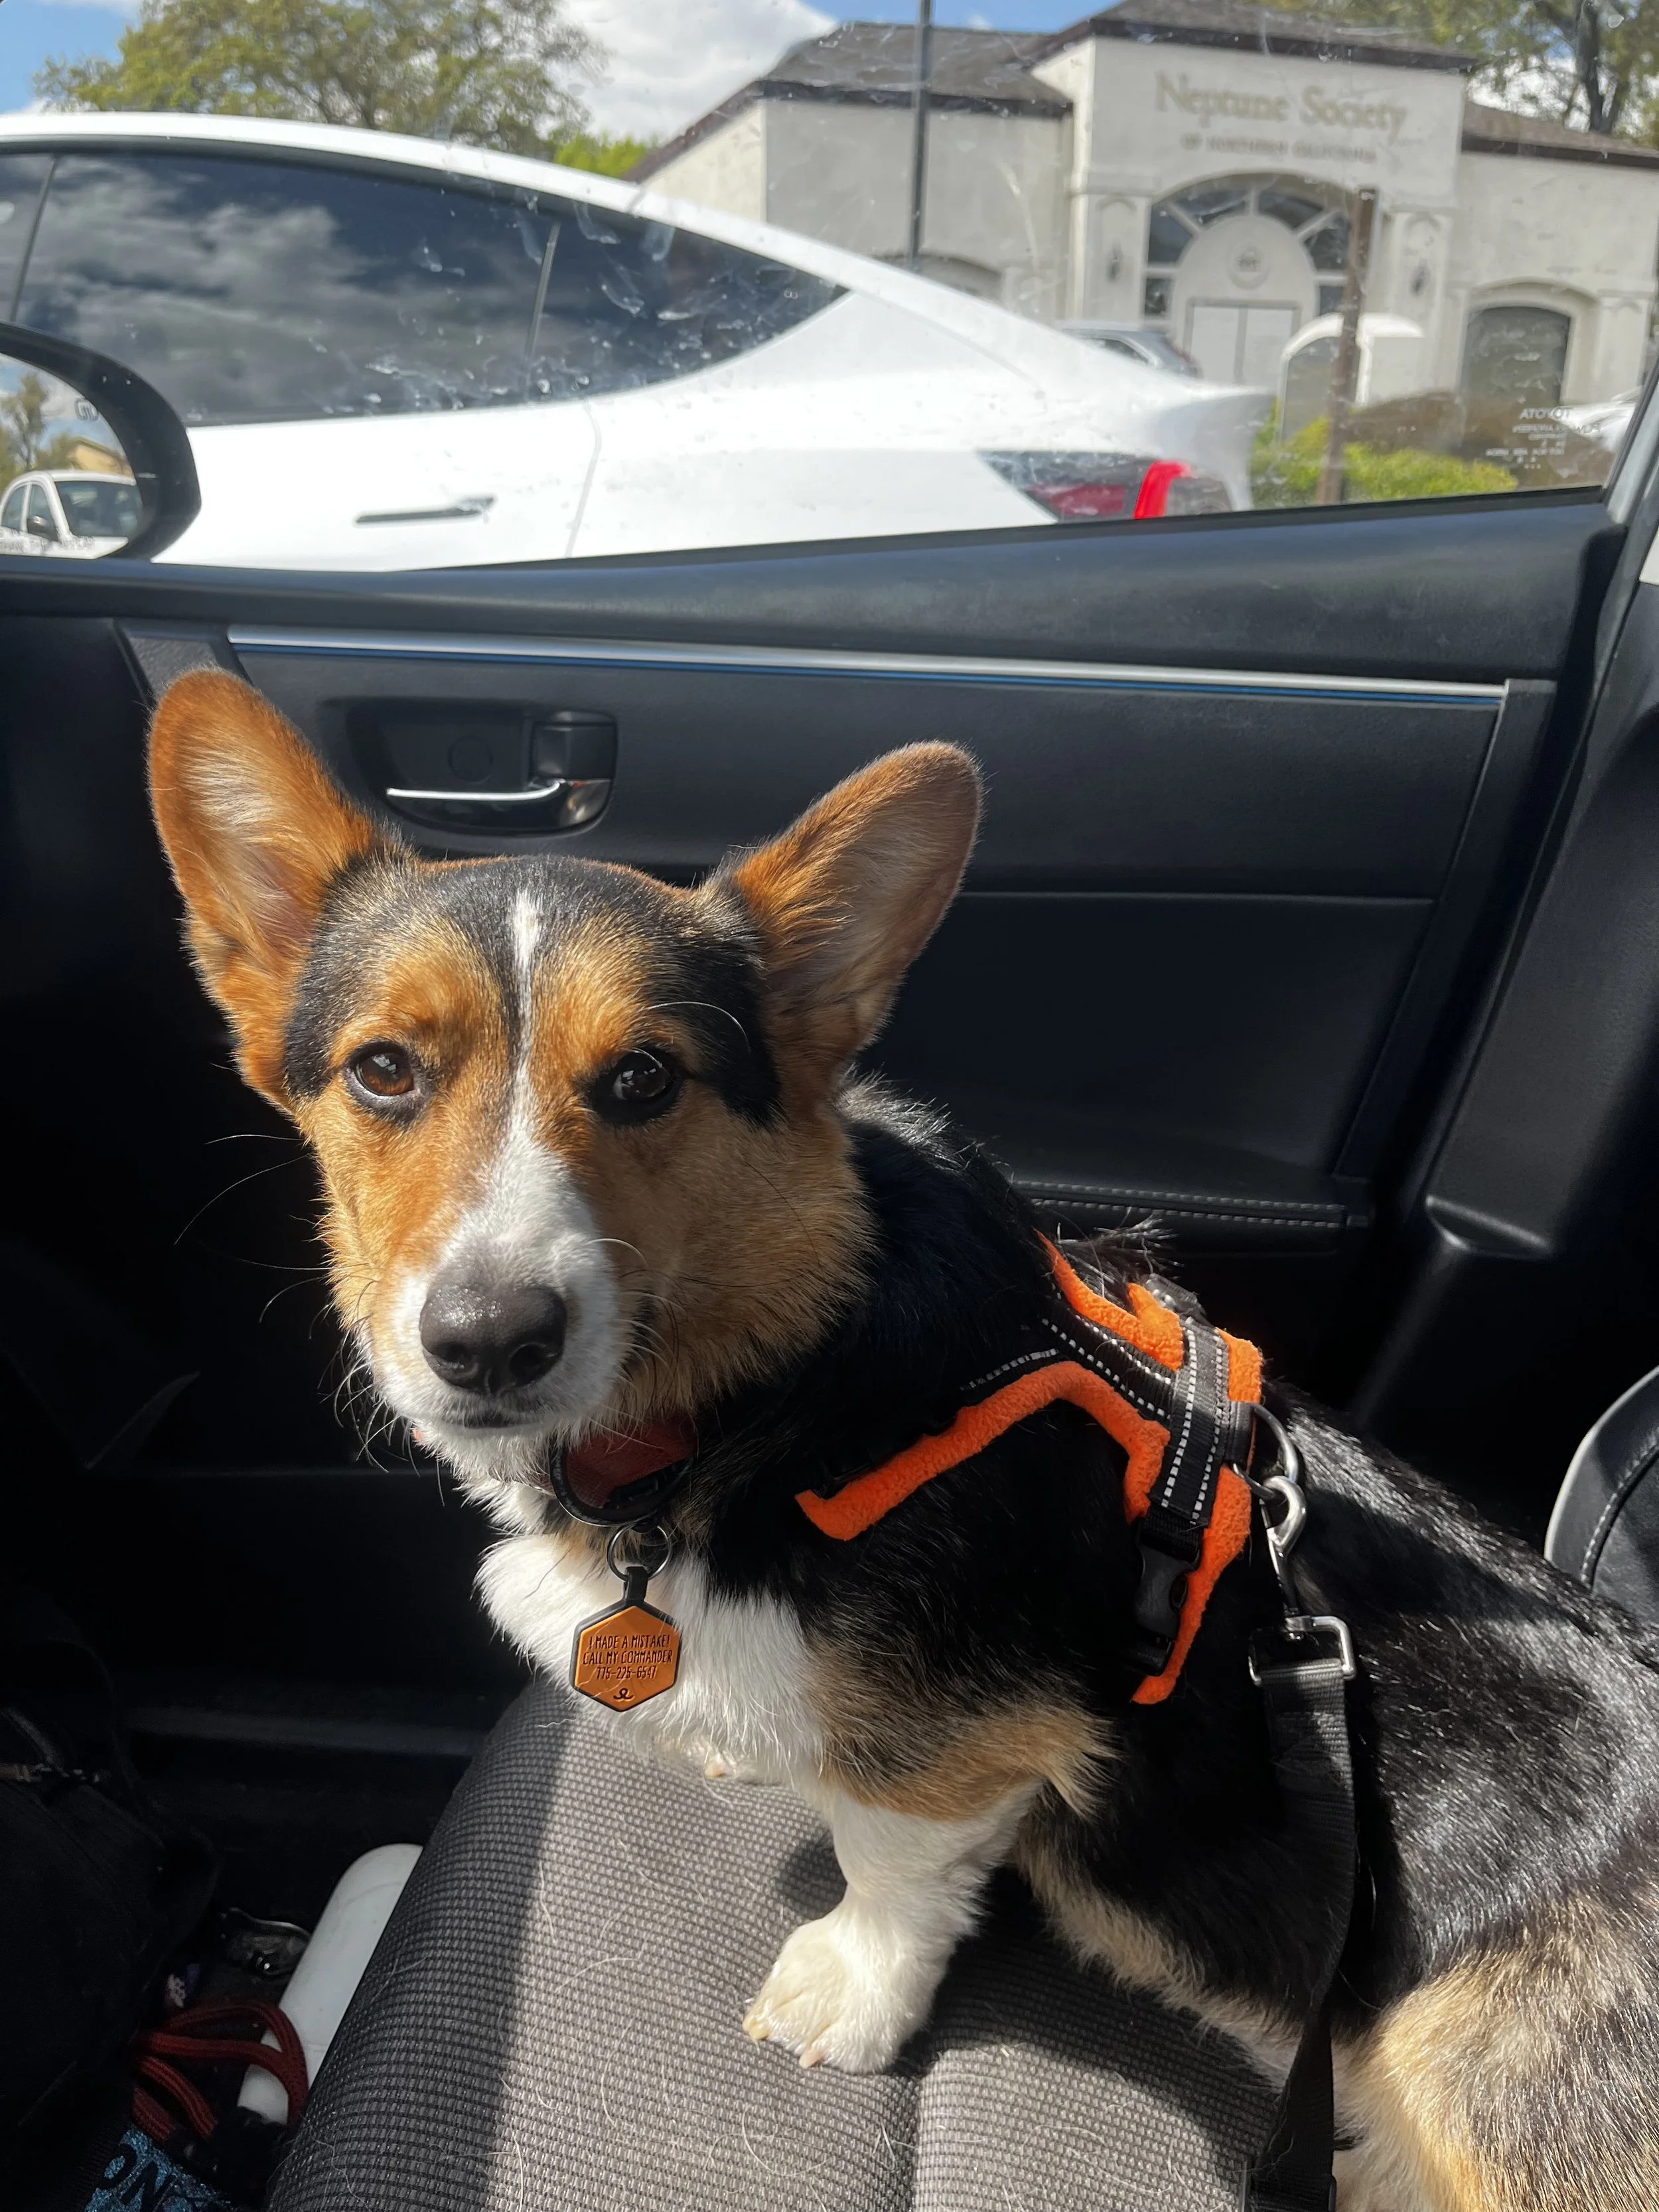
“Padded, colorful, neck and chest clips. Highly customizable and adjustable for odd body shapes. Also front and back D-rings.” - @dogtormordinsolus
[Mordin is a corgi and his three pieces are medium girth, medium back, and small front and has reflective stitching]
“It goes over the head like a collar, clips on the back, reflective, has lasted 6 years so far, very little that can rust, plastic clips clip on the back of the dog not the sides more comfortable, very soft, machine washable, plastic sliders adjust easily and stay in place.”
[Bailey is a large, deep chested Labrador wearing a size 32”-35”]

“The padding is really nice, especially on the front chest. My boy's chest bone protrudes and I feel the ones with just a strap there probably are uncomfortable and/or hurt him, plus they really shift to one side of it and he is a PULLER. While this harness does shift a bit if he pulls to the side, the front padding is still distributing that pressure I feel. The padding is nice and thick, and soft material. Since he pulls so much, other harnesses have rubbed him raw instantly near his arm area and under, and he does also have thin fur on his underside - this one only rubs a bit when he has his REALLY crazy pulling moments. My boy is very strong (Frank the Tank) but this harness is up to the job!”
[Franklin is a 40 pound muscular dog with a long body and short legs and wears a 60-80/24-32"]

“As a very small dog with a large chest, it can be hard to find harnesses that fit well, are unrestrictive to her movement, and don't let her escape by backing out of the harness. We tried a number of options before this one and they all were too restrictive and put pressure on her shoulders as well as were not secure no matter how tight the harness fit. This harness is amazing for us because it's super easy to put on as it goes over the head and then buckles on, is super unrestrictive since it only has a few straps instead of large fabric areas, and is super secure thanks to the third strap that buckles behind her chest.”
[Ellerbie is a 10 pound Yorkie and wears a size XS]

“We love this harness because nearly every part is adjustable so we were able to get a pretty good fit and her movement doesn't seem to be impacted or restricted at all while she's wearing it. The straps are pretty narrow and have a little bit of padding to them, so it's a good balance of being lightweight while still being comfortable. Phoebe is able to run, jump, play, train, and nap as usual in this harness and doesn't seem to be bothered by it, even when she's wearing it for extended periods. The handle on the back isn't something I usually look for in a harness, but the handleless version Hurtta makes is less adjustable and just didn't work as well for us and the handle is actually quite convenient for grabbing her quickly if needed.”
[Phoebe is a small 11 pound mix (Terrier? Chihuahua?) wearing the 14-18 inch size]
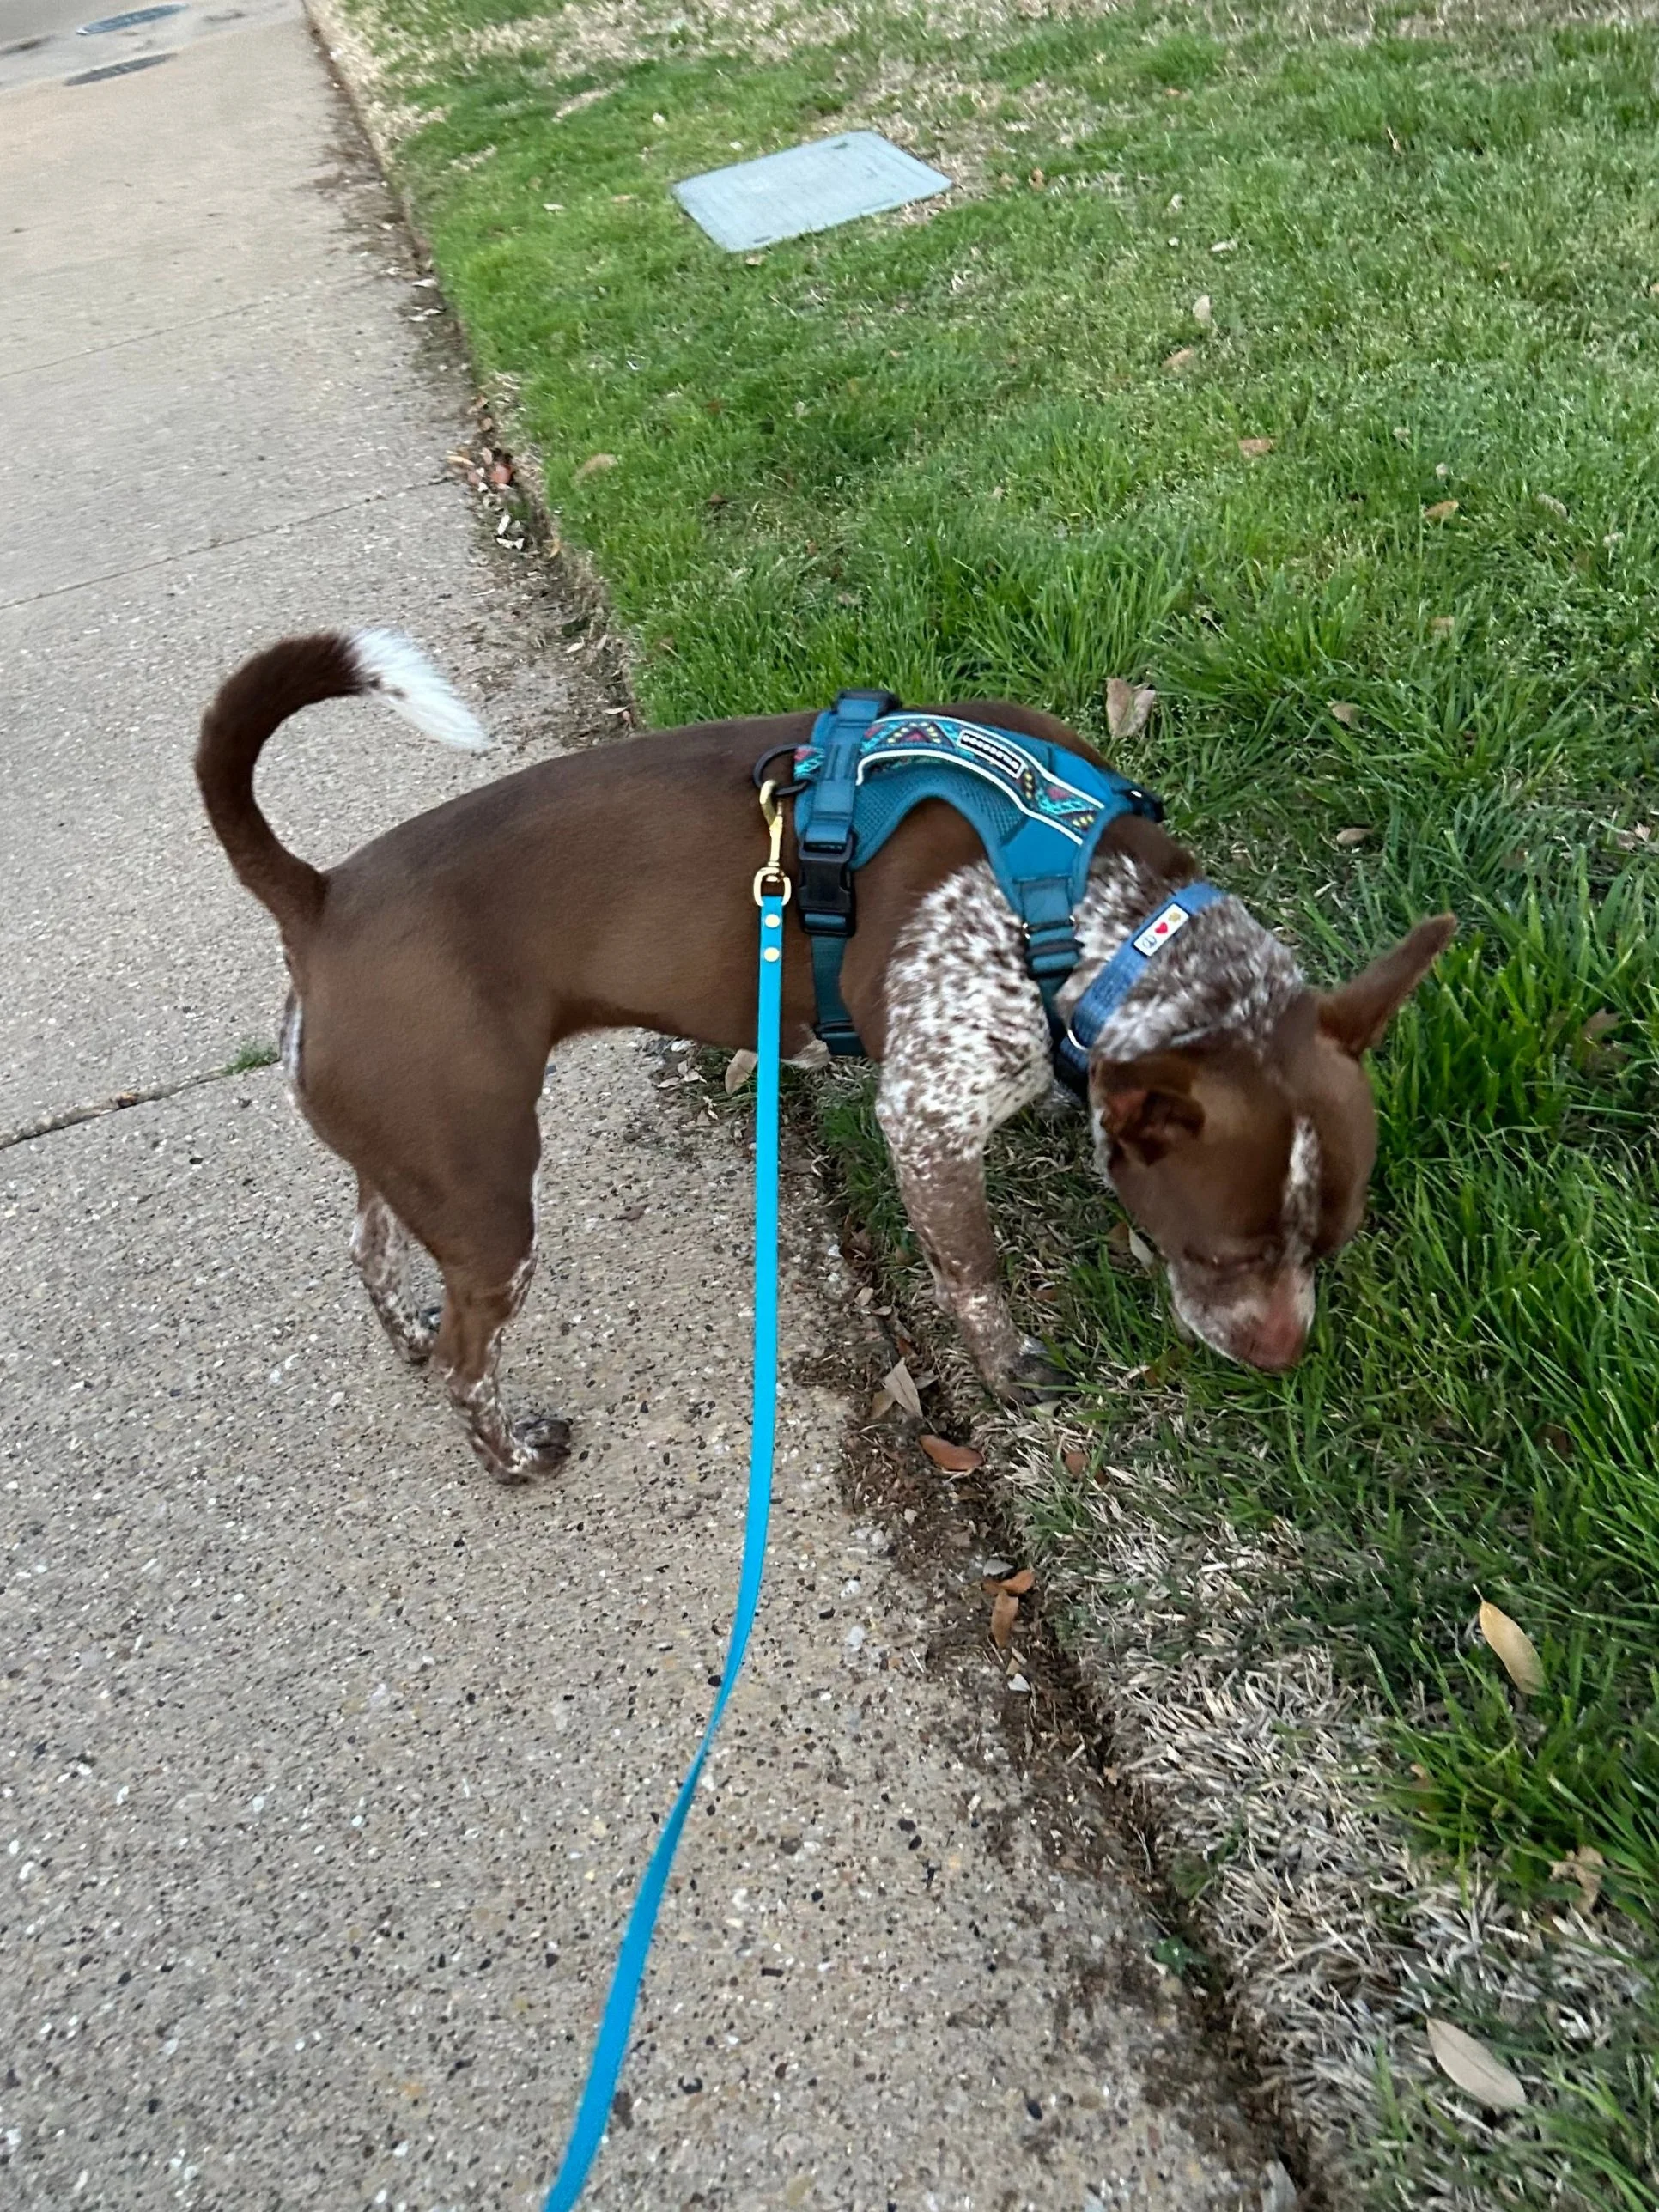
“The straps are thin and the harness is not bulky in the front, great for narrow dogs, but still it remains stable. The harness has high visibility stripes that work very well. Exists in many bright colors. There is an additional clip on the shoulder, so that you can avoid going over the head for gear shy dogs. And bonus, the back clips are really silent when you close them.”
[Thalia is a 30 pound mix breed dog who is narrow between the feet but has a deep chest and wears a size M]
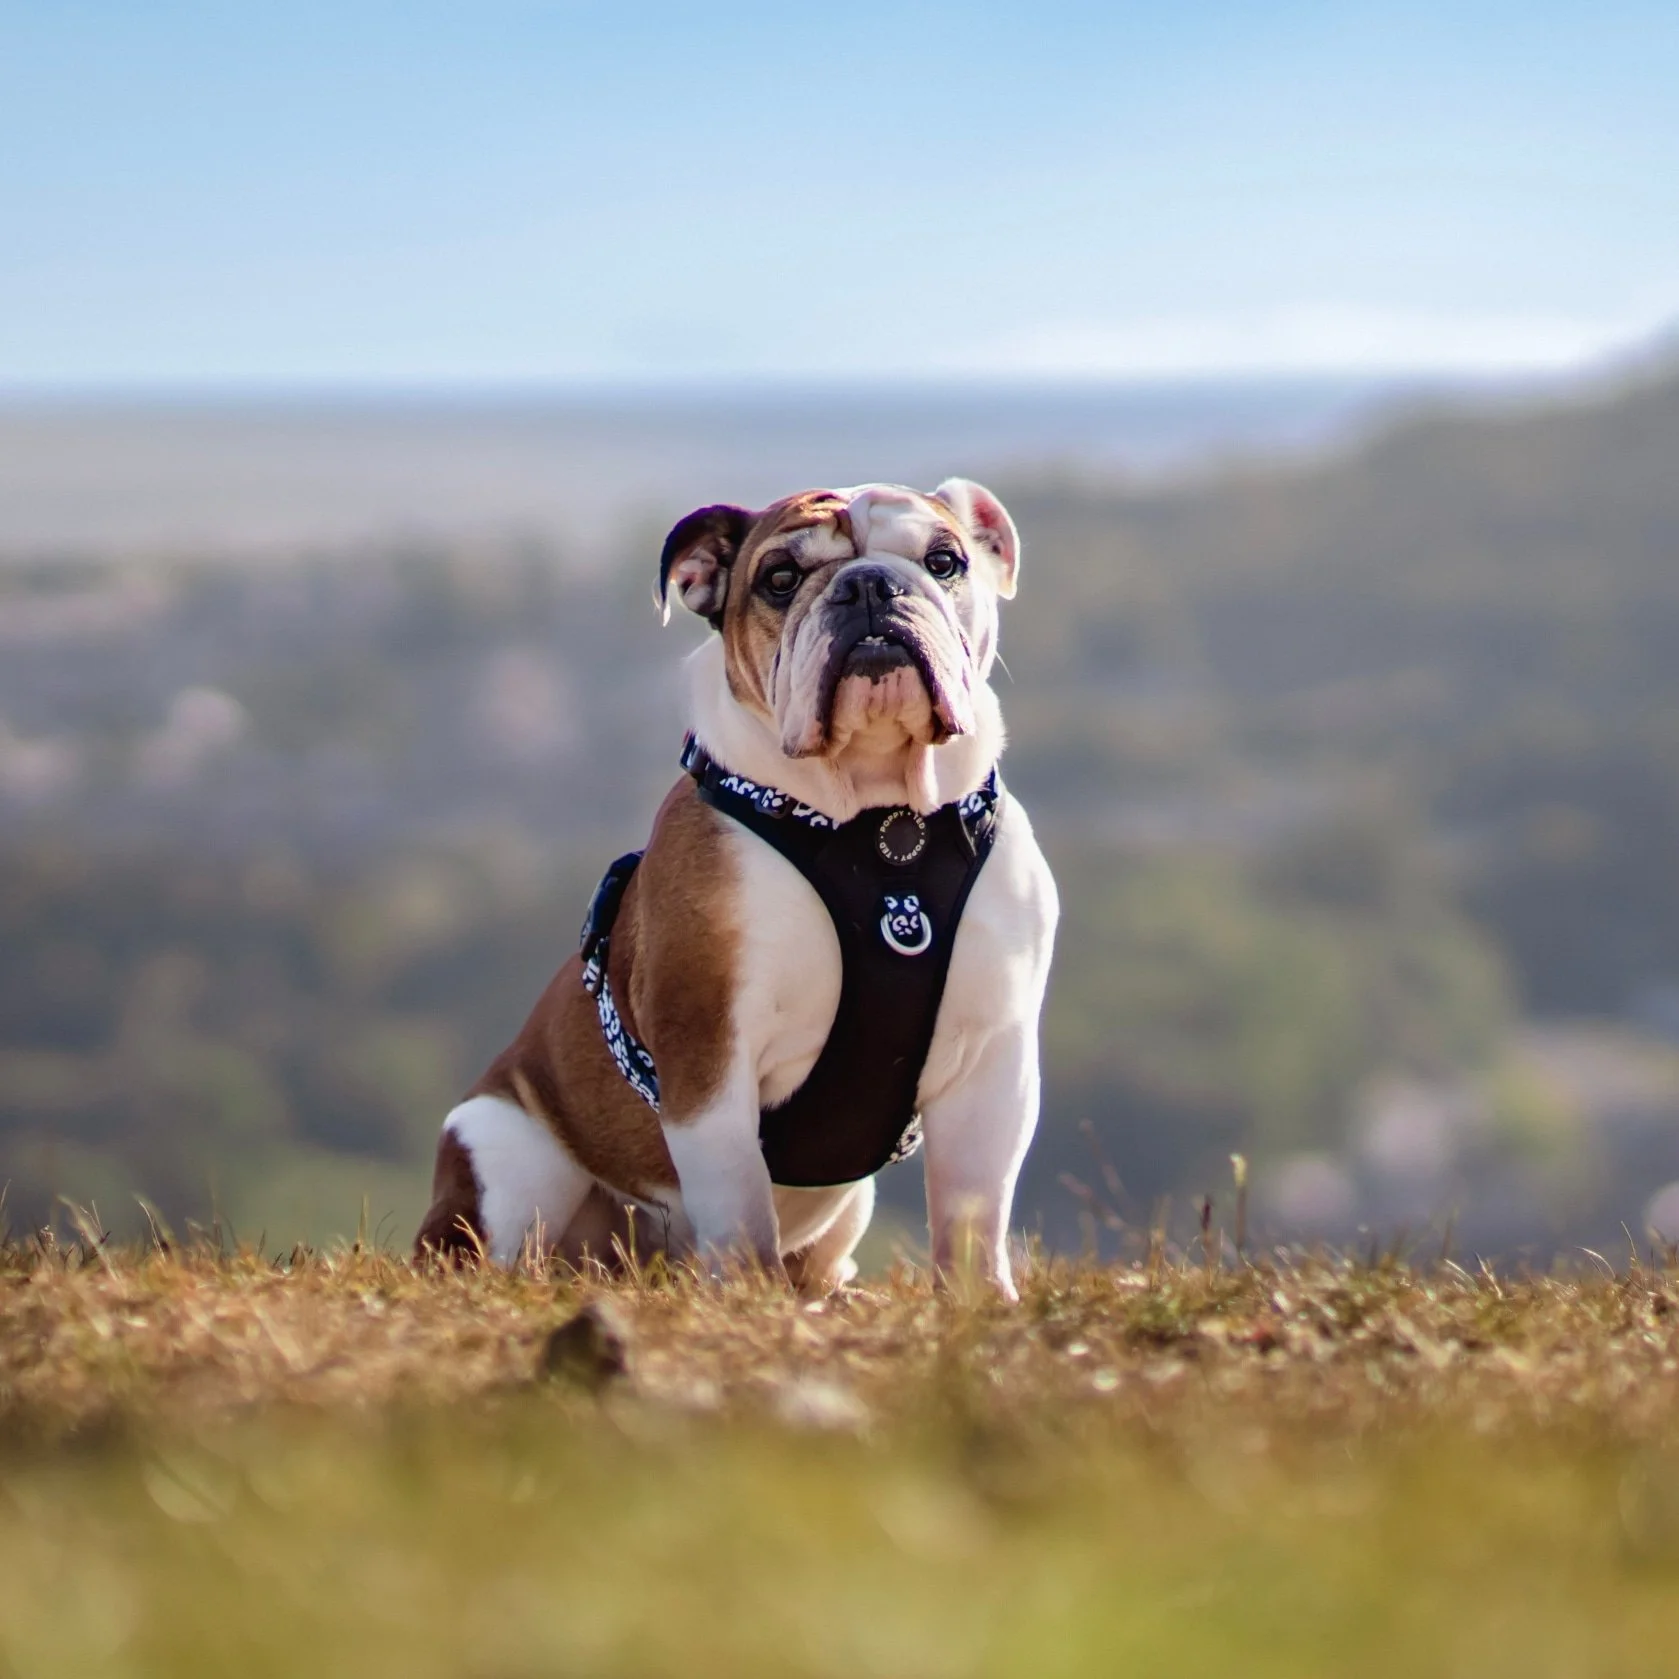
“Beautiful! Washable. Adaptable sizing. Matching products. Quality. Attention to detail. Y Shaped.” - The Pet Behaviourist, Vanessa Ward
[Bear is a bulldog wearing a size large]
“I got this harness because a lot of the reviews talked about how it was gave longer bodied dogs more armpit space and it does! I really love the freedom of movement this harness offers. It’s fairly lightweight but still has padding in the chest and back. Plus, I love all the colors!”
[Jester is longer than she is tall, but shorter than a corgi. She’s deep chested, being 26” at the widest, and about 40 pounds. She’s wearing size M in pacific blue.]
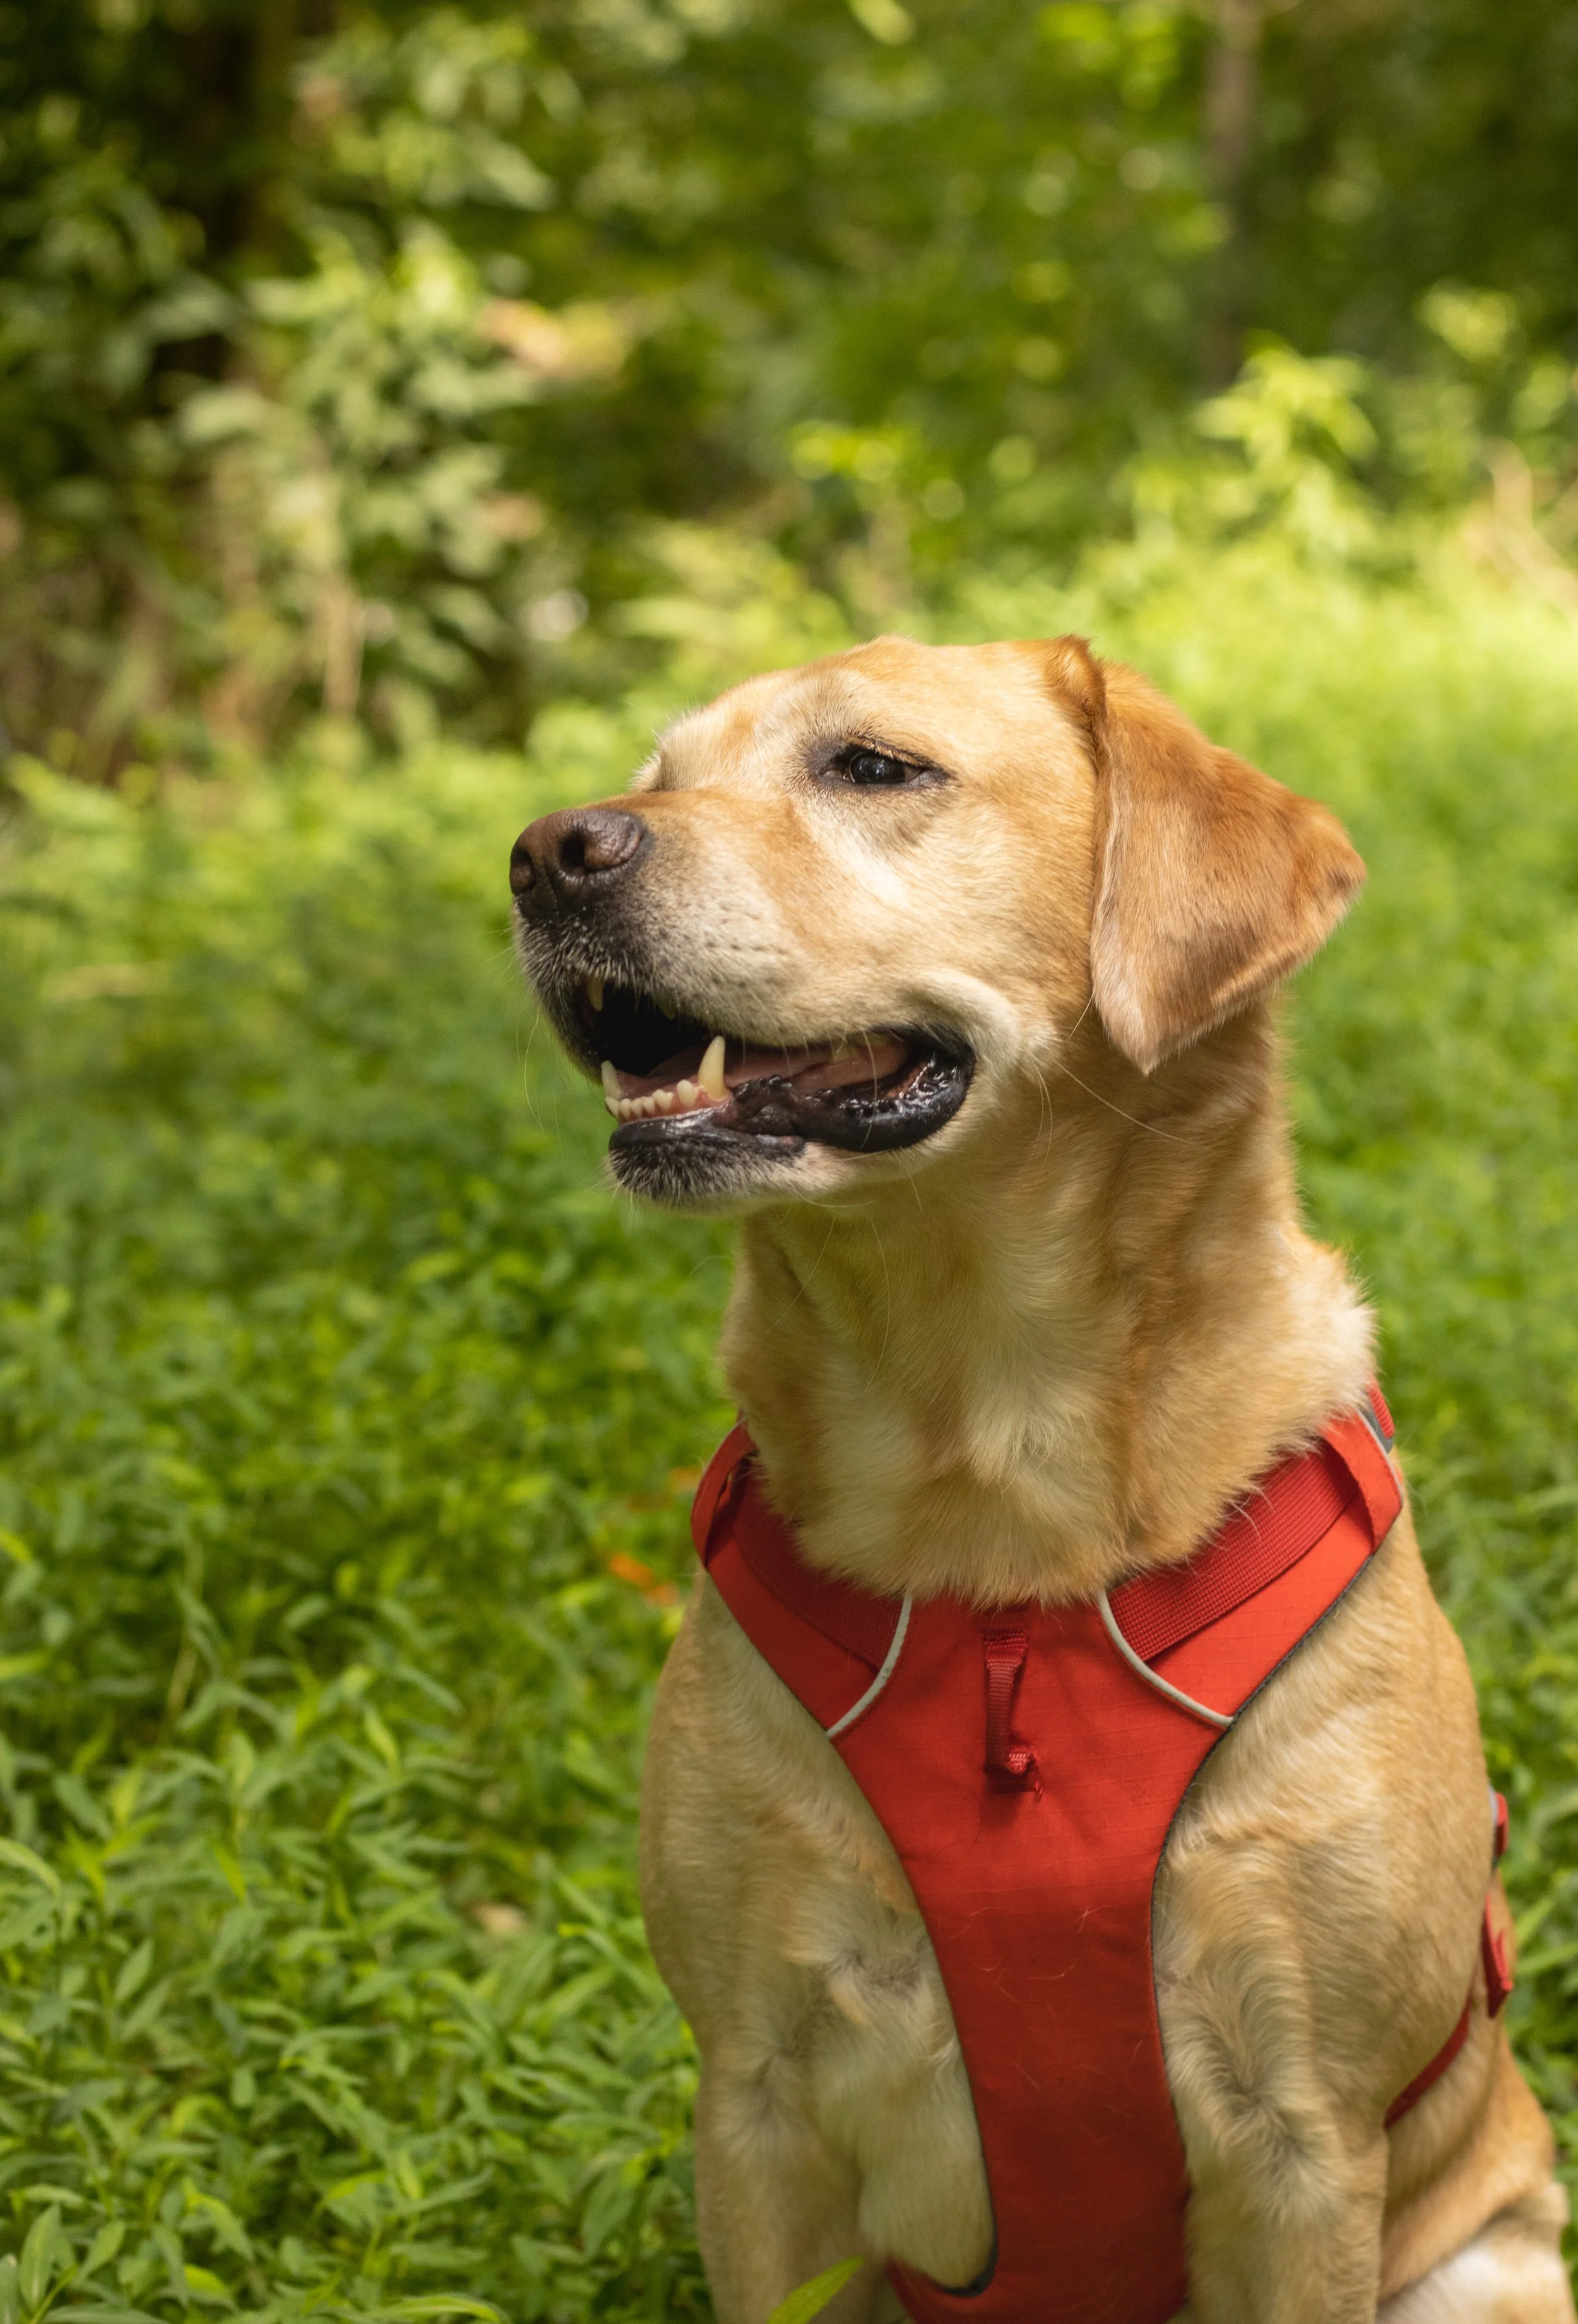
“I love that it’s easy to put on and take off. The buckles and leash connections feel sturdy and have stood up to some tough use. I use these harnesses with long lines through the woods and have never had one break.” (Note: This is a bulkier harness, so may not be as comfortable on smaller breeds.) - Leslie Taylor
[Tor is a 62 pound Labrador Retriever with a big chest and short body wearing a size Medium but can fit into a Large.]
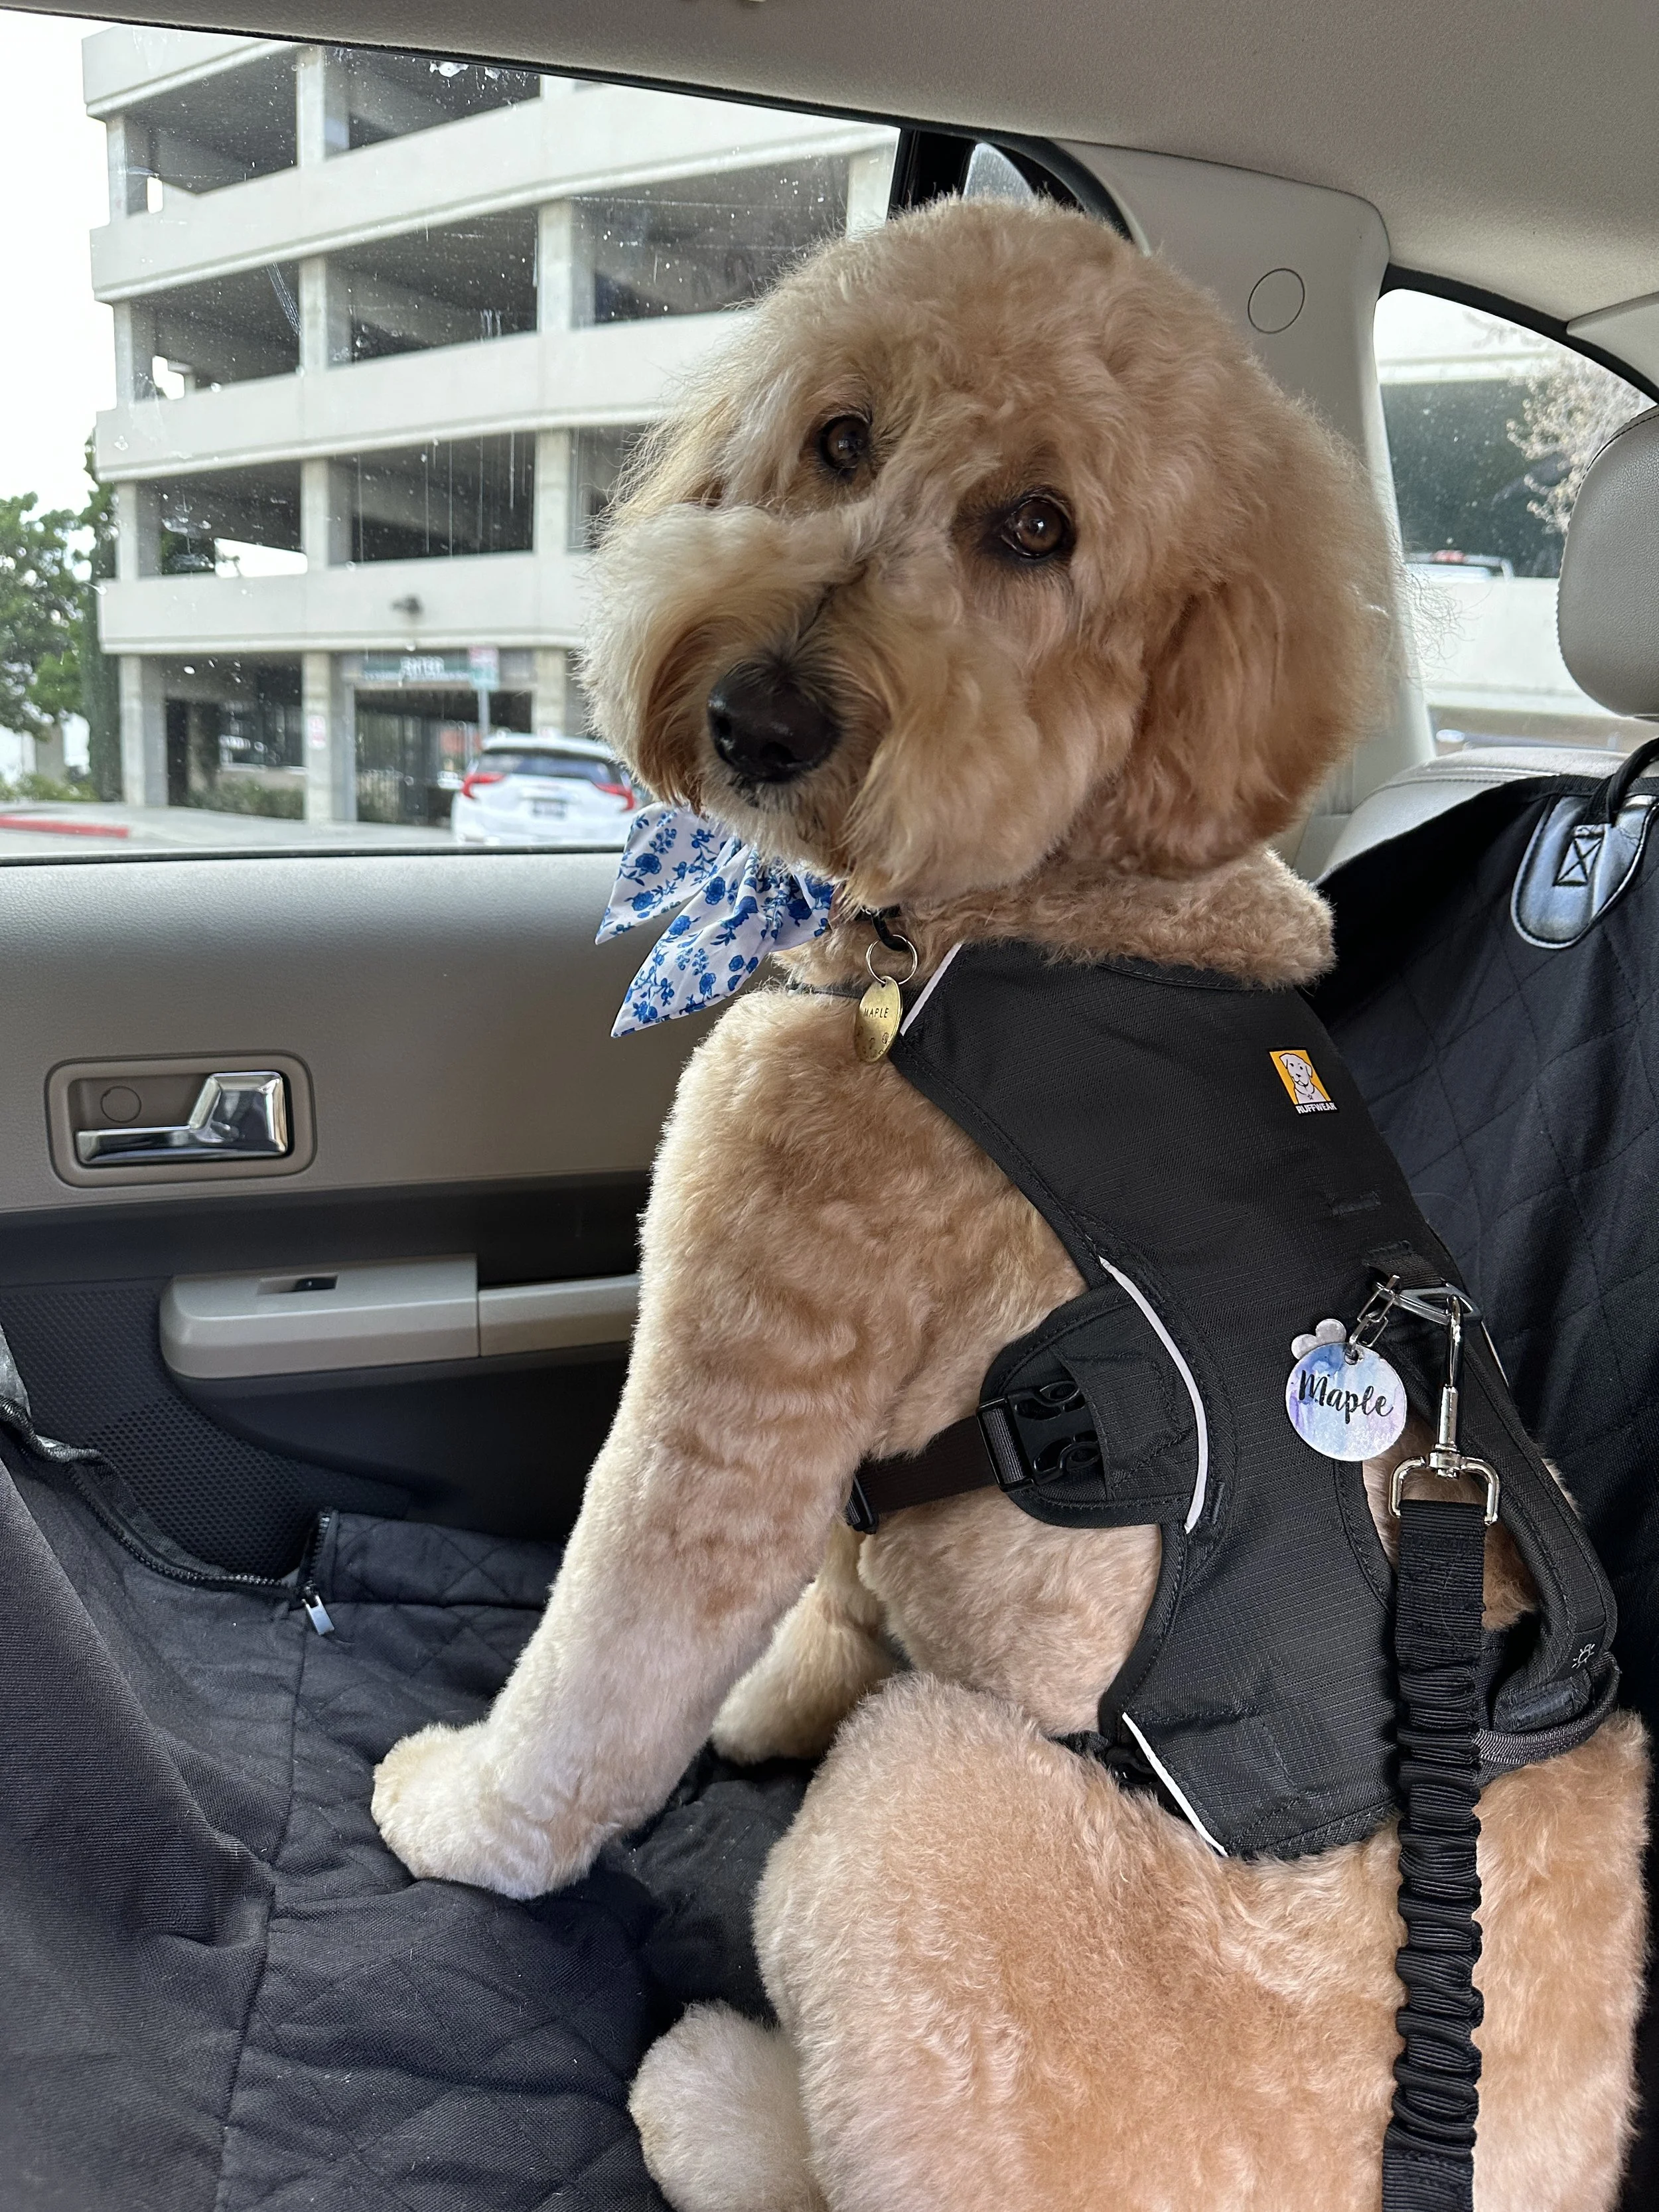
“We love that it has a second strap that buckles lower on her abdomen that keeps her secure. Maple gets scared of loud noises and tries to run. It also has a handle.” - @doodles.maple.sadie
[Maple is a 45 pound Goldendoodle wearing a size Medium]
“My dog Milo can be a bit gear-shy and harnesses with more material/padding tend not to fit him well (especially along the chest). The PetSafe 3-in-1 harness has been excellent as an alternative: no extra fabric (just webbing and thin neoprene padding), 5 points of adjustment, front and back D-rings, two girth buckles and a buckle for the shoulder strap (*very* helpful for gear-shy dogs). I think it's one of the best accessible Y-front harnesses that allows my dog to have full range of motion while staying comfortable. Minimal yet adjustable harness design. It is not bulky, does not retain heat due to extra fabric and does not have to go over my dog's head when I'm putting it on him. He can freely run, sleep, walk and swim with this harness on. Front and back attachment points are great. PetSafe also sells a double-attachment-point leash for dogs who use this type of system. Angle of shoulder straps and chest strap is not fixed (straps move around an o-ring), unlike some other harnesses. This makes it fit better on my dog, clearing more space for his freedom of movement. This is an extremely affordable and accessible non-restrictive harness option. The harness is usually $30, sometimes on sale, and available in major pet stores as well as online. If you are on a budget, the PetSafe Sure-Fit Harness has a similar shape but no shoulder buckle or padding (~$18).” - @whats.the.pupdate / Milo
[Milo is a 35 pound Shiba Inu mix wearing a size Small (most straps on largest setting).]

“It’s recommended by [a vet]. It allows for full range of motion in the shoulder. It sits on the sternum and not on the neck. There are places in the front and back to clip the leash. For some reason my 10-lb pulling machine doesn’t pull in this harness and I clip to the back. It has a buckle at the neck so it’s easier to get on and allows for a better fit at the neck for my big/headed girl. It has length adjusters in every strap.”
[Cricket is a 10 pound Shih Tzu mix wearing a size XS.]
Spark Paws Comfort Control
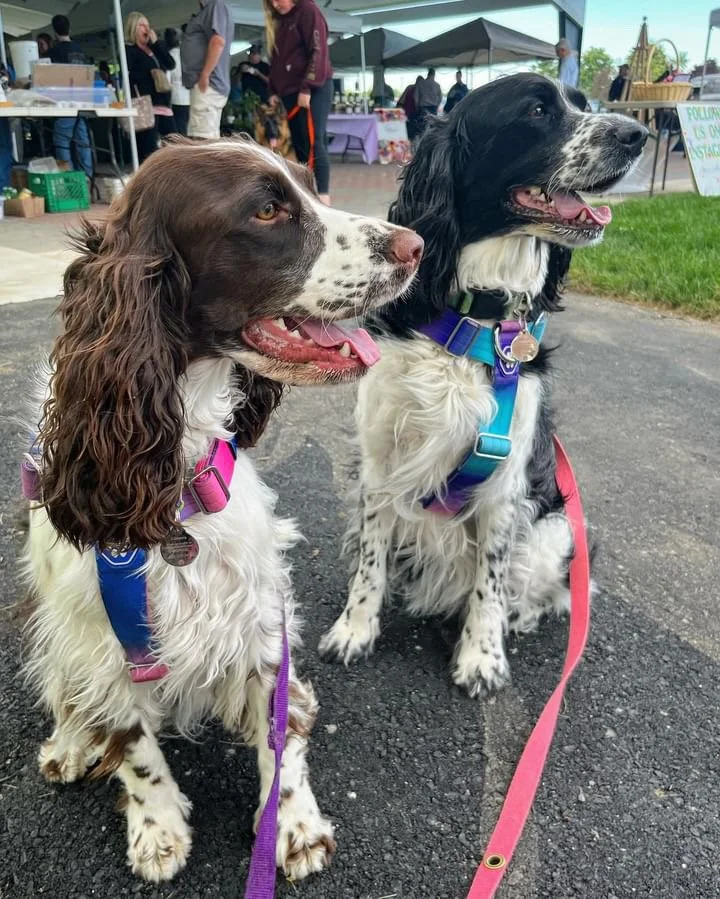
“I like that they are VERY sturdy. They’re designed for stronger bodied dogs, but the fit is just *chefs kiss* plus I love the colours they come in. It has a front clip and two back clips.” - @stonecity.spaniels
[Gamora, brown, is 40 pounds and wearing a size small; Elphaba, black, is 48 pounds and wearing a medium]

“These are great three point attachment harnesses for dogs who are narrower or who may be at risk of slipping a harness. They also make me feel a bit more secure walking my reactive dog.”
A big thank you to our TOC Family for helping us come up with the products in our list. If you have a harness you think should be added, please email us at hello@tailsofconnection.com.
